This post contains affiliate links. As an Amazon Associate I earn from qualifying purchases.
Learning to make dairy-free pumpkin muffins isn’t just about baking one seasonal treat—it’s about mastering the fundamental technique that unlocks dozens of other recipes in your kitchen. Once you understand how to balance wet and dry ingredients, fold gently without deflating, and bake to that perfect golden-brown finish, you’ll confidently create everything from carrot cake vegan recipes to simple vegan biscuits that make your family ask for seconds.
Master the Technique Behind Dairy-Free Pumpkin Muffin Recipe (And Never Struggle in the Kitchen Again)
I’ll never forget the afternoon my abuela called from Miami, frustrated because her pumpkin muffins kept coming out dense and rubbery. She’d been mixing everything too aggressively, treating the batter like she was kneading bread. That single conversation changed how I teach baking—because I realized that most home cooks don’t know why their muffins fail. They just know they do. When I walked her through the gentle folding technique, explaining how overmixing develops gluten strands that create a tough crumb, something clicked for her. Six months later, she sent me a photo of her beautiful muffins at a family gathering. That’s when I understood: teaching technique isn’t about the recipe. It’s about giving people confidence.
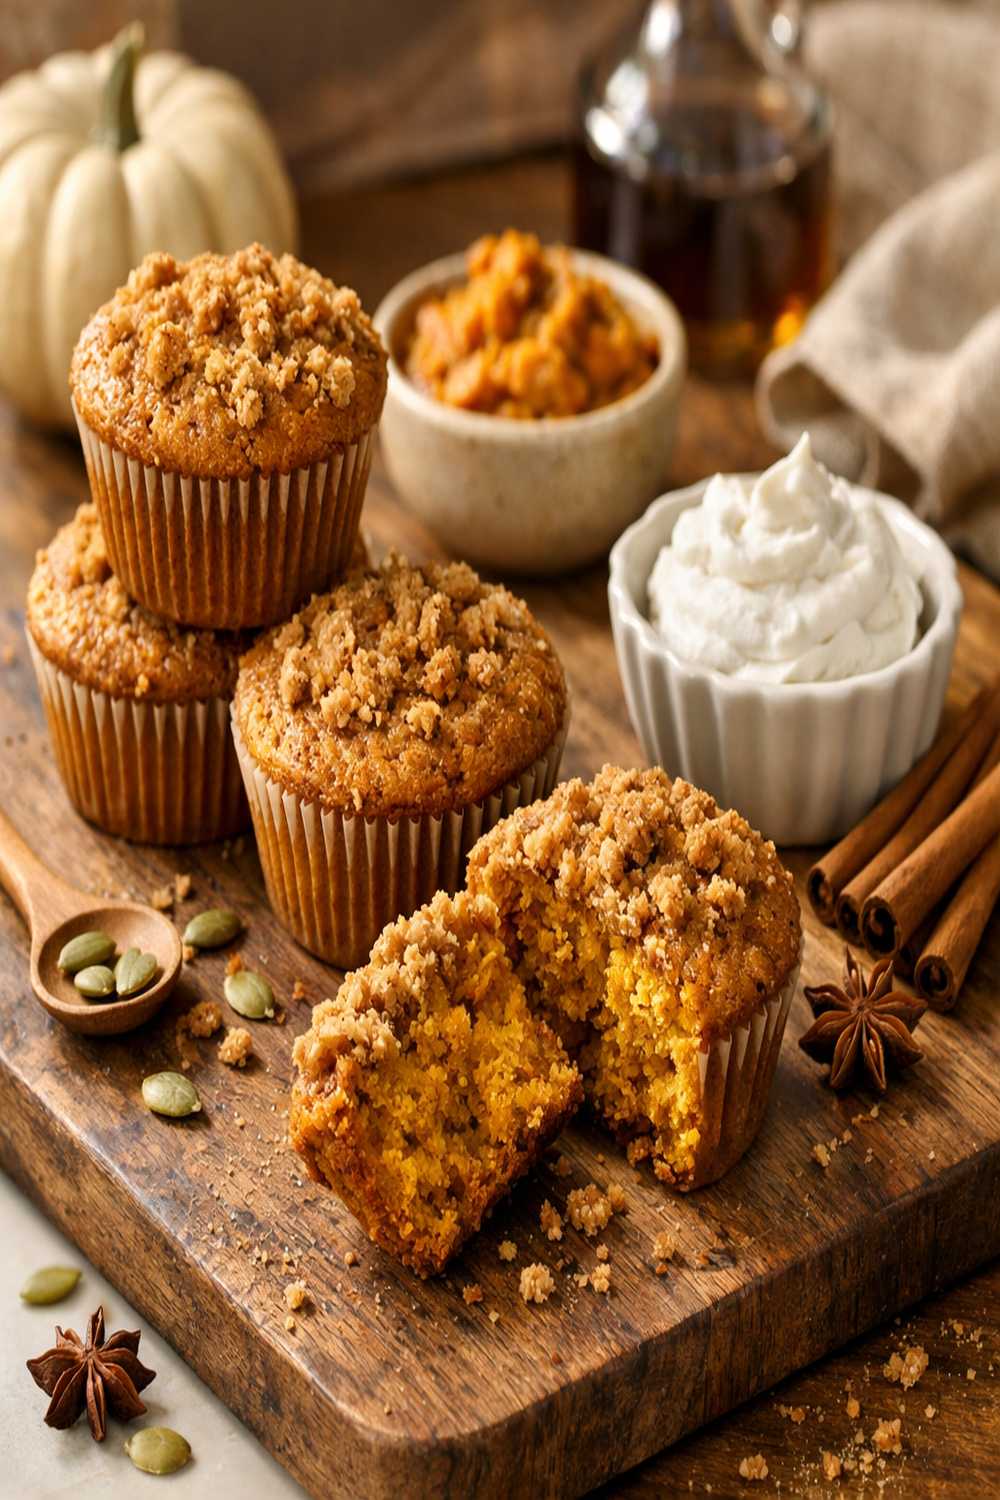
The Core Technique Explained
The heart of great muffins—dairy-free or otherwise—is understanding the wet-and-dry integration method, combined with strategic gentle folding. Here’s the science: when you whisk your wet ingredients (pumpkin, plant-based milk, oil, and sugar), you’re creating an emulsion—a stable mixture of ingredients that normally don’t mix well together. The sugar dissolves, the oil disperses evenly, and the moisture content becomes uniform.
When you then sift your dry ingredients over this wet base and fold them together with restraint, you’re minimizing gluten development. Gluten forms when flour’s proteins hydrate and align—which happens with vigorous mixing. By folding gently with a wooden spoon until the ingredients are just combined, you keep the crumb tender and moist. This technique works because it respects the science: pumpkin’s natural moisture and pucker require less mixing than other batters. Overwork it, and you’ll have hockey pucks instead of muffins.
What This Technique Unlocks
Once you master the gentle folding method with this pumpkin recipe, you can apply it to create:
- Blueberry breakfast muffins – uses the same wet-and-dry integration with delicate fruit folding
- Zucchini bread loaves – requires identical moisture balance and anti-overmixing principles
- Apple crisp with almond flour topping – incorporates the same restraint-based technique for tender crumbs
- Vegan carrot cake layers – demands the same careful emulsification and gentle combining
- Brown butter muffins with nuts – applies the exact folding strategy to keep add-ins evenly distributed
- Sweet potato scones – uses moisture management and minimal mixing for perfect texture
The Ingredients – Chosen to Teach the Technique
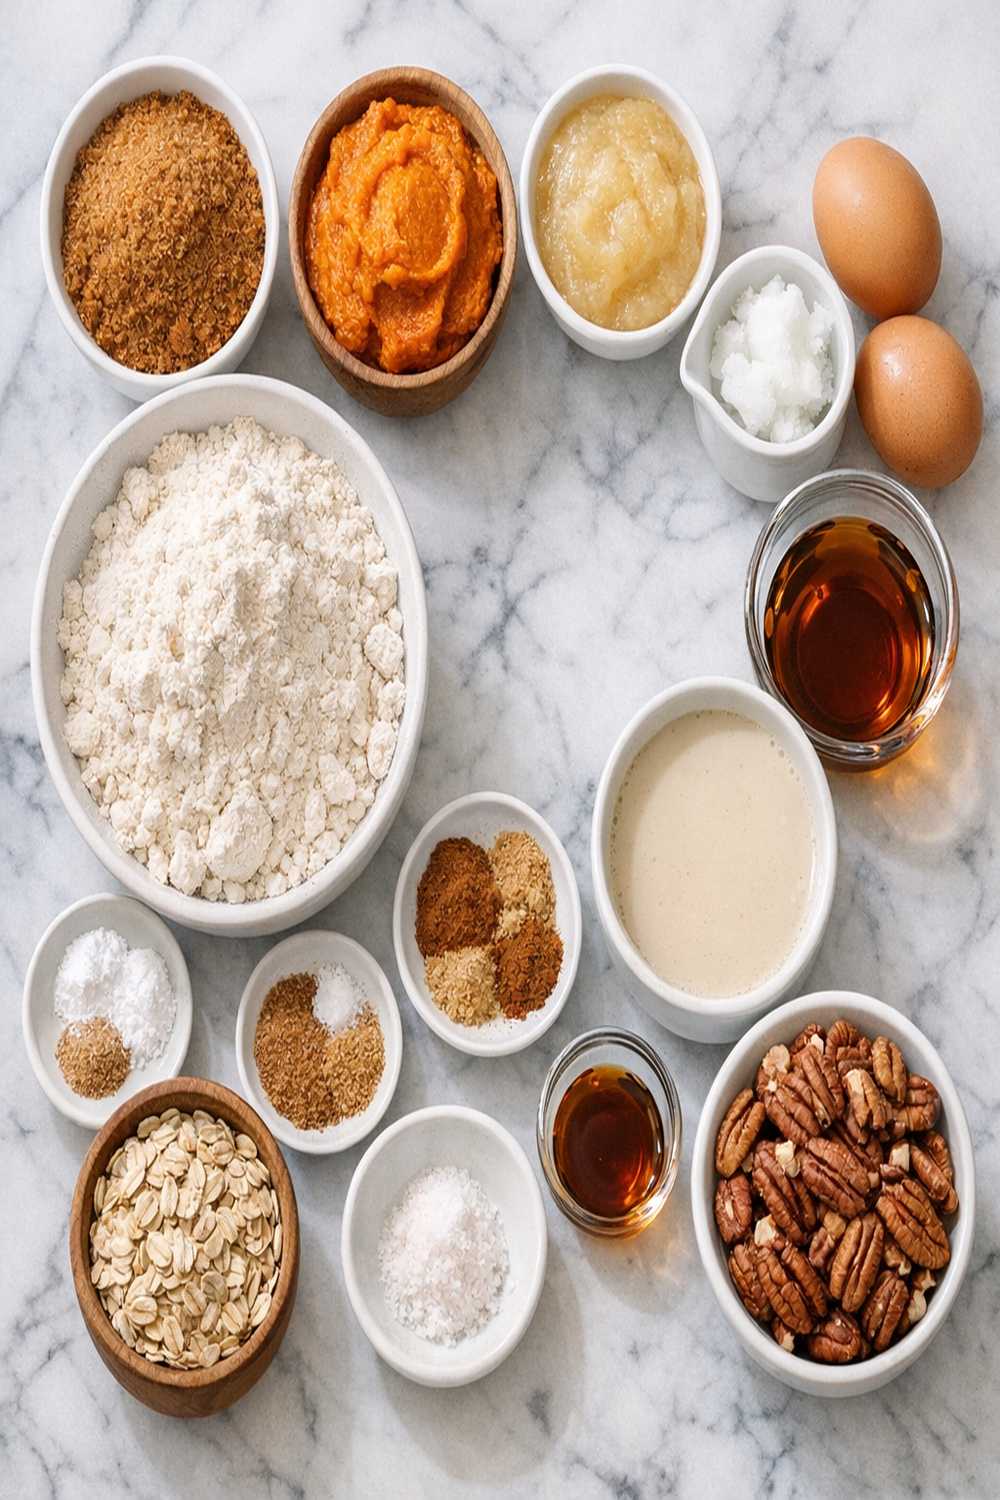
I’ve selected every ingredient in this recipe to teach you something about muffin mastery. The pumpkin puree provides natural moisture and binding without eggs—so you’ll learn how to work with plant-based binders. The plant milk and oil create the emulsion that keeps muffins moist for days. Brown sugar dissolves evenly during whisking, teaching you proper wet-ingredient preparation. The flour, leavening, and spices must be sifted together—a step that aerates and prevents lumps, which is crucial when you’re not using buttermilk for tenderness.
For the Muffin Batter
- 1 tablespoon baking powder (provides lift without chemical aftertaste)
- 1/2 teaspoon ground nutmeg (prevents the batter from tasting one-dimensional)
- 1 can (15 ounces) pumpkin puree (pure pumpkin, not pie filling—this is your moisture anchor)
- 1 cup non-dairy chocolate chips, raisins, or chopped toasted walnuts (optional add-ins for texture variation)
- 1/2 teaspoon ground ginger (adds subtle heat and complexity)
- 1 1/4 cups brown sugar, lightly packed (dissolves smoothly when whisked into wet ingredients)
- 1/2 teaspoon vanilla extract (enhances flavor depth, not essential but transformative)
- 1 tablespoon cornstarch (added to your flour mixture—prevents density from moisture)
- 1/2 teaspoon fine sea salt (balances sweetness and enhances pumpkin flavor)
- 2 teaspoons ground cinnamon (warming spice that’s essential to the profile)
- 1/3 cup melted vegan butter or neutral vegetable oil (helps create tender crumb and aids emulsification)
- 1 3/4 cups all-purpose flour (spooned and leveled, never packed—this prevents density)
- 1/2 cup unsweetened plant-based milk, soy or almond (completes the liquid ratio for proper rise)
- 1/4 teaspoon ground cloves (teaches restraint—a pinch transforms, too much overwhelms)
Makes 12 generous muffins
The Masterclass: How to Make Dairy-Free Pumpkin Muffin Recipe
This isn’t just a recipe—it’s a cooking class in muffin mastery. Each step teaches you something you’ll use for years. Pay attention to the sensory cues, the timing, and the “why” behind each instruction. That’s where real cooking skill lives.
Step 1: Prepare Your Pan With Strategic Precision
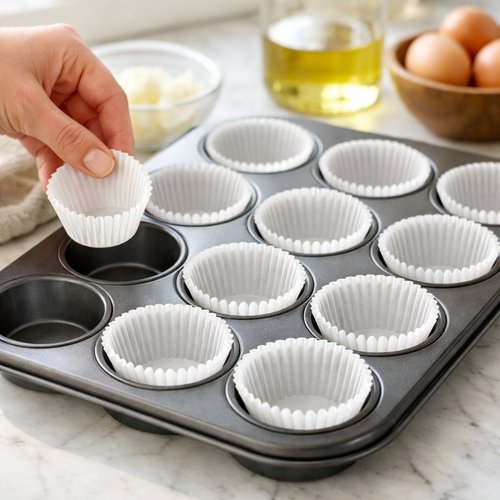
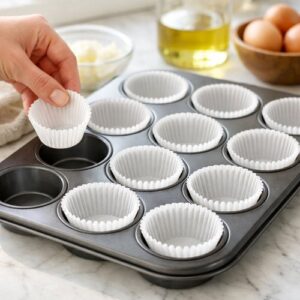
Preheat your oven to 375°F while you prepare the muffin pan. This matters because temperature consistency creates even rise. While the oven heats, lightly grease your 12-cup muffin pan with neutral oil or cooking spray. If you’re using paper liners, spray the inside of each cup lightly—this prevents the muffin from sticking to the paper as it rises. Many bakers skip this step and end up with muffin tops separated from the base. Don’t be that baker. The coating ensures moisture can’t be absorbed by the paper, which keeps your muffins moist.
Step 2: Create Your Emulsion With Confidence
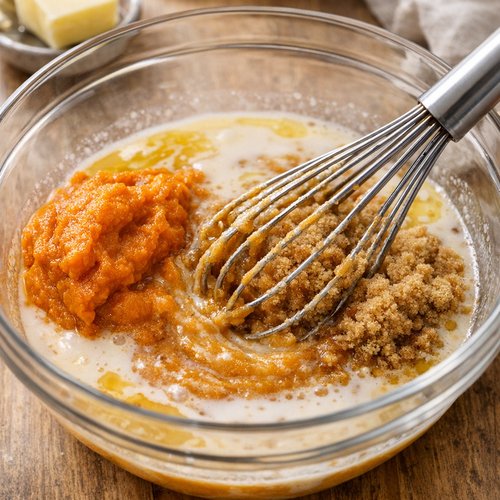
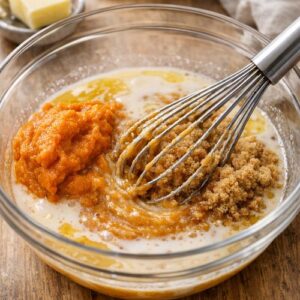
In a large mixing bowl, add your pumpkin puree, melted vegan butter (or oil), unsweetened plant milk, and brown sugar. Using a sturdy whisk, combine these ingredients vigorously for about 1 to 2 minutes. You’re looking for a smooth, unified mixture with no visible streaks of oil or clumps of sugar. This is emulsification—you’re creating a stable combination of ingredients that want to separate. The sugar dissolves, the oil disperses evenly throughout the liquid, and the pumpkin integrates completely. This step is critical because a well-emulsified wet base means your muffins will be uniformly moist and tender. If you skip or rush this, dry spots and dense pockets will form.
Step 3: Sift the Dry Mixture With Care
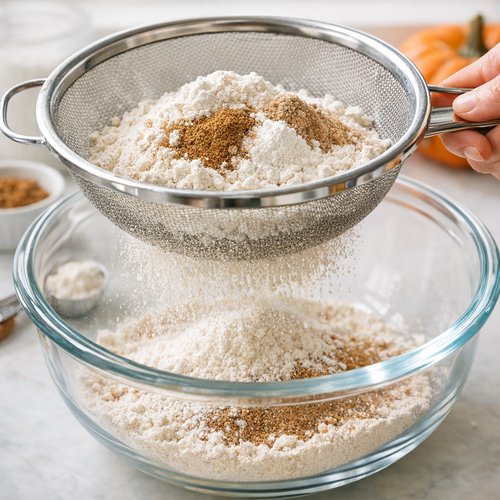
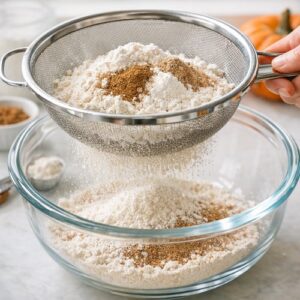
This is where most home bakers lose credibility. Take a fine-mesh strainer or flour sifter and combine your flour, baking powder, salt, cinnamon, nutmeg, ginger, cloves, and cornstarch. Sift this mixture directly over your wet ingredients. Sifting serves two purposes: it aerates the flour (which promotes lighter rise) and it distributes the leavening agents evenly, preventing bitter baking powder pockets. If you dump dry ingredients directly into wet ones, you’ll get uneven texture and potentially metallic flavor notes from concentrated baking powder.
Step 4: Master the Gentle Fold
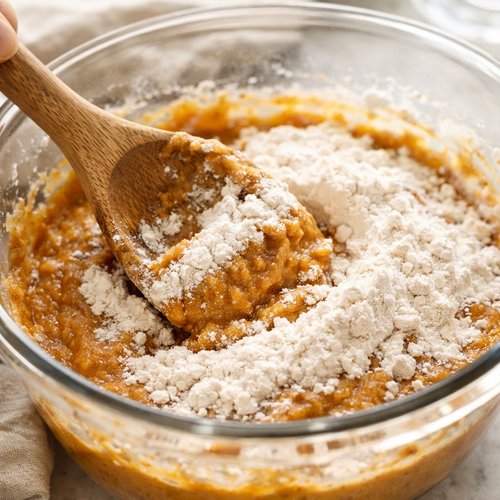
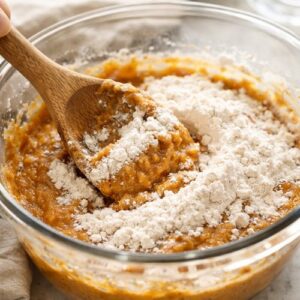
Here’s where your muffins become legendary or disappointing. Pick up a large wooden spoon and, using a folding motion (not stirring), combine the dry and wet ingredients. Fold means you’re scraping the bottom of the bowl, bringing the mixture up and over the top, rotating the bowl slightly, and repeating. This gentle motion incorporates ingredients with minimal gluten development. You want to stop when you see no dry flour streaks remaining—typically 10-15 gentle folds. This takes about 30 seconds. The batter will look slightly lumpy. That’s perfect. Lumps will smooth out in the oven. Overmixing turns those lumps into tunnels and dense crumb.
Step 5: Fold in Your Add-Ins
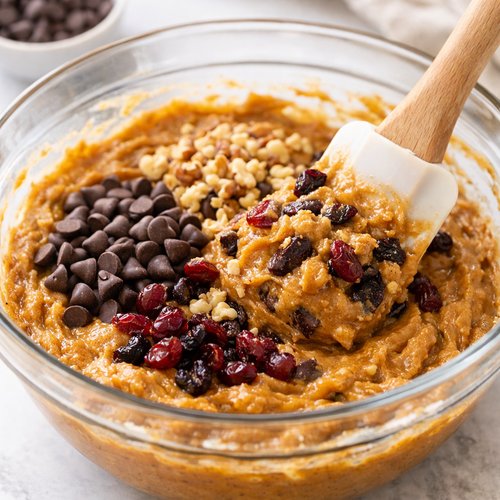
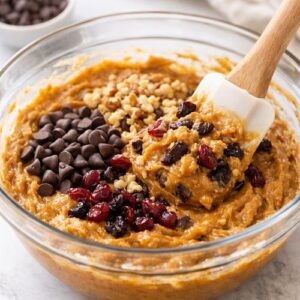
If using chocolate chips, raisins, walnuts, or cranberries, sprinkle them over the batter now and fold them in gently with just 3-4 additional folds. Don’t stir—fold. This distributes them evenly while maintaining your tender crumb structure. If you mix aggressively now, you’re undoing all your careful work from step 4.
Step 6: Fill Your Pan With Intention
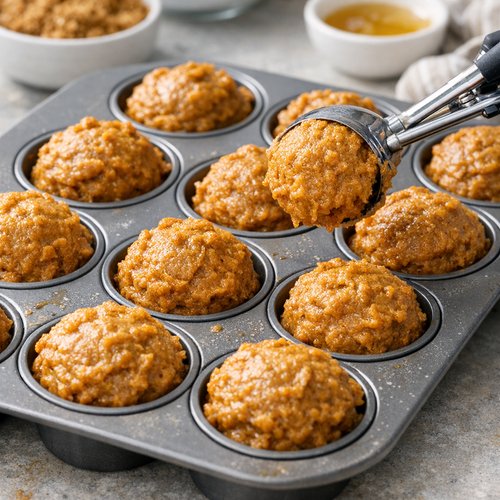
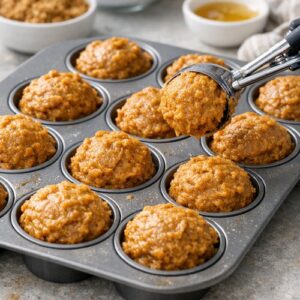
Using an ice cream scoop or 1/4-cup measuring spoon, fill each muffin cup until it’s nearly full. Muffins rise upward, not outward, so filling generously gives you those attractive domed tops. If cups are only half-full, you’ll get flat, disappointing muffins. All cups should have roughly equal amounts of batter—this ensures even baking times across all 12 muffins.
Step 7: Bake With Confidence and Restraint
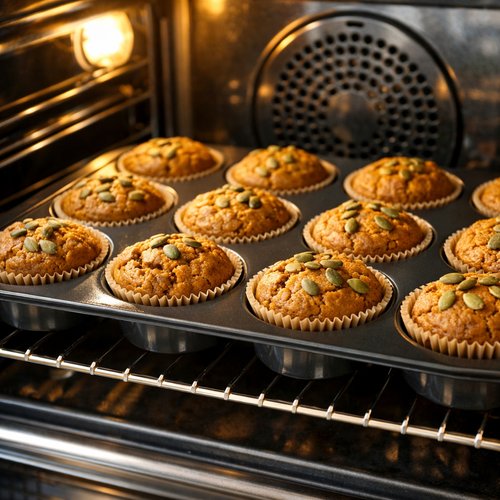
Place your pan in the preheated 375°F oven and bake for 22 to 25 minutes. Do not open the oven door before 20 minutes have passed—opening it allows heat to escape and interrupts the rise. At the 22-minute mark, insert a toothpick into the center of a muffin (not into a chocolate chip, as that will be melted and deceive you). If the toothpick comes out clean or with just a few moist crumbs, your muffins are done. If wet batter clings to it, bake for another 2-3 minutes and test again. Overbaking creates dryness in dairy-free muffins because there’s no fat to compensate.
Step 8: Cool for Perfect Texture
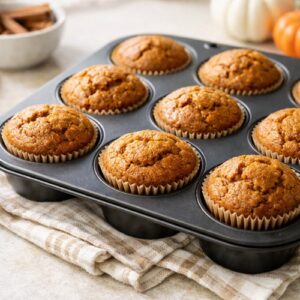
Remove the pan from the oven and let the muffins rest in the pan for 5 minutes. This allows the structure to set slightly, making them easier to remove. Then turn them out onto a wire cooling rack for at least 15 minutes before serving. Eating them directly from the hot pan might be tempting, but you’ll lose the refined texture. Once fully cooled, they’re perfect for eating plain or pairing with your favorite toppings.
How to Know You’ve Mastered the Technique
True mastery leaves sensory evidence. Here’s what a perfect batch looks, feels, and smells like:
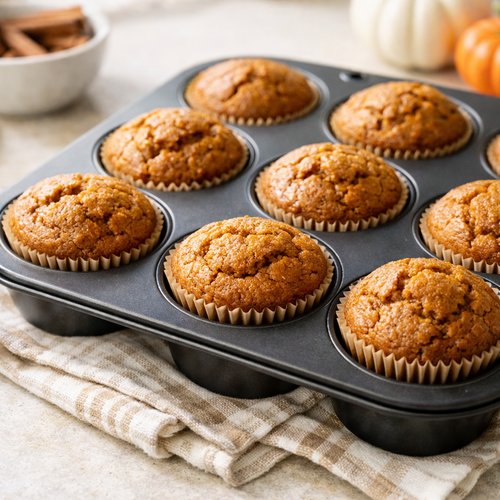
- Golden-brown, domed tops – the muffins rose evenly and baked without sinking or browning unevenly; when you tap the top, it feels slightly firm but still has gentle give
- Moist crumb with tender bite – when you break one open, you see a fine, even crumb structure (no tunnels, no dense pockets); one bite should require gentle chewing, not wrestling
- Perfect toothpick test – when inserted into the center, it comes out clean or with just moist crumbs clinging, never wet batter
- Aromatic spice profile – you smell cinnamon and pumpkin first, with warm nutmeg undertones; cloves should be subtle, not overpowering
- Consistent size across the batch – all 12 muffins look remarkably similar in size and color, indicating even baking and consistent portioning
Common Technique Mistakes and How to Fix Them
- Dense, heavy muffins with tunnels – you overmixed the batter, developing excess gluten. Fix this by using a folding motion instead of stirring, stop as soon as dry flour disappears, and resist the urge to “stir it one more time.”
- Muffins that sink or collapse after baking – your oven temperature was too low or you opened the door too early. Invest in an oven thermometer ($12-15) to verify actual temperature, and resist peeking before the 20-minute mark.
- Dry, crumbly texture despite using pumpkin – you overbaked them or your oven runs hot. Check doneness at 20 minutes with a toothpick test, and use an oven thermometer to calibrate temperature. Dairy-free muffins dry out faster than traditional ones.
- Uneven browning with some muffins dark and others pale – your muffin pan has hot spots (common in most home ovens). Rotate the pan halfway through baking, and consider lining the upper racks with foil if top muffins brown too quickly.
- Flat muffins without the characteristic dome – you underfilled the cups or used expired baking powder. Fill each cup nearly full (about 3/4 to the top), and check your baking powder’s expiration date—it’s only effective for 6-12 months after opening.
Practice Variations to Build Your Skill
Level 1: Classic Chocolate Chip Pumpkin Muffins (Beginner) – Follow the recipe exactly as written, adding 1 cup non-dairy chocolate chips in the final fold. This teaches you the core technique with the added variable of incorporating chunky mix-ins. The chocolate provides visual feedback of even distribution.
Level 2: Spiced Pumpkin Muffins with Streusel Topping (Intermediate) – Make the base recipe, then prepare a simple topping: combine 1/3 cup rolled oats, 1/4 cup brown sugar, 2 tablespoons melted vegan butter, and 1/2 teaspoon cinnamon. Sprinkle this over the filled muffin cups before baking. This level teaches you to manage multiple components and understand how toppings affect moisture retention and browning.
Level 3: Pumpkin-Ginger Muffins with Coconut Cream Frosting (Advanced) – Increase ground ginger to 1 teaspoon for a spicier profile. After baking and cooling completely, prepare a frosting by whipping 1/2 cup coconut cream with 1 tablespoon vegan butter and 1/2 cup powdered sugar. Pipe or spread onto cooled muffins. This level teaches you flavor balance (more ginger requires careful tasting before baking) and how to frost without compromising the muffin’s structure.
Expert’s Nutritional Tip From My Practice
Here’s something I tell my nutrition clients that changes their relationship with pumpkin: one 15-ounce can of pure pumpkin puree contains more than 7 grams of fiber and 450+ milligrams of potassium, along with powerful antioxidants like beta-carotene. That’s genuine nutrition, not just an ingredient for flavor. When you make these dairy-free muffins, you’re creating a breakfast that provides sustained energy from complex carbohydrates (the flour) and plant-based protein from the legumes in most plant milks. A single muffin delivers approximately 8-10 grams of fiber, which supports digestive health. The addition of walnuts (if using) adds omega-3 fatty acids that support brain health. This isn’t indulgence—this is nourishment.
Can I Store Dairy-Free Pumpkin Muffin Recipe?
One of the beautiful advantages of these muffins is their remarkable shelf life. Store them in an airtight container at room temperature for up to 4 days without any texture decline. The pumpkin’s natural moisture keeps them tender longer than traditional muffins. For longer storage, wrap individual muffins in parchment paper and freeze them in an airtight freezer container for up to 3 months. Thaw them at room temperature for about 2 hours, or reheat wrapped muffins in a 300°F oven for 8-10 minutes to restore that fresh-baked warmth.
I prepare a double batch every fall and freeze half for November and December mornings when time is tight. My family never knows these are 6 weeks old—they taste exactly like this morning’s bake.
Make-Ahead Guide: From Busy Professional to Prepared Parent
As a registered dietitian who works with families juggling schedules, I’ve built this recipe into a complete make-ahead system:
The Week Before: Combine all dry ingredients (flour, baking powder, salt, spices, cornstarch) in a gallon-sized zip-top bag. Label with the date and “Mix with wet ingredients.” This dry mixture keeps for 2 weeks and eliminates the need to measure spices on busy mornings.
The Day Before: Make the full batter, fill the muffin pan, cover with plastic wrap, and refrigerate overnight. The batter actually improves slightly—flavors meld and the pumpkin hydrates more completely. Bake directly from the fridge the next morning, adding just 2-3 minutes to the bake time since the batter starts cold.
Batch and Freeze: Bake a double recipe on Sunday. Cool completely, wrap individual muffins in parchment, and freeze. Mornings become grab-and-go moments. These keep up to 3 months frozen.
Nutrition Information
Per muffin (based on 12 muffins per batch, without optional mix-ins), according to USDA nutrient database standards:
- Calories: 220
- Total Fat: 7g
- Saturated Fat: 1g
- Carbohydrates: 38g
- Dietary Fiber: 1.5g
- Total Sugars: 22g
- Protein: 2.5g
- Sodium: 185mg
- Potassium: 145mg
If using 1 cup of walnuts as add-ins, each muffin gains approximately 45 calories, 4.5g fat, and 1g additional fiber. If using chocolate chips, calories increase by about 40 per muffin and sugar increases by 5g. These numbers make dairy-free pumpkin muffins a reasonable choice for a nutrient-dense breakfast or snack—the pumpkin provides vitamins A and C, while the whole grain flour adds minerals and B vitamins.
What to Serve With Dairy-Free Pumpkin Muffin Recipe?
These muffins shine when paired with thoughtful accompaniments that let the spice and pumpkin take center stage. Since the muffins are naturally sweet and slightly rich, I recommend pairing them with acidic or creamy elements:
- Almond or cashew butter spread – the nutty creaminess complements pumpkin’s earthiness, and plant-based proteins make this a complete breakfast. Spread while muffins are still warm for easy melting.
- Fresh Greek-style coconut yogurt – tangy and cool against warm spiced muffins, providing probiotics and additional protein for sustained energy
- Homemade avocado spread recipe – creamy, nutrient-dense, and the subtle bitterness of avocado balances pumpkin’s sweetness beautifully
- Strong brewed coffee or chai tea – the bitterness and warmth echo the muffin’s spice profile, creating a cohesive breakfast experience
- Fresh apple slices or pear – crisp, light, and naturally sweet; provides dietary fiber and freshness that cuts the muffin’s richness

Dairy Free Pumpkin Muffin Recipe
Ingredients
Method
- Preheat your oven to 375°F while you prepare the muffin pan. This matters because temperature consistency creates even rise. While the oven heats, lightly grease your 12-cup muffin pan with neutral oil or cooking spray. If you're using paper liners, spray the inside of each cup lightly—this prevents the muffin from sticking to the paper as it rises. Many bakers skip this step and end up with muffin tops separated from the base. Don't be that baker. The coating ensures moisture can't be absorbed by the paper, which keeps your muffins moist.
- In a large mixing bowl, add your pumpkin puree, melted vegan butter (or oil), unsweetened plant milk, and brown sugar. Using a sturdy whisk, combine these ingredients vigorously for about 1 to 2 minutes. You're looking for a smooth, unified mixture with no visible streaks of oil or clumps of sugar. This is emulsification—you're creating a stable combination of ingredients that want to separate. The sugar dissolves, the oil disperses evenly throughout the liquid, and the pumpkin integrates completely. This step is critical because a well-emulsified wet base means your muffins will be uniformly moist and tender. If you skip or rush this, dry spots and dense pockets will form.
- This is where most home bakers lose credibility. Take a fine-mesh strainer or flour sifter and combine your flour, baking powder, salt, cinnamon, nutmeg, ginger, cloves, and cornstarch. Sift this mixture directly over your wet ingredients. Sifting serves two purposes: it aerates the flour (which promotes lighter rise) and it distributes the leavening agents evenly, preventing bitter baking powder pockets. If you dump dry ingredients directly into wet ones, you'll get uneven texture and potentially metallic flavor notes from concentrated baking powder.
- Here's where your muffins become legendary or disappointing. Pick up a large wooden spoon and, using a folding motion (not stirring), combine the dry and wet ingredients. Fold means you're scraping the bottom of the bowl, bringing the mixture up and over the top, rotating the bowl slightly, and repeating. This gentle motion incorporates ingredients with minimal gluten development. You want to stop when you see no dry flour streaks remaining—typically 10-15 gentle folds. This takes about 30 seconds. The batter will look slightly lumpy. That's perfect. Lumps will smooth out in the oven. Overmixing turns those lumps into tunnels and dense crumb.
- If using chocolate chips, raisins, walnuts, or cranberries, sprinkle them over the batter now and fold them in gently with just 3-4 additional folds. Don't stir—fold. This distributes them evenly while maintaining your tender crumb structure. If you mix aggressively now, you're undoing all your careful work from step 4.
- Using an ice cream scoop or 1/4-cup measuring spoon, fill each muffin cup until it's nearly full. Muffins rise upward, not outward, so filling generously gives you those attractive domed tops. If cups are only half-full, you'll get flat, disappointing muffins. All cups should have roughly equal amounts of batter—this ensures even baking times across all 12 muffins.
- Place your pan in the preheated 375°F oven and bake for 22 to 25 minutes. Do not open the oven door before 20 minutes have passed—opening it allows heat to escape and interrupts the rise. At the 22-minute mark, insert a toothpick into the center of a muffin (not into a chocolate chip, as that will be melted and deceive you). If the toothpick comes out clean or with just a few moist crumbs, your muffins are done. If wet batter clings to it, bake for another 2-3 minutes and test again. Overbaking creates dryness in dairy-free muffins because there's no fat to compensate.
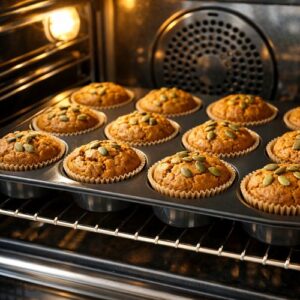
- Remove the pan from the oven and let the muffins rest in the pan for 5 minutes. This allows the structure to set slightly, making them easier to remove. Then turn them out onto a wire cooling rack for at least 15 minutes before serving. Eating them directly from the hot pan might be tempting, but you'll lose the refined texture. Once fully cooled, they're perfect for eating plain or pairing with your favorite toppings.
Notes
FAQs
Can I use fresh pumpkin instead of canned puree?
Yes, but with important technique modifications. Fresh pumpkin requires cooking and straining, and the water content varies wildly. Roast one medium sugar pumpkin (about 2 pounds) at 350°F for 45 minutes until tender, then scoop and puree. You’ll need about 1 3/4 cups puree for this recipe, but fresh pumpkin is wetter than canned. Reduce your plant milk to 1/4 cup instead of 1/2 cup, otherwise your batter becomes too wet and your muffins emerge dense. The technique remains identical—what changes is respecting moisture variables.
What happens if I overmix the batter?
Overmixing develops gluten strands, transforming your tender muffins into dense, tough ones with tunnels (those unappetizing air pockets). When flour hydrates and gets stirred aggressively, its proteins align and create an elastic network. That’s great for bread, terrible for muffins. The fix: fold gently until you see no dry flour streaks, then stop immediately. Thirty seconds of folding is usually perfect. Your batter will look slightly lumpy—embrace it.
Why did my muffins sink in the middle after baking?
Sunken centers indicate insufficient oven temperature or opening the oven door too early. If your oven runs cool, muffins rise and then collapse because the structure hasn’t set. Invest in an oven thermometer and let it preheat for 15 minutes. Additionally, resist peeking before the 20-minute mark—opening the door drops oven temperature 25-50°F, disrupting the rise. If you must check, do it after 20 minutes using the toothpick test.
Can I make these egg-free and nut-free?
This recipe is already egg-free—pumpkin puree acts as your binder. For nut-free, simply omit walnuts or choose non-nut mix-ins like dried fruit or coconut flakes. The core technique remains unchanged. If someone in your home has severe nut allergies, prepare these muffins separately from any nut-containing baking to avoid cross-contamination.
How do I prevent my muffin tops from browning too quickly while the centers remain underdone?
Muffin tops brown faster than centers because they’re exposed to direct oven heat. If this happens, tent the muffin pan loosely with aluminum foil halfway through baking (around the 12-minute mark). The foil reflects some heat, slowing browning while centers finish baking. Alternatively, position the rack in the lower-middle section of your oven rather than the top rack. Every oven has hot spots—foil helps equalize those temperature differences.
Seasonal Variations: Adapting the Recipe Throughout the Year
Fall (September-November): This is the classic season. Use the recipe as written with warming spices emphasized. Add 1/4 teaspoon cardamom for unexpected depth. If using mix-ins, choose dried cranberries or toasted pecans for autumn flavor harmony.
Winter (December-February): Increase the molasses-like quality by swapping half your brown sugar for dark muscovado sugar (if available), adding deeper flavor. Fold in non-dairy chocolate chips and add 1/2 teaspoon orange zest to the wet ingredients. The citrus brightens winter heaviness beautifully.
Spring (March-May): Pumpkin still works in spring! Lighten the spice profile—reduce cinnamon to 1.5 teaspoons and omit cloves entirely. Fold in dried blueberries or fresh raspberries. Add a whisper of almond extract (1/4 teaspoon) instead of vanilla for spring brightness.
Summer (June-August): Yes, make these in summer for unexpected comfort on hot mornings. Reduce brown sugar slightly to 1 cup (summer calls for less heaviness), and fold in fresh corn kernels (about 1/3 cup) for seasonal interest. Serve with coconut yogurt and fresh berries.
More Recipes Using This Technique
- Carrot Cake Vegan Recipe – applies identical wet-and-dry integration and gentle folding for tender layers
- Blueberry Crisp Recipe – uses the same philosophy of respecting delicate fruit and avoiding overmixing
- Brunch Potato Recipe Make-Ahead – teaches timing and preparation that pairs beautifully with breakfast muffins
- Apple Crisp Recipe Dairy-Free – demonstrates how gentle combining creates superior texture in plant-based baking
Learning to bake these dairy-free pumpkin muffins isn’t just about creating one delicious recipe—it’s about gaining a cooking superpower. You now understand how to balance moisture, respect your ingredients, and fold with intention. You’ve learned that technique matters more than ingredients, that sensory awareness beats guesswork, and that patience during the folding step creates muffins that make people ask your secret. You can apply this knowledge to countless recipes: scones, quick breads, pancakes, and beyond.
The next time someone tells you their muffins came out dense, you’ll know exactly what happened and how to fix it. That’s expertise. That’s what transforms you from someone who follows recipes into someone who understands cooking. Your family gathers around your table not because the muffins are good—though they absolutely are—but because homemade, thoughtfully prepared food nourishes the body and spirit in ways packaged goods never can. That’s the real mastery here.
Happy cooking!