This post contains affiliate links. As an Amazon Associate I earn from qualifying purchases.
Easy Eggless Banana Pancakes Recipe (Fluffy, Dairy-Free & Ready in 20 Minutes!)
I still remember Sunday mornings at my abuela’s kitchen in Tampa, where the smell of fresh banana pancakes would fill the entire house. But here’s the thing—every time I tried to recreate those pancakes without eggs, they’d come out dense, gummy, or completely flat. I’d follow recipes that promised fluffy results, only to end up with something that tasted more like rubber than comfort food. Sound familiar? After years working with families managing allergies and dietary restrictions in my nutrition practice, I realized the problem wasn’t the lack of eggs—it was the technique. Once I understood what eggs actually do in pancake batter and how to replace their magic, everything changed. These eggless banana pancakes are now a staple in my kitchen, and I’m thrilled to share exactly how to make them foolproof.
Why Your Eggless Pancakes Never Turn Out Right (And How to Fix It)
Let me be honest: when I first started experimenting with plant-based pancakes, my results were disappointing. The pancakes would be rubbery on the outside, undercooked in the middle, or they’d fall apart entirely. As a registered dietitian, I know that eggs serve multiple purposes in baking—they bind ingredients, provide structure, trap air for lift, and add moisture. Without them, you can’t just follow a traditional pancake recipe and hope for the best.
The secret I discovered? Mashed banana itself acts as the binding agent and leavening power, but you need the right ratio of wet to dry ingredients, plus the correct cooking temperature and timing. The soy milk adds moisture and richness that mimics the fat eggs would provide, while the baking powder does the heavy lifting for lift. This combination creates pancakes that are genuinely fluffy and tender—not a sad substitute for the “real thing,” but delicious in their own right.
I’ve made these pancakes hundreds of times now, for clients with egg allergies, vegans transitioning to plant-based eating, and families simply looking for variety. Every single time, following this method produces consistent, restaurant-quality results.
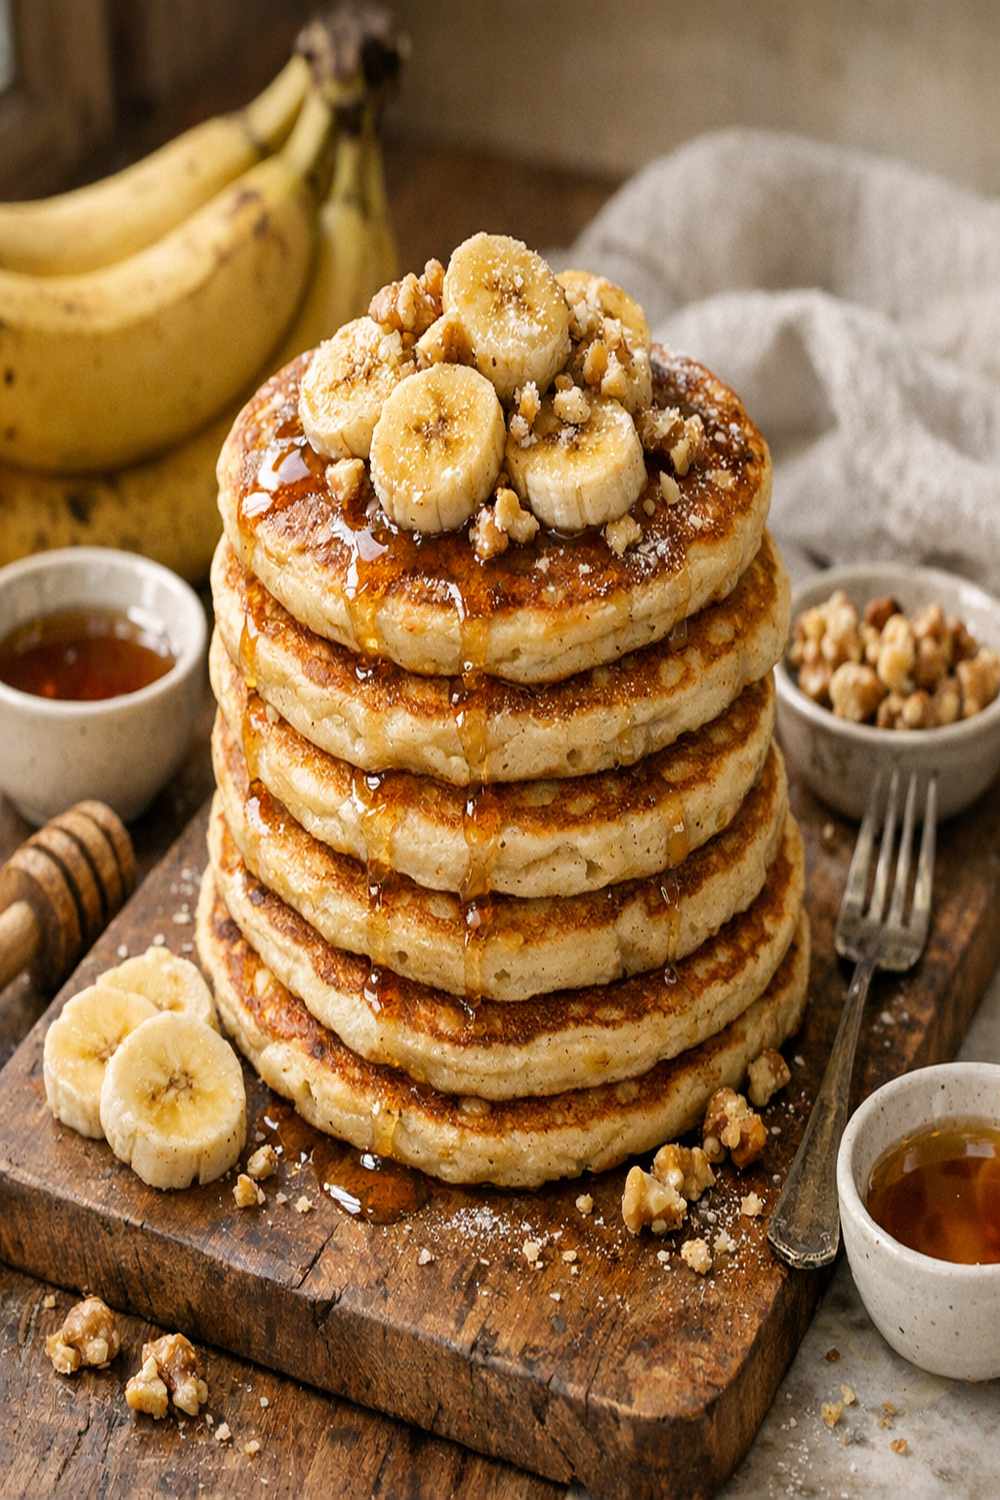
What Makes This Eggless Banana Pancake Recipe Different?
Most eggless pancake recipes fall into one of two camps: they either use applesauce as the binder (which makes pancakes dense and apple-flavored) or they rely on commercial egg replacers (which can taste chalky and gritty). This recipe is different because it harnesses the natural binding and leavening properties of ripe banana itself.
Here’s what makes it work: ripe banana provides pectin and natural sugars that help bind the batter while also trapping air bubbles for lift. The soy milk—not dairy milk—creates a richer batter without weighing it down. Canola oil instead of butter ensures the pancakes stay tender and moist through cooking and reheating. The timing and temperature method I teach you ensures they cook through without burning on the outside.
The result? Pancakes with a delicate, tender crumb, subtle banana flavor (not overwhelming), and a golden-brown exterior that’s crispy without being tough. These hold up beautifully in the freezer for up to three months, making them perfect for busy mornings when you want wholesome homemade nutrition without the stress.
Before You Start: What You Need to Know
Before you begin, there are two critical insights that separate success from disappointment with this recipe. Most recipes skip these entirely, and that’s why people struggle.
- Banana ripeness determines everything – You need a banana with brown speckles on the skin, soft enough that it mashes easily with a fork. A yellow banana won’t provide enough pectin for binding, and you’ll end up with falling-apart pancakes. An overripe banana (mostly brown) actually works better than a slightly green one, so don’t wait for perfect yellow.
- Don’t overmix the batter under any circumstances – This is the most common mistake that leads to tough, rubbery pancakes. Lumps in the batter are your friend. They disappear during cooking while keeping the texture light. Overmixing develops gluten, which creates density.
- Your griddle temperature must be medium-high, never high – A griddle that’s too hot burns the outside before the inside cooks through. Too cool, and the pancakes spread thin and refuse to flip properly. Medium-high heat is the sweet spot where pancakes develop that gorgeous color while cooking through in about 2-3 minutes total.
The Ingredients
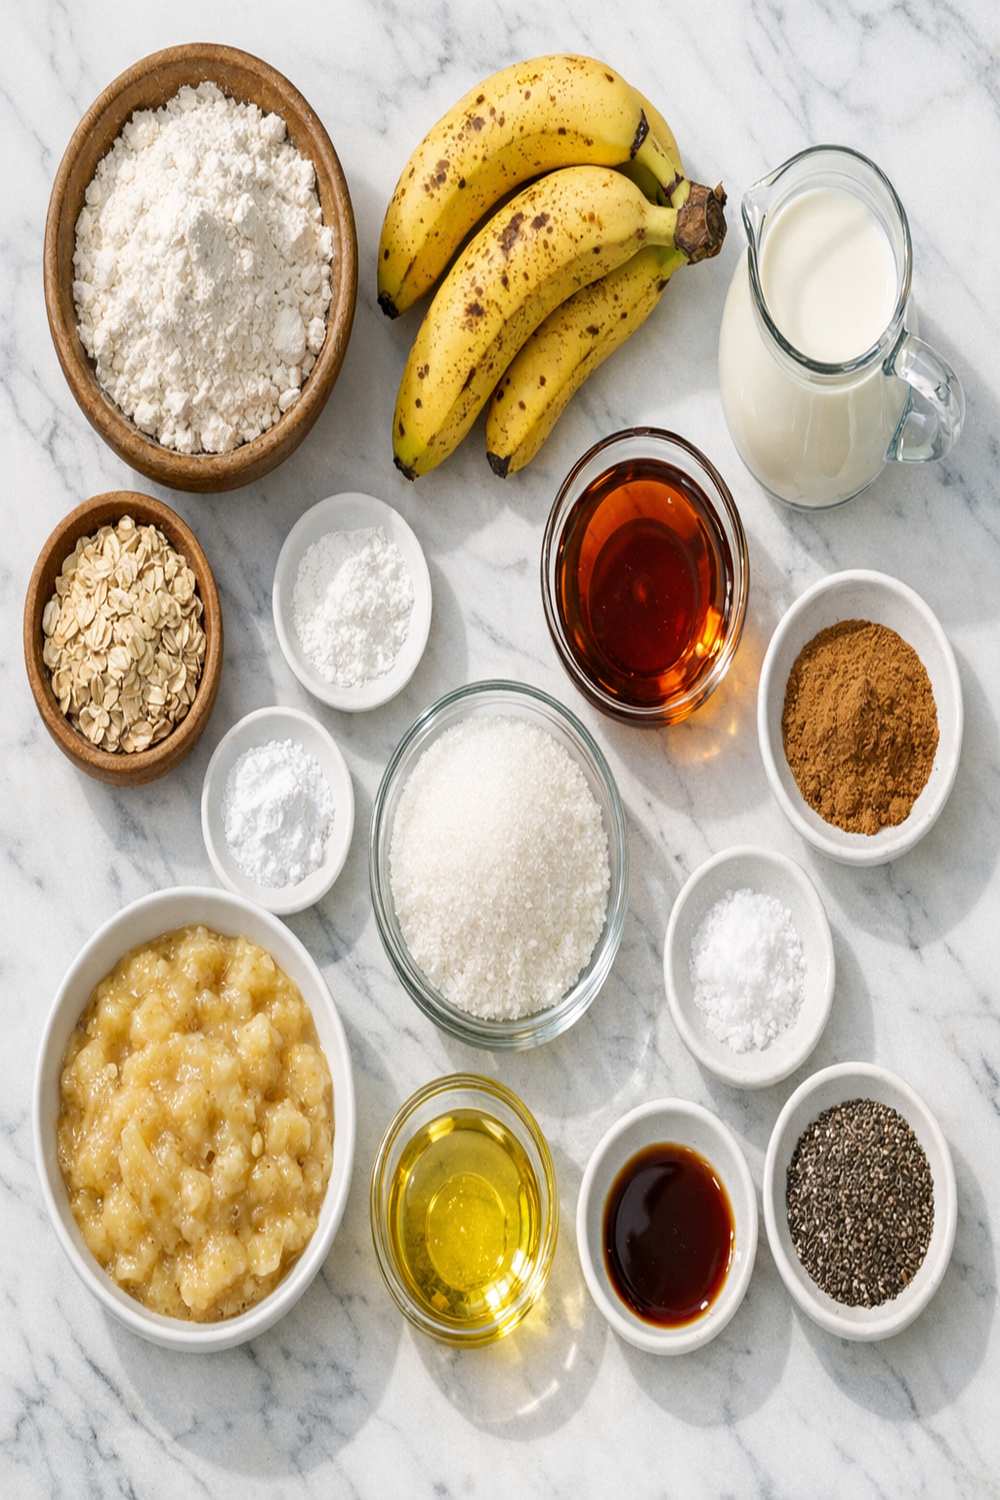
I’ve chosen each ingredient specifically for its nutritional contribution and functional role in creating fluffy, moist pancakes. This recipe makes approximately 12-14 pancakes (serving 4-5 people), and every component matters for the final result.
- 2 tablespoons canola oil (keeps pancakes moist and prevents sticking; better than coconut oil which can leave a film)
- 1½ cups all-purpose flour, spooned and leveled, never packed (structure and crumb foundation)
- 1 tablespoon baking powder, measured carefully (creates lift without any metallic aftertaste)
- 2 tablespoons granulated sugar (balances flavor and helps with browning through caramelization)
- ½ teaspoon fine sea salt (brightens banana flavor and balances sweetness)
- 1 medium ripe banana, mashed to yield approximately ½ cup (provides natural sweetness, pectin for binding, and banana flavor without added sugar)
- 1 cup unsweetened soy milk (creates a tender crumb and mimics the fat richness that eggs would provide)
- 1 teaspoon pure vanilla extract, not imitation (adds warmth and depth to the banana flavor)
- ½ teaspoon ground cinnamon, optional but highly recommended (enhances banana naturally without overpowering it)
- Cooking spray or additional canola oil for the griddle (prevents sticking and creates even browning)
Step-by-Step: How to Make Eggless Banana Pancakes Without Fail
I’m going to walk you through this process exactly as I make it in my kitchen. Follow these steps in order, and you’ll have fluffy, delicious pancakes every single time. This takes about 20 minutes from start to finish.
Step 1: Prepare and Measure Your Banana
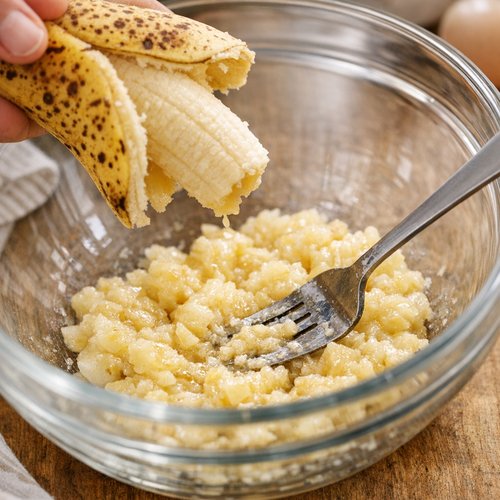
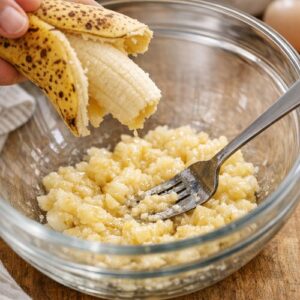
Take your ripe banana (with brown speckles on the skin) and peel it directly over a medium-sized mixing bowl. Using a fork, gently mash the banana until you have approximately ½ cup of relatively smooth mash—a few small lumps are fine, but you don’t want large chunks. This usually takes one medium banana.
Why this matters: the mashing process breaks down the banana’s cell walls, releasing pectin that will help bind your batter. You’re not creating a perfectly smooth puree; you’re breaking it down enough to distribute it evenly through the wet ingredients while preserving some texture. Measuring is critical—too little banana and your batter won’t bind properly; too much and the pancakes become dense.
Step 2: Combine All Wet Ingredients
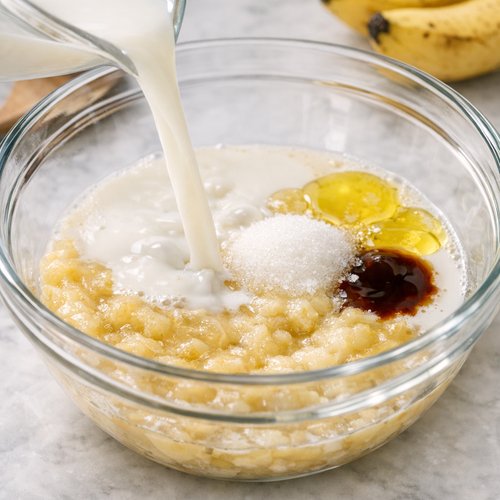
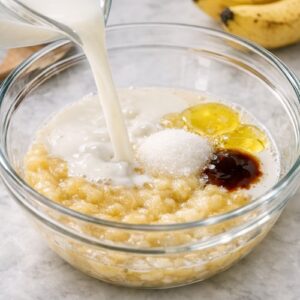
To your mashed banana in the bowl, add the 1 cup unsweetened soy milk, 2 tablespoons canola oil, 2 tablespoons granulated sugar, and 1 teaspoon pure vanilla extract. Using a wooden spoon or whisk, stir these ingredients together for about 30-45 seconds until they’re well combined and mostly smooth. The mixture should look somewhat uniform with no visible streaks of oil or unmixed banana.
Expert’s tip: I always use unsweetened soy milk specifically because it has a neutral taste and the right fat content (about 2 grams per cup) to create tender pancakes. Almond milk is too thin; coconut milk is too thick. The combination of oil and soy milk replicates the moisture and richness that eggs provide.
Step 3: Add the Dry Ingredients Correctly
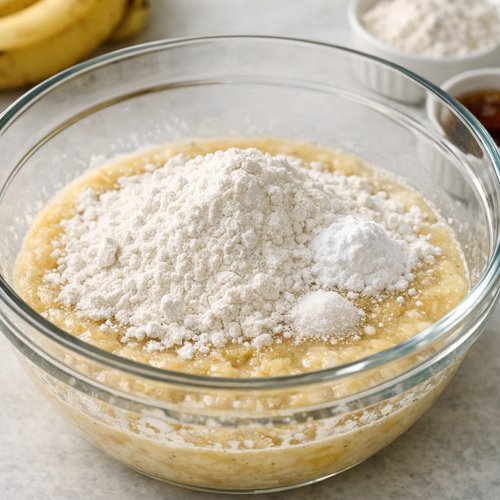
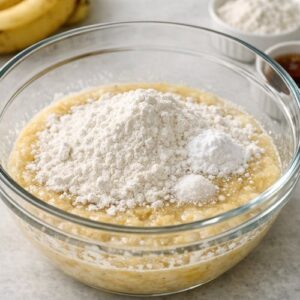
Sprinkle your 1½ cups all-purpose flour directly over the wet ingredients. Don’t stir yet. Next, sprinkle the 1 tablespoon baking powder, ½ teaspoon salt, and ½ teaspoon cinnamon (if using) directly on top of the flour layer. This layering prevents the baking powder from activating prematurely.
Now, using a wooden spoon, gently fold and stir the ingredients together until just combined—this should take only about 15-20 seconds. Stop when you still see some flour streaks and lumps. The batter will look decidedly lumpy, almost underdone. This is exactly what you want. Overmixing at this stage develops gluten strands that make pancakes tough and rubbery.
Step 4: Heat Your Griddle to the Perfect Temperature
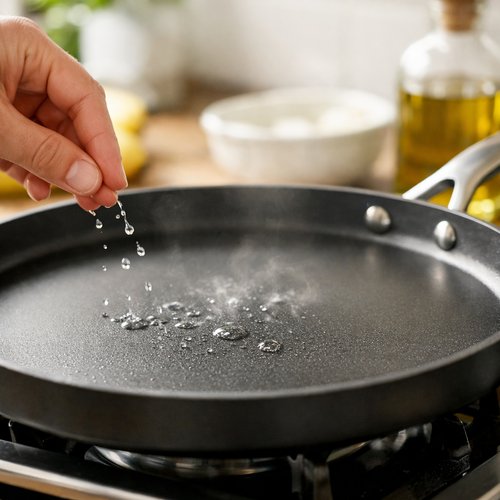
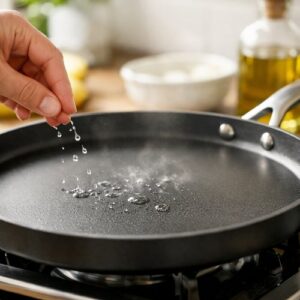
Place a large griddle or non-stick skillet over medium-high heat. Let it preheat for about 2-3 minutes. To test if it’s ready, flick a few drops of water onto the surface—they should sizzle immediately and evaporate within 2 seconds. If the water sits there, it’s not hot enough. If it evaporates instantly in less than a second, it’s too hot.
Safety note: Keep your hands and arms away from the griddle as it heats. Even preheated griddles can cause serious burns. Use a long-handled spatula for flipping.
Step 5: Coat the Griddle and Begin Cooking
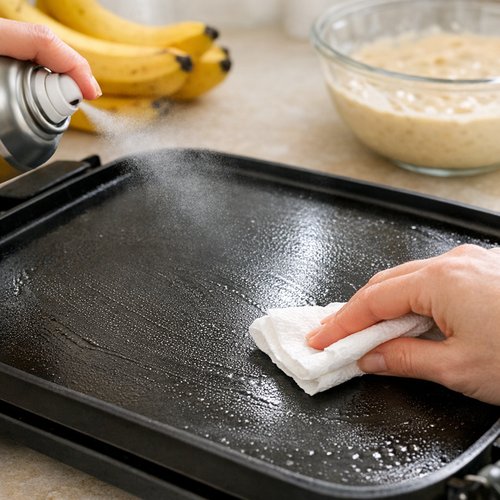
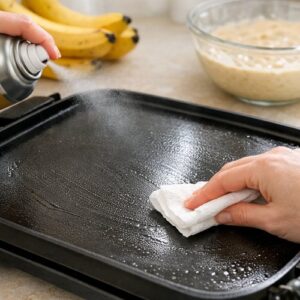
Lightly coat your preheated griddle with cooking spray or a thin layer of canola oil. Wipe any excess with a paper towel so you have just a light coating. Using a ⅓-cup measuring cup, pour the batter directly onto the griddle. You should be able to fit 3-4 pancakes at a time without crowding them.
Do not move the pancakes once they’re poured. Let them cook undisturbed for about 2 minutes. You’ll see small bubbles forming on the surface—this is the baking powder releasing gas and creating lift.
Step 6: Flip and Finish Cooking
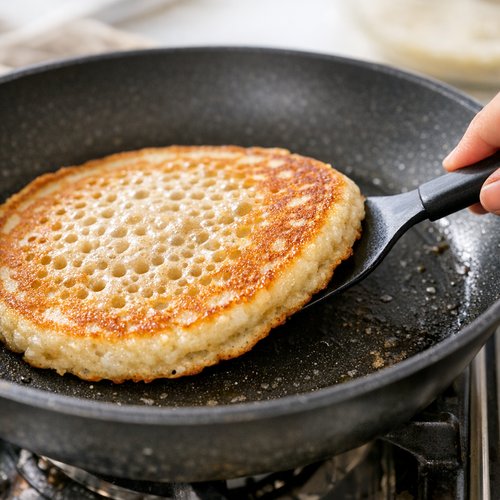
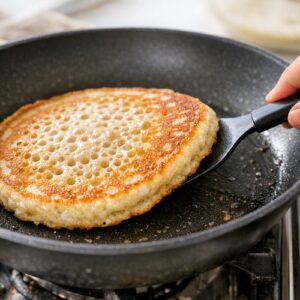
When the surface of the pancake is covered with bubbles and the edges look set and slightly dry, it’s time to flip. Using a thin spatula, slide it under the pancake in one smooth motion and flip it confidently. Don’t flip back and forth; commit to the flip. The second side needs only 1-1.5 minutes to cook until it’s golden brown.
A properly flipped pancake should be golden brown (not pale or dark), and when you press the center gently with your finger, it should spring back immediately. Transfer cooked pancakes to a warm plate and cover loosely with a clean kitchen towel to keep them warm while you cook the remaining batter.
Step 7: Serve Immediately or Cool for Storage
Stack your finished pancakes on a serving plate. If eating immediately, top with vegan butter, pure maple syrup, and fresh sliced bananas. If you’re planning to freeze them for later (which I highly recommend), let them cool completely on a wire rack for about 10 minutes before stacking.
The Most Common Mistakes (And How to Avoid Them)
- Using underripe bananas – A yellow banana without brown speckles won’t provide enough pectin to bind the batter. Your pancakes will fall apart or refuse to hold together when flipping. Always wait for brown speckles, or even slightly overripe is better. If you must use yellow bananas, add 1 tablespoon cornstarch to compensate.
- Overmixing the batter to smoothness – When you overmix, you develop gluten networks that trap too much water, creating dense, rubbery pancakes. Mix only until you still see flour streaks and lumps. The lumps are not a mistake; they actually create a lighter, fluffier texture because they don’t fully hydrate during cooking.
- Cooking on the wrong heat level – Too hot and the outside burns brown while the inside remains undercooked and gummy. Too cool and the pancakes spread thin, refuse to flip cleanly, and come out pale and tough. Medium-high is the only temperature that works. If your first batch isn’t perfect, adjust the heat slightly for the next batch.
- Moving the pancake before it’s ready to flip – Resist the urge to check progress before the edges look set. Premature flipping results in pancakes that tear, don’t cook evenly, or fall apart on the griddle. Wait for visible bubbles on the surface; that’s your signal it’s time to flip.
How Do I Know When It’s Done?
Doneness isn’t just about time—it’s about visual, tactile, and color cues. I use three specific indicators to know when a pancake is perfectly cooked.
First, look for bubbles covering the entire top surface, and watch for the edges to look set and slightly dry. This usually happens around the 2-minute mark on the first side. Second, the edges should pull away from the griddle slightly when you gently try to slide your spatula underneath—if they’re still stuck, wait another 10-15 seconds. Third, when you flip and the second side cooks, it should develop a golden-brown color within 1-1.5 minutes, not pale yellow and not dark brown.
If you want to be extra sure, you can cut into a pancake at the thickest point—it should be moist but not gummy or wet. The interior should be light and tender, not dense or doughy.
Troubleshooting: When Things Go Wrong
- Pancakes are falling apart or won’t hold together when flipping – Your batter doesn’t have enough binding. Likely causes: underripe banana, or you didn’t mash it thoroughly enough. Fix mid-cook by adding 1 tablespoon cornstarch mixed with 1 tablespoon soy milk to your remaining batter and stirring gently. For future batches, always use brown-speckled bananas and mash completely.
- Pancakes are coming out dense and gummy in the center – Your griddle is too hot, cooking the outside too quickly while the inside stays raw. Immediately reduce heat to medium (not medium-high) for your next batch. You can also try cooking 30 seconds longer on the first side before flipping.
- Pancakes are spreading thin and won’t flip cleanly – Your griddle isn’t hot enough, so the batter is spreading instead of rising. Increase heat to medium-high and let the griddle preheat properly for 2-3 minutes. Test with water drops before cooking the next batch.
- Pancakes are burning on the outside but still wet inside – Griddle temperature is too high. Reduce to medium and give the pancakes a bit more time on the first side (up to 2.5 minutes) to allow the inside to cook through before flipping.
Can I Store Eggless Banana Pancakes?
Yes, and this is one of my favorite things about this recipe. These pancakes freeze beautifully and reheat perfectly, making them ideal for batch cooking.
For refrigerator storage: Stack cooled pancakes in an airtight container separated by parchment paper. They’ll keep for 3-4 days in the refrigerator. Reheat in a toaster oven at 300°F for 8-10 minutes, or in the microwave for 30-40 seconds per pancake. Microwave reheating is faster but can make them slightly denser; the toaster oven is my preferred method because it restores the original texture.
For freezer storage: Cool pancakes completely on a wire rack. Stack them separated by parchment paper and place in a freezer bag, removing as much air as possible. They’ll keep for up to 3 months without quality loss. Thaw at room temperature for 20-30 minutes, or reheat directly from frozen in a toaster oven at 325°F for 12-15 minutes.
Pro tip: I always make a double or triple batch on Sunday and freeze the extras. On busy weekday mornings, I can have warm, homemade pancakes on the table in less than 15 minutes with zero stress. This is meal prep that actually tastes good and holds up to reheating.
Nutrition Information
Per serving (2 pancakes): approximately 280 calories, 9g fat, 45g carbohydrates, 2g fiber, 12g sugar (from banana and added sugar), 5g protein, and 35mg sodium. Based on USDA FoodData Central nutrition database.
What I love about this recipe from a nutritional standpoint: the banana provides natural sweetness (so you use less added sugar than traditional recipes), plus potassium for heart health and resistant starch when the banana is slightly ripe. The soy milk contributes complete plant protein, and the small amount of canola oil provides heart-healthy polyunsaturated fats. These aren’t empty-calorie breakfast pancakes—they’re genuinely nutritious. For families managing diabetes or blood sugar concerns, these are actually better than traditional pancakes because the banana fiber and protein slow down glucose absorption.
One serving pairs well with avocado spread for added healthy fats and creaminess, which will further slow carbohydrate absorption and keep you fuller longer.
What Can I Serve With Eggless Banana Pancakes?
These pancakes are incredibly versatile. They work beautifully for breakfast, brunch, or even a light dessert. Here are my favorite pairings based on nutritional balance and flavor harmony:
- Pure maple syrup and vegan butter – Classic, simple, and lets the banana flavor shine. The maple adds depth without competing.
- Fresh sliced bananas and cinnamon – Doubles down on banana flavor and adds no extra sugar. The cinnamon enhances the spice note already in the pancakes.
- Avocado spread with sea salt – Creates a savory-sweet contrast that’s absolutely divine. The creamy avocado balances the sweetness perfectly.
- Blueberry jam with coconut yogurt – The tartness of jam plays beautifully against the sweetness of the pancakes. Coconut yogurt adds protein and tang.
- Almond butter and fresh berries – Adds protein and healthy fats for a more substantial breakfast that keeps you satisfied for hours.
- Cacao nibs and a drizzle of maple syrup – For when you’re craving something dessert-like but want to keep it plant-based.
If you’re serving these as part of a full brunch, they pair beautifully with make-ahead brunch potatoes for a more filling meal, or with a fresh green salad if you want to balance the sweetness.
Make-Ahead Guide: Pancakes for the Whole Week
As a registered dietitian, I always tell families that the best recipe is the one you’ll actually use. That’s why I built this recipe to be incredibly make-ahead friendly. Here’s my professional strategy for having homemade pancakes ready all week:
Sunday Batch Cooking: Dedicate about 45 minutes on Sunday to make 3 batches of this recipe (tripling the measurements). This yields about 36-42 pancakes. Cook them all while listening to music or a podcast. As they finish, place them on wire racks to cool completely—this is critical because warm pancakes create steam that makes them soggy when stacked.
Storage Strategy: Once completely cooled, I stack pancakes in groups of 2-3, separating each pair with a small piece of parchment paper. This allows you to pull out exactly what you need without thawing the entire batch. Place these stacks in a gallon-sized freezer bag, label with the date, and freeze immediately.
Daily Reheating: On busy mornings, pull out 2 pancakes directly from the freezer and reheat in a toaster oven at 325°F for 12-15 minutes. While they warm, you can brew coffee, unpack backpacks, or check emails. The pancakes come out warm, slightly crispy on the edges, and nearly as good as freshly made. This takes less time than making oatmeal and actually tastes like a real breakfast.
Seasonal Variations: Adapt This Recipe Year-Round
While these pancakes are delicious as written, I love updating them seasonally to keep breakfast interesting. Here are my favorite variations:
Fall (September-November): Add 1 teaspoon pumpkin pie spice instead of just cinnamon. Use 2 tablespoons pure pumpkin puree mixed into your banana. Serve with maple syrup and toasted pecans. This combination feels cozy without straying far from the base recipe.
Winter (December-February): Add ½ teaspoon ginger and ¼ teaspoon nutmeg to the dry ingredients. Add 1 teaspoon molasses to the wet ingredients. Serve with warming toppings like warm almond butter or a drizzle of maple syrup with cinnamon. This version has warming spices perfect for cold mornings.
Spring (March-May): Add 1 teaspoon lemon zest to the wet ingredients and reduce vanilla to ½ teaspoon. Use this recipe as a base for fresh fruit toppings like strawberries, raspberries, or fresh blueberries. The brightness is perfect as weather warms.
Summer (June-August): Omit cinnamon and instead add 1 tablespoon fresh lime zest and reduce banana to ⅓ cup (add 2 tablespoons more soy milk to compensate). Top with mango slices and a tiny drizzle of coconut milk. This version feels fresh and tropical.

Eggless Banana Pancake Recipe
Ingredients
Method
- Take your ripe banana (with brown speckles on the skin) and peel it directly over a medium-sized mixing bowl. Using a fork, gently mash the banana until you have approximately ½ cup of relatively smooth mash—a few small lumps are fine, but you don't want large chunks. This usually takes one medium banana. Why this matters: the mashing process breaks down the banana's cell walls, releasing pectin that will help bind your batter. You're not creating a perfectly smooth puree; you're breaking it down enough to distribute it evenly through the wet ingredients while preserving some texture. Measuring is critical—too little banana and your batter won't bind properly; too much and the pancakes become dense.
- To your mashed banana in the bowl, add the 1 cup unsweetened soy milk, 2 tablespoons canola oil, 2 tablespoons granulated sugar, and 1 teaspoon pure vanilla extract. Using a wooden spoon or whisk, stir these ingredients together for about 30-45 seconds until they're well combined and mostly smooth. The mixture should look somewhat uniform with no visible streaks of oil or unmixed banana. Expert's tip: I always use unsweetened soy milk specifically because it has a neutral taste and the right fat content (about 2 grams per cup) to create tender pancakes. Almond milk is too thin; coconut milk is too thick. The combination of oil and soy milk replicates the moisture and richness that eggs provide.
- Sprinkle your 1½ cups all-purpose flour directly over the wet ingredients. Don't stir yet. Next, sprinkle the 1 tablespoon baking powder, ½ teaspoon salt, and ½ teaspoon cinnamon (if using) directly on top of the flour layer. This layering prevents the baking powder from activating prematurely. Now, using a wooden spoon, gently fold and stir the ingredients together until just combined—this should take only about 15-20 seconds. Stop when you still see some flour streaks and lumps. The batter will look decidedly lumpy, almost underdone. This is exactly what you want. Overmixing at this stage develops gluten strands that make pancakes tough and rubbery.
- Place a large griddle or non-stick skillet over medium-high heat. Let it preheat for about 2-3 minutes. To test if it's ready, flick a few drops of water onto the surface—they should sizzle immediately and evaporate within 2 seconds. If the water sits there, it's not hot enough. If it evaporates instantly in less than a second, it's too hot. Safety note: Keep your hands and arms away from the griddle as it heats. Even preheated griddles can cause serious burns. Use a long-handled spatula for flipping.
- Lightly coat your preheated griddle with cooking spray or a thin layer of canola oil. Wipe any excess with a paper towel so you have just a light coating. Using a ⅓-cup measuring cup, pour the batter directly onto the griddle. You should be able to fit 3-4 pancakes at a time without crowding them. Do not move the pancakes once they're poured. Let them cook undisturbed for about 2 minutes. You'll see small bubbles forming on the surface—this is the baking powder releasing gas and creating lift.
- When the surface of the pancake is covered with bubbles and the edges look set and slightly dry, it's time to flip. Using a thin spatula, slide it under the pancake in one smooth motion and flip it confidently. Don't flip back and forth; commit to the flip. The second side needs only 1-1.5 minutes to cook until it's golden brown. A properly flipped pancake should be golden brown (not pale or dark), and when you press the center gently with your finger, it should spring back immediately. Transfer cooked pancakes to a warm plate and cover loosely with a clean kitchen towel to keep them warm while you cook the remaining batter.
- Stack your finished pancakes on a serving plate. If eating immediately, top with vegan butter, pure maple syrup, and fresh sliced bananas. If you're planning to freeze them for later (which I highly recommend), let them cool completely on a wire rack for about 10 minutes before stacking.
Notes
FAQs
Can I use regular dairy milk instead of soy milk?
Technically yes, but I don’t recommend it if you’re trying to keep these fully plant-based. If you’re not strictly vegan, whole dairy milk works fine because it has similar fat content to soy milk. However, the whole point of this recipe is accessibility for people with dairy allergies, so I specifically developed it around soy milk. If you’re using dairy milk, you can reduce the amount to ¾ cup since dairy milk is richer. Avoid skim milk—it’s too thin and will change the texture of your pancakes.
What if I don’t have soy milk? What are good substitutes?
The best substitutes are oat milk (which has similar fat content) or coconut milk if you use the canned full-fat variety. Avoid thin plant milks like unsweetened almond milk—they don’t provide enough richness. For each cup of soy milk, you can use 1 cup oat milk or ¾ cup full-fat canned coconut milk (the thick part, whisked smooth) plus ¼ cup water. Coconut milk will add a slight coconut flavor, which actually works beautifully with banana.
Can I make these pancakes lower in sugar?
Absolutely. Reduce the granulated sugar to 1 tablespoon since the banana already provides sweetness. If you want to reduce sugar further, omit the added sugar entirely and the pancakes will still taste good—they’ll just be less brown (browning requires some sugar for caramelization). You can also use a 1:1 sugar substitute like monk fruit, though this may slightly affect browning. The key is not eliminating the sugar from the banana itself, as that’s what provides structure and browning.
Why do my pancakes taste gummy even though they’re cooked through?
This is usually caused by overmixing the batter, which develops too much gluten and traps excess moisture. It can also happen if you’re using underripe banana (which doesn’t bind as well) or if you’re cooking on too low heat (which doesn’t set the structure fast enough). Go back to Step 3 and make absolutely sure you’re mixing only until flour streaks remain. And confirm your griddle is truly at medium-high by testing with water drops before cooking.
Can I add chocolate chips, nuts, or other mix-ins?
Yes, but add them strategically. If you want chocolate chips or coconut flakes, fold them in very gently at the very end of mixing, after the dry ingredients are just combined. Use no more than ½ cup total mix-ins per batch, or they’ll weigh down the batter. For nuts, I prefer sprinkling them on top of the raw batter right after pouring onto the griddle, so they toast slightly without sinking. This keeps the pancakes fluffy instead of dense.
Are these pancakes safe for people with tree nut allergies?
The base recipe as written is 100% tree-nut free and safe for tree nut allergies. However, I make no promises about cross-contamination in your kitchen—if you have tree nuts in your pantry, check all your ingredient labels. Soy milk is sometimes processed in facilities with tree nuts, so if you have a severe allergy, check the specific brand you’re buying. For serving suggestions, avoid almond butter and pecan toppings; stick with seeds or coconut oil instead.
More Recipes You’ll Love
- this simple cake – Another eggless dessert-for-breakfast option that’s surprisingly wholesome
- Blueberry Jam – Homemade topping that pairs perfectly with these pancakes and freezes beautifully
- Brunch Potato Recipe Make Ahead – Complete your brunch spread with this make-ahead side that reheats perfectly
- Low Calorie Overnight Oats – Another quick, plant-based breakfast option for when you’re short on time
You now have everything you need to make fluffy, delicious eggless banana pancakes that rival anything from a restaurant. You understand not just the what, but the why behind every step—and that knowledge is what transforms cooking from stressful to confident. Whether you’re managing allergies, exploring plant-based eating, or simply want a foolproof breakfast that nourishes your family, these pancakes deliver. Start with the base recipe, master the technique, then play with seasonal variations. I promise you’ll be amazed at how consistently good they turn out.
The memories created around the breakfast table—the laughter, the conversations, the simple joy of eating something homemade and wholesome—that’s what these pancakes are really about. That’s what I learned from my abuela all those years ago, and that’s what I hope you experience in your own kitchen.
Happy cooking!