This post contains affiliate links. As an Amazon Associate I earn from qualifying purchases.
If you’ve always wanted to make a Chickpea Salad Curry Recipe but felt intimidated by the curry powder or worried about getting the texture just right, this is your starting point. I’m going to walk you through every single step, and I promise you—this dish is foolproof and forgiving. You’ll have a restaurant-quality meal ready in about 10 minutes, and it tastes even better the next day. Whether you’re looking for a quick lunch, meal prep solution, or something to serve at a gathering, this recipe delivers creamy, aromatic comfort without any fuss. If you loved the heartiness of my Black Bean And Sweet Potato Burger Recipe, you’re going to adore how versatile this chickpea situation becomes once you master it.
How to Make Chickpea Salad Curry Recipe for the First Time (You’ve Got This)
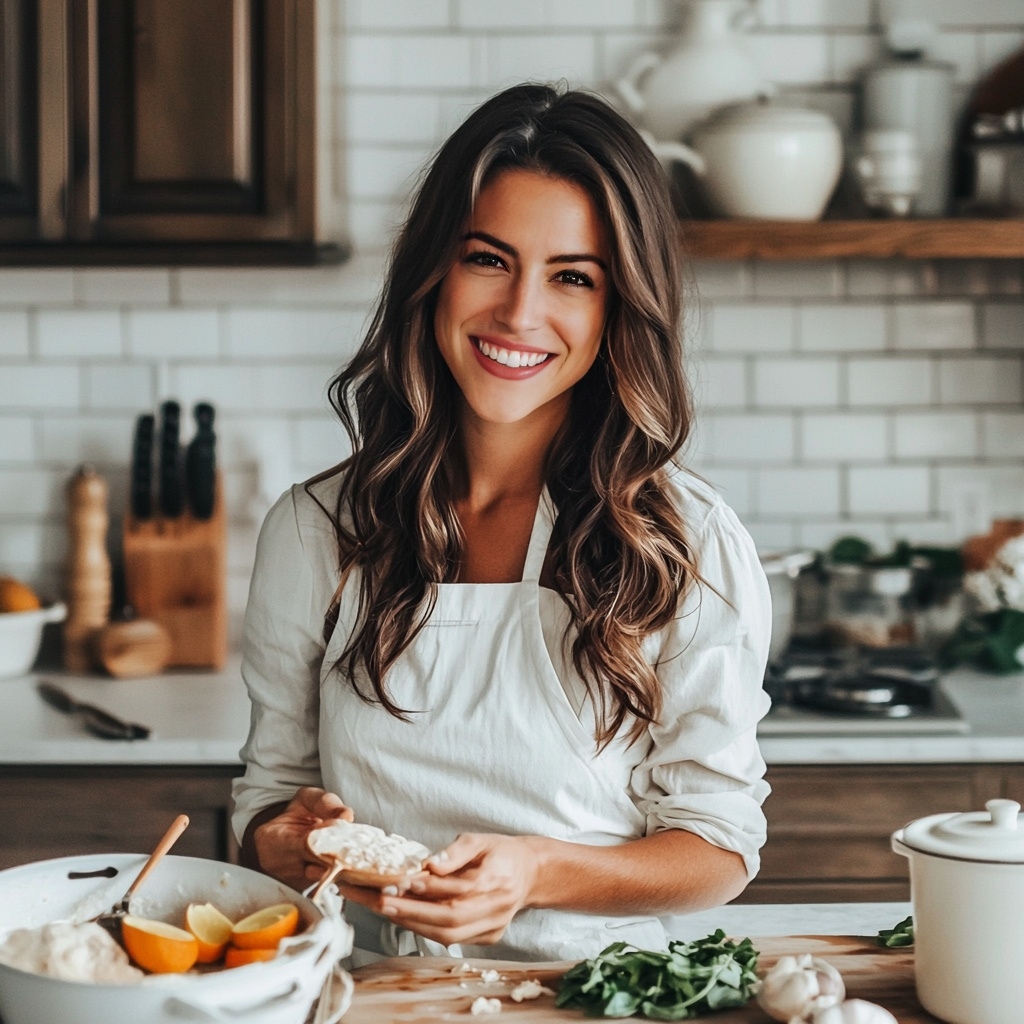
Let me take you back to a family gathering in my Miami kitchen about seven years ago. I was hosting my cousins, and I’d promised to bring something “light but satisfying” to our Sunday afternoon meal. I had all these beautiful canned chickpeas in my pantry, and I remembered seeing a version of this dish at a café in Boca Raton that absolutely captivated me—creamy, subtly spiced, nothing heavy.
The truth? My first attempt was a disaster. I over-processed everything into a paste, used way too much curry powder (my kitchen smelled like a spice market for three days), and somehow made it taste more like dessert than lunch. My cousin Lucia politely pushed it around her plate, and I learned a valuable lesson: restraint is a superpower in cooking. But here’s the beautiful part—I refined it, tested it obsessively, and now this recipe is so reliable that even my aunt (who claims she can’t cook) makes it regularly.
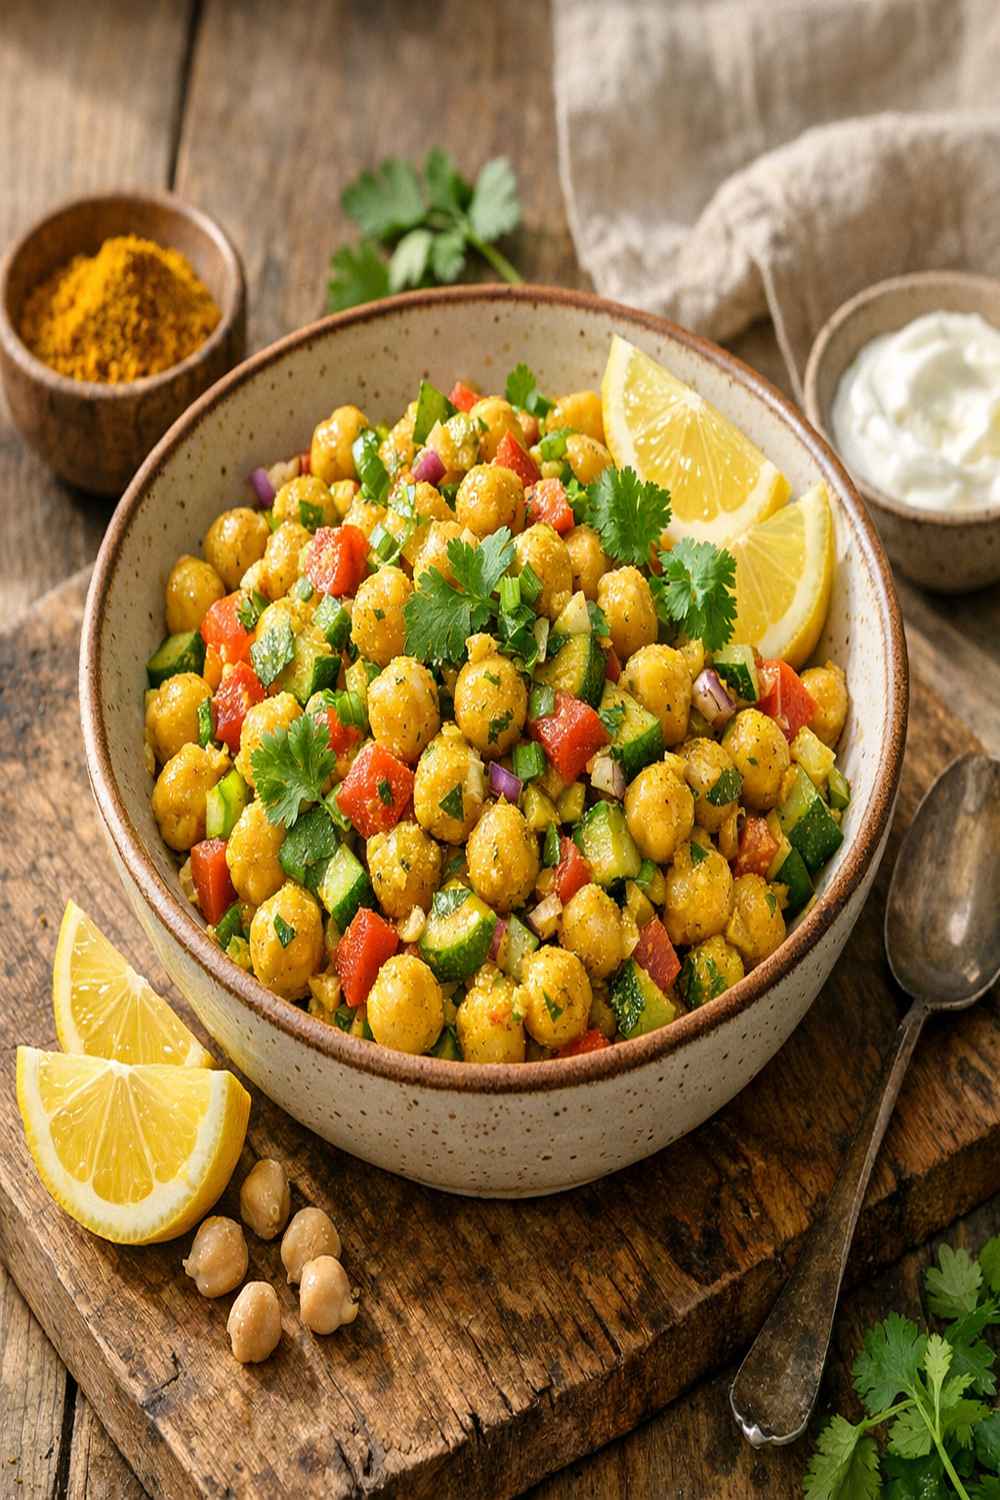
What to Expect Before You Start
This recipe takes about 10 minutes of active prep time and requires zero cooking—just mixing. You’re not sautéing, roasting, or managing heat. It’s the kind of recipe that builds confidence because you can literally taste as you go and adjust everything to your preference. The difficulty level is genuinely beginner-friendly, even if you’ve never worked with curry powder before.
- Texture control is your biggest learning moment – You’re aiming for chunky-creamy, not baby food. I’ll show you exactly how to break down those chickpeas without turning them into mush. Most beginners either over-mash (resulting in dense paste) or under-mash (resulting in soup-like texture). We’ll nail the sweet spot together.
- Curry powder isn’t as scary as it seems – I work with curry powder clinically and recreationally, and I can tell you that it’s one of the most forgiving spices in your cabinet. Even if you’ve never used it before, this recipe shows you exactly how much you need, and tasting as you go means you’re always in control.
Equipment You’ll Need (And What You Can Skip)
Here’s my philosophy: you don’t need fancy tools to make beautiful food. I’m giving you multiple options because every kitchen is different, and working with what you have builds real cooking confidence. No equipment excuses in this kitchen.
- A regular mixing bowl – Any size bowl that holds at least 4 cups works perfectly. Ceramic, glass, or plastic—I don’t care. This is where your magic happens.
- A fork, pastry cutter, or potato masher – All three work beautifully for breaking down chickpeas. If you have a fork, you’re set. A potato masher gives you a bit more control if you have one hiding in a drawer. The pastry cutter creates small, even pieces if you’re the type who likes precision.
- A food processor (optional but helpful) – If you have one and want to use it, I’ll give you exact pulse instructions. But honestly? A fork does the job perfectly well. Don’t buy a food processor just for this recipe.
- A measuring spoon and measuring cups – Standard kitchen measuring tools. If you don’t have them, I trust you to eyeball based on the descriptions I give you.
The Ingredients – A Beginner’s Shopping Guide
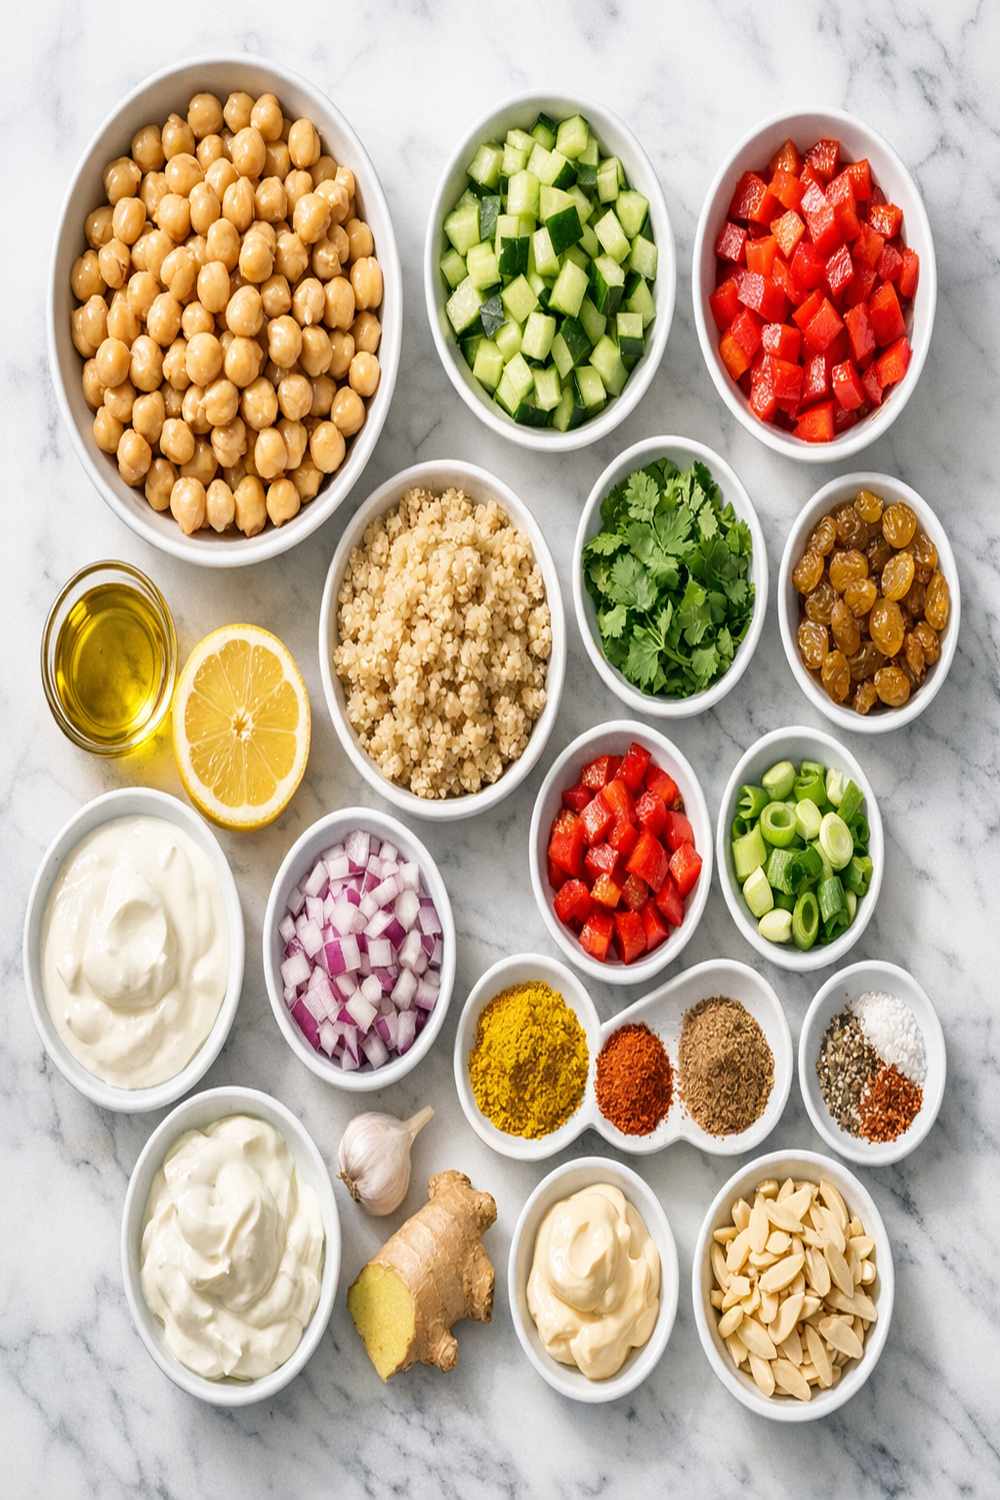
Before you head to the store, let me walk you through where to find everything and what to look for. Most of these ingredients live in your pantry or regular grocery rotation already. I’ve also included smart substitutions because cooking is about flexibility, not rigid rules.
- 2 tablespoons finely minced garlic (optional but highly recommended; adds depth and complexity that elevates the entire dish)
- 2 tablespoons fresh red onion, finely minced (raw onion gives brightness; found in the produce section, choose firm bulbs with papery skin)
- 1 tablespoon curry powder (this is your star ingredient; look for pure curry powder blends without added salt in the spice aisle)
- 2 tablespoons pickles, finely diced or relish, or minced celery (adds tang and crunch; use whatever you prefer or have on hand)
- Sea salt and freshly ground black pepper to taste (essential for bringing everything into focus)
- ½ teaspoon Dijon mustard (amplifies savory notes; find it near regular yellow mustard in the condiment aisle)
- ¼ teaspoon ground ginger powder (optional; complements curry beautifully and adds warmth)
- 3 tablespoons plump, unsweetened raisins (adds subtle sweetness and chewiness; find them near dried cranberries in the baking aisle)
- 2 tablespoons fresh flat-leaf parsley or fresh dill, finely chopped (brightens everything; fresh herbs are worth the trip to produce, but dried works in a pinch—use 1 tablespoon dried)
- 1 can (15 ounces) chickpeas, drained and rinsed thoroughly (look for low-sodium varieties in the canned bean aisle; if using dried, you’ll need about 1½ cups cooked chickpeas)
- ¼ cup vegan mayonnaise or regular mayonnaise (creates the creamy base; look in the condiment aisle or dairy section)
- 1 fresh lime, for juice (fresh is non-negotiable here; one lime yields about 2 tablespoons juice)
Expert’s Nutritional Tip: Chickpeas are nutritional powerhouses—they’re loaded with fiber, plant-based protein, and resistant starch, which means they keep you satisfied for hours. The combination of chickpeas with a small amount of fat (from the mayo) helps your body absorb fat-soluble vitamins from the other ingredients. This isn’t indulgent eating; it’s strategic nutrition.
Step-by-Step: Your First Chickpea Salad Curry Recipe
Alright, here we go. I’m going to be incredibly detailed because your first time should feel supported and certain. Read through all the steps first so nothing surprises you, then move through them at your own pace. This is a judgment-free zone, and tasting as you go is not just allowed—it’s required.
Step 1: Prepare Your Chickpeas Properly
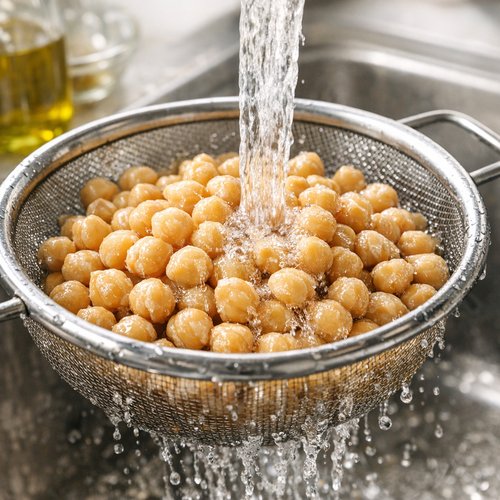
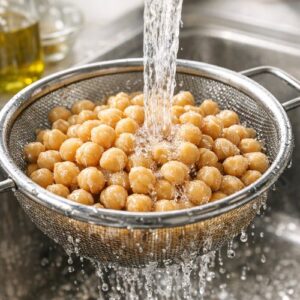
Open your can of chickpeas and pour everything—the chickpeas and the liquid—into a fine-mesh strainer. Hold the strainer under cold running water and gently rub the chickpeas between your fingers for about 30 seconds. This step matters more than you might think. You’re removing excess sodium, the starchy coating that makes them foamy, and any metallic taste from the can. Pat them dry with a paper towel and place them in your mixing bowl. If you’re using dried chickpeas you cooked yourself, follow the same rinsing and drying process.
Safety note: If you have a tree nut allergy, you’re completely safe here—chickpeas are legumes, not tree nuts. However, if you’re using store-bought mayo, always check the label for allergen information since production facilities vary.
Step 2: Add Your Creamy Base
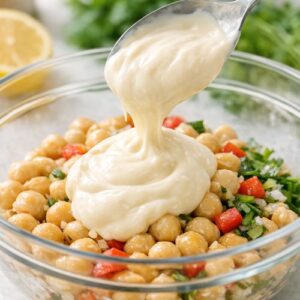
Pour the ¼ cup of vegan or regular mayonnaise directly into the bowl with your chickpeas. This is what creates that luxurious, cohesive texture. The mayo coats each chickpea, acts as a binder, and carries flavor beautifully. Don’t skip this or reduce it—a quarter cup is actually quite modest for the amount of chickpeas, and it’s what makes the difference between a salad that falls apart and one that holds together elegantly.
Step 3: Build Your Flavor Base with Aromatics and Spices
Add your minced red onion, the curry powder, and the Dijon mustard to the bowl. If you’re including the optional garlic and ginger, add those now too. Don’t mix yet. Just let these ingredients sit on top of the chickpeas for a moment. This is when I recommend smelling the mixture—you should get an immediate whiff of warm spice and brightness from the onion. That’s your signal that you’re on the right track.
Step 4: Add Texture and Brightness
Now add your chopped pickles (or diced celery or relish, whatever you chose), the fresh herbs, and the raisins. These three components create contrast—the pickles add tang and crunch, the fresh herbs add brightness and visual appeal, and the raisins add subtle sweetness and chewiness. Each one plays a specific role, so don’t skip any.
Step 5: The Mashing Technique (This Is Crucial)
Pick up your fork, pastry cutter, or potato masher. You’re now going to gently break down the chickpeas while incorporating all the other ingredients. This is not a vigorous beating. Use gentle, deliberate pressure, working from the center of the bowl outward. Your goal is to break down roughly 60-70% of the chickpeas into smaller pieces while leaving some completely intact. You’re creating a texture that’s creamy but still has dimension and bite.
If using a food processor, place all ingredients in the bowl and pulse 5-6 times, about 1 second per pulse. Do not process continuously—you’ll end up with paste. Pulse, stop, check the texture, pulse again if needed. The processor is faster but gives you less control, which is why I recommend the fork method for your first time.
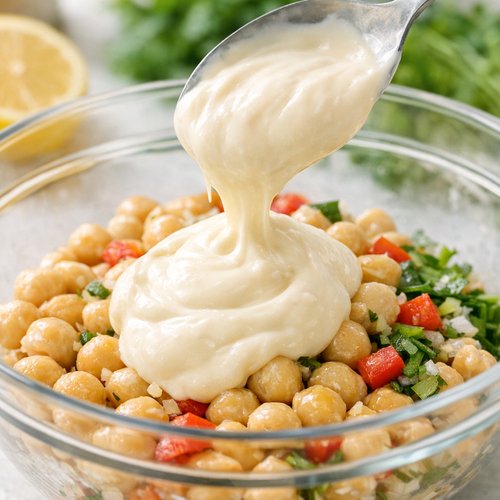
Keep mashing until you have a chunky-creamy consistency where you can still see whole chickpeas but everything is cohesive. This should take about 2 minutes of gentle work. You’ll know you’re done when the mixture looks like a rustic salad, not baby food.
Step 6: Season with Citrus Acid and Salt
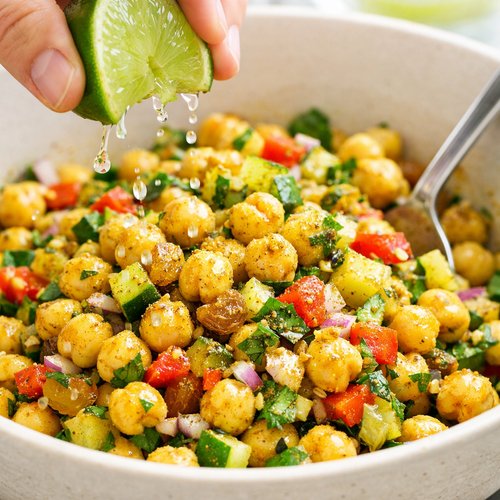
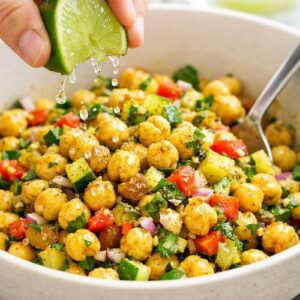
Squeeze your fresh lime over the entire mixture—you want about ½ to 1 tablespoon of juice, depending on how much juice your lime yielded. The acid is crucial because it brightens the spices and prevents the dish from tasting flat or heavy. Now, add a small pinch of sea salt and black pepper. Don’t salt generously yet—remember, your chickpeas were likely already salted, and so is the mayo and pickles. You’re adjusting, not seasoning from scratch.
Step 7: Taste and Adjust (This Step Is Everything)
Use a clean spoon to taste a small spoonful. Let it sit on your tongue for a moment before swallowing. Notice what you taste: Do you get the curry spice? Is there brightness from the lime? Do you taste the sweetness from the raisins? Is it salty enough?
Now make your adjustments:
- Too bland? Add a tiny pinch more salt and another squeeze of lime.
- Too sweet? Add a tiny pinch more salt to balance the raisins.
- Texture too mushy? You over-mashed; it’s still delicious, just serve it in lettuce wraps or on crackers instead of as a chunky salad.
- Too tangy? You may have added too much lime—this isn’t fixable, so learn for next time, but it’s still delicious on greens.
- Need more curry flavor? Add ¼ teaspoon more curry powder, mix, and taste again.
This tasting-and-adjusting step is where cooking becomes intuitive rather than robotic. Trust your palate. You know what you like better than any recipe does.
How to Tell If You Did It Right
Success in this recipe isn’t complicated, but there are specific visual and sensory cues that confirm you’ve nailed it. Here’s exactly what to look for:
- Visual texture: A chunky-creamy salad where you can see distinct chickpea pieces mixed with creamy filling – You should be able to see whole chickpeas, broken chickpea halves, and creamy pockets all mixed together. It should look rustic and homemade, not uniform or pureed. If you hold a spoonful up to light, you should see the yellow curry color with flecks of green herbs and red onion visible.
- Aroma: Warm curry spice mixed with bright citrus and fresh herbs – When you bring the bowl to your nose, the first thing you smell should be the curry powder, then the lime brightness, then the fresh herb notes. If you smell nothing, you’ve under-seasoned. If it smells overwhelming and one-note, you’ve over-seasoned with curry.
- Taste: Warm spice with brightness, sweetness, and slight tang in perfect balance – The curry should be present but not dominating. You should taste the lime. The raisins should be noticeable sweetness but not sugary. Your mouth should feel slightly salivated and ready for another bite, which means the acid balance is right.
- Consistency when scooped: Holds together as a mound but isn’t dense – When you scoop it with a spoon, it should hold its shape briefly but break apart easily. It should feel creamy on your tongue but have texture variation from the different-sized chickpea pieces.
What Went Wrong? Beginner Fixes
You’ve made something, tasted it, and realized it’s not quite right. This is normal and fixable. Here are the most common beginner mistakes and exactly how to prevent them or rescue them:
- Too mushy or paste-like texture – You over-mashed. This happened because you either mashed for too long or used a food processor too aggressively. To prevent it next time, use the fork method and mash for exactly 2 minutes, checking your progress every 30 seconds. If it already happened, stop mashing immediately. Fold in another ¼ cup of whole chickpeas if you have them, or just accept it and serve it as a dip on crackers or in lettuce wraps instead of as a chunky salad. It still tastes wonderful.
- Bland, flat flavor with no curry presence – You likely didn’t use enough curry powder or forgot to taste and adjust. Curry powder has volatile aromatics that dissipate over time, so even a tablespoon makes a difference. To fix: Add ¼ teaspoon more curry powder, mix thoroughly, wait 2 minutes for the flavors to distribute, and taste again. Always taste before serving.
- Too much curry powder, almost medicinal tasting – You were generous with the spice. This is actually harder to fix after the fact because curry is powerful. To prevent it: Measure curry powder carefully (use a measuring spoon, not a shake from the container) and remember that you can always add more, but you can’t remove it. If it happened: Fold in another ½ cup of drained chickpeas mixed with ¼ cup mayo to dilute the intensity. It becomes a bigger batch, but it becomes edible again.
- Watery or too wet – Your chickpeas weren’t drained and dried properly, or you used too much lime juice. To prevent it: Make sure you rinse under running water and pat very dry with paper towels before using. One lime is usually perfect; if your lime was particularly juicy, use less. If it happened: Add a few extra whole chickpeas mixed with a tiny amount of mayo, or fold in some crispy toasted chickpea pieces if you have them on hand.
- Separated, with mayo pooling at the bottom – You didn’t mash enough to incorporate the mayo evenly. To prevent it: Spend those full 2 minutes mashing gently but thoroughly. The mashing action is what distributes the mayo throughout. If it happened: Use a fork to re-mash for another minute, really breaking down more of those chickpeas to create more surface area for the mayo to coat.
Expert’s Nutritional Insight: Why This Combination Works
As a registered dietitian, I see chickpea salad curry through a clinical lens too. Here’s what makes it nutritionally smart: Chickpeas provide approximately 15 grams of protein and 13 grams of fiber per cooked cup, which means sustained energy and stable blood sugar. The mayonnaise (yes, really) contains fat-soluble vitamins and helps your body absorb the fat-soluble vitamins in the other ingredients—it’s not enemy fat, it’s strategic fat.
The curry powder contains curcumin, which has anti-inflammatory properties. The lime juice provides vitamin C and citric acid, which enhances iron absorption from the chickpeas. The fresh herbs add phytonutrients and antioxidants. The raisins, while sweet, provide polyphenols and minerals. This isn’t indulgence—it’s intentional nutrition that happens to taste luxurious. When you combine whole foods in balanced proportions, the body recognizes and uses them efficiently.
Make-Ahead Guide: Meal Prep Like a Dietitian
One of my favorite things about this recipe is how beautifully it stores, which makes it ideal for meal prep. Here’s my professional approach:
For the week ahead: Make a double batch (this takes about 15 minutes total) and store it in an airtight glass container in the refrigerator. It actually tastes better after 24 hours because the flavors deepen and meld together. The texture stays perfect for up to 4 days.
Component prep approach: If you prefer more flexibility, prep all components separately: drain and rinse chickpeas, mince onion, chop herbs, dice pickles, and store each in separate containers. Then assemble fresh each morning—this takes 5 minutes and ensures maximum freshness and crunch. The chickpeas will hold for 4 days, the fresh herbs for 3-4 days, and the onion and pickles for up to 5 days.
Important safety note: Never leave the assembled salad at room temperature for more than 2 hours. The mayo-based mixture is a potentially hazardous food when it sits unrefrigerated. If you’re packing it for lunch, keep it in an insulated lunch bag with an ice pack, and consume within 4 hours of removal from refrigeration.
Freezing note: Don’t freeze the assembled salad—the texture becomes mealy and disappointing. However, you can freeze cooked chickpeas (rinsed and dried) for up to 3 months, which makes future batches even quicker.
Seasonal Variations: Making It Year-Round
Spring version: Add diced cucumber, fresh tarragon or chives, and a tiny amount of fresh mint. Reduce the raisins to 2 tablespoons because spring vegetables are naturally fresher-tasting.
Summer version: Add roasted red pepper (jarred is fine), fresh basil, a squeeze of lemon instead of lime, and increase the fresh herbs to 3 tablespoons. Serve on a bed of peppery arugula with crispy chips on the side.
Fall version: Add crispy diced apple, toasted pumpkin seeds, and a sprinkle of smoked paprika in addition to the curry powder. Keep the raisins at 3 tablespoons and add ¼ teaspoon of cinnamon for depth.
Winter version: Add diced roasted beets, fresh dill, and increase the ginger to ½ teaspoon for warmth. Top with crispy fried onions for texture and nostalgia.
Your Next Steps After Mastering This
Once you’ve made this chickpea salad curry a few times and feel confident with it, you’ve actually learned several foundational cooking techniques that transfer to countless other dishes:
Texture control through mashing: This skill applies to making veggie burgers, bean dips, and the Black Bean And Sweet Potato Burger Recipe I absolutely love. Understanding when to break something down completely versus leaving it chunky is a cornerstone technique.
Spice-layering and taste-adjusting: You now know how to use curry powder confidently, which opens doors to making curries, seasoning vegetables, and creating depth in plant-based bowls. You’ve learned that tasting and adjusting is non-negotiable.
Mayonnaise-based dressings: This technique—using mayo as a binder and emulsifier—works for tuna salad, egg salad, and vegetable slaws. You understand now why it works and how much to use.
Once you’re comfortable here, try making Best Vegan Lasagna Recipe or exploring other legume-based dishes with similar flavor profiles.
Can I Store Chickpea Salad Curry Recipe?
Refrigerator storage: Place your finished chickpea salad in an airtight container and refrigerate immediately. It keeps perfectly for up to 4 days. The flavors actually develop and improve over the first 24-48 hours as ingredients meld together. Make sure the container is truly airtight—this prevents the salad from absorbing refrigerator odors and losing moisture.
Before serving again: The salad may look slightly separated or drier on top—this is completely normal. Give it a gentle stir with a fork, adding a tiny squeeze of lime if it seems too dense. This refreshes both the texture and the flavor.
What to avoid: Never leave it at room temperature for more than 2 hours. The mayo-based mixture requires refrigeration for food safety. If you’re transporting it, use an insulated lunch container with an ice pack.
Can you freeze it? I don’t recommend freezing assembled chickpea salad curry because the texture deteriorates significantly—the chickpeas become mealy and the overall consistency becomes unappetizing. If you have leftover salad and freezing is your only option, strain out the liquid before freezing and reconstitute with fresh mayo when thawing, but I genuinely recommend eating it fresh or within those 4 days.
Nutrition Information
Based on USDA data for chickpeas and mayonnaise, this recipe yields approximately 4 servings (about 1 cup per serving):
Per serving (1 cup): 245 calories | 12g protein | 24g carbohydrates | 9g dietary fiber | 8g fat (2g saturated) | 0mg cholesterol | 580mg sodium | 15mg calcium | 3.2mg iron
The protein and fiber combination means this meal keeps you satisfied for 3-4 hours. The fiber content is particularly notable—that 9 grams represents about one-third of your daily recommended intake, which supports digestive health and stable blood sugar. The iron from chickpeas combined with vitamin C from the lime juice means your body absorbs that iron efficiently. If you use vegan mayo, the saturated fat decreases slightly but nutritional profiles remain virtually identical.
What Can I Serve With Chickpea Salad Curry Recipe?
This is where versatility shines. The chickpea salad curry is genuinely adaptable to however you want to eat it. Here are my favorite serving methods, ranked by how often I actually make them:
- On a bed of fresh greens – Use peppery arugula, mixed baby greens, or crispy romaine. The fresh greens complement the warm spice beautifully, and the acidity in the salad dressing carries everything together. Add crispy chickpeas on top for extra texture if you’re feeling fancy.
- In lettuce wraps – Use butter lettuce, romaine leaves, or crispy iceberg. Place about ½ cup of the salad in the center of a leaf, fold up the sides, and eat it like a hand-held taco. This is my favorite lunch format because it feels elegant but is completely portable and mess-free.
- In a sandwich or wrap – Spread it between two slices of toasted whole grain bread with fresh tomato slices and leafy greens, or use it as a filling for a whole wheat wrap with cucumber and fresh herbs. It’s creamy enough to hold everything together and flavorful enough to not need additional condiments.
- On crispy crackers or as a dip – Serve it with whole grain crackers, vegetable crudités, or toasted pita chips. It’s perfect for gatherings because you can set it out in a bowl and people naturally graze on it throughout the afternoon.
- Atop roasted vegetables – Serve it alongside or on top of roasted sweet potatoes, beets, or cauliflower. The warm spice and creamy texture complement roasted vegetables beautifully.
- With fresh fruit on the side – Add sliced mango, fresh pineapple, or crispy apple slices alongside. The tropical or crisp fruit provides cooling contrast to the warm spice.
- In a Buddha bowl – Layer it over cooked grains like quinoa or brown rice, add roasted vegetables, fresh herbs, and avocado. Make it a complete, balanced meal that looks absolutely magazine-worthy.
My personal favorite? A simple lettuce wrap with a side of sliced cucumber, fresh lemon wedges, and whatever fruit is in season. It feels lighter than a sandwich but more substantial than a salad, and I can eat it one-handed while reviewing patient nutrition plans in my home office.

Chickpea Salad Curry Recipe
Ingredients
Method
- Open your can of chickpeas and pour everything—the chickpeas and the liquid—into a fine-mesh strainer. Hold the strainer under cold running water and gently rub the chickpeas between your fingers for about 30 seconds. This step matters more than you might think. You're removing excess sodium, the starchy coating that makes them foamy, and any metallic taste from the can. Pat them dry with a paper towel and place them in your mixing bowl. If you're using dried chickpeas you cooked yourself, follow the same rinsing and drying process. Safety note: If you have a tree nut allergy, you're completely safe here—chickpeas are legumes, not tree nuts. However, if you're using store-bought mayo, always check the label for allergen information since production facilities vary.
- Pour the ¼ cup of vegan or regular mayonnaise directly into the bowl with your chickpeas. This is what creates that luxurious, cohesive texture. The mayo coats each chickpea, acts as a binder, and carries flavor beautifully. Don't skip this or reduce it—a quarter cup is actually quite modest for the amount of chickpeas, and it's what makes the difference between a salad that falls apart and one that holds together elegantly.
- Add your minced red onion, the curry powder, and the Dijon mustard to the bowl. If you're including the optional garlic and ginger, add those now too. Don't mix yet. Just let these ingredients sit on top of the chickpeas for a moment. This is when I recommend smelling the mixture—you should get an immediate whiff of warm spice and brightness from the onion. That's your signal that you're on the right track.
- Now add your chopped pickles (or diced celery or relish, whatever you chose), the fresh herbs, and the raisins. These three components create contrast—the pickles add tang and crunch, the fresh herbs add brightness and visual appeal, and the raisins add subtle sweetness and chewiness. Each one plays a specific role, so don't skip any.
- Pick up your fork, pastry cutter, or potato masher. You're now going to gently break down the chickpeas while incorporating all the other ingredients. This is not a vigorous beating. Use gentle, deliberate pressure, working from the center of the bowl outward. Your goal is to break down roughly 60-70% of the chickpeas into smaller pieces while leaving some completely intact. You're creating a texture that's creamy but still has dimension and bite. If using a food processor, place all ingredients in the bowl and pulse 5-6 times, about 1 second per pulse. Do not process continuously—you'll end up with paste. Pulse, stop, check the texture, pulse again if needed. The processor is faster but gives you less control, which is why I recommend the fork method for your first time. Keep mashing until you have a chunky-creamy consistency where you can still see whole chickpeas but everything is cohesive. This should take about 2 minutes of gentle work. You'll know you're done when the mixture looks like a rustic salad, not baby food.
- Squeeze your fresh lime over the entire mixture—you want about ½ to 1 tablespoon of juice, depending on how much juice your lime yielded. The acid is crucial because it brightens the spices and prevents the dish from tasting flat or heavy. Now, add a small pinch of sea salt and black pepper. Don't salt generously yet—remember, your chickpeas were likely already salted, and so is the mayo and pickles. You're adjusting, not seasoning from scratch.
- Use a clean spoon to taste a small spoonful. Let it sit on your tongue for a moment before swallowing. Notice what you taste: Do you get the curry spice? Is there brightness from the lime? Do you taste the sweetness from the raisins? Is it salty enough? Now make your adjustments: Too bland? Add a tiny pinch more salt and another squeeze of lime.Too sweet? Add a tiny pinch more salt to balance the raisins.Texture too mushy? You over-mashed; it's still delicious, just serve it in lettuce wraps or on crackers instead of as a chunky salad.Too tangy? You may have added too much lime—this isn't fixable, so learn for next time, but it's still delicious on greens.Need more curry flavor? Add ¼ teaspoon more curry powder, mix, and taste again. This tasting-and-adjusting step is where cooking becomes intuitive rather than robotic. Trust your palate. You know what you like better than any recipe does.
Notes
FAQs
Can I make this ahead of time for a party?
Absolutely, and I recommend it. Make the chickpea salad curry up to 4 days ahead and store it in the refrigerator in an airtight container. About 30 minutes before your guests arrive, remove it from the refrigerator and give it a gentle stir—this brings it to a better texture for serving. You can set it out on a platter with lettuce leaves, crackers, and fresh vegetable crudités around it, and guests can build their own plates. Never leave it at room temperature for more than 2 hours, so keep the serving bowl in a cool spot and bring it back to the refrigerator if the party lasts longer.
What if I don’t have fresh herbs—can I use dried?
Yes, you can use dried herbs, but here’s the exchange rate: use one-third the amount of dried herbs that you would use fresh, so instead of 2 tablespoons fresh parsley, use about ¾ teaspoon dried. Dried herbs are more concentrated in flavor. However, dried herbs don’t provide the same brightness and visual appeal that fresh does, so if you can get fresh—even just one small bundle—it makes a noticeable difference. Some grocery stores now sell tiny packages of fresh herbs specifically for small-batch cooking, which is perfect for situations like this.
I’m allergic to tree nuts—is this safe for me?
Yes, absolutely safe. Chickpeas are legumes, not tree nuts, so this recipe is naturally tree nut-free. However—and this is important—always check the label on your mayo and any other prepared ingredients for allergen information, because some manufacturers produce multiple products in shared facilities. The curry powder itself is typically tree nut-free, but verify your specific brand. When in doubt, contact the manufacturer.
Can I use frozen chickpeas instead of canned?
Yes, frozen cooked chickpeas work wonderfully. Thaw them in the refrigerator overnight or at room temperature for about 2 hours, then rinse thoroughly under cold running water and pat completely dry before using. The texture will be slightly softer than canned chickpeas, so you may need to mash slightly less to achieve the same creamy-chunky consistency. Follow the rest of the recipe identically.
What’s the difference between vegan mayo and regular mayo?
The nutritional difference is negligible—both are high in fat and serve the same emulsifying and binding purpose. Vegan mayo (typically made with aquafaba or soy instead of eggs) creates a nearly identical texture in this recipe. The taste difference is very subtle; some people prefer the richness of egg mayo, while others prefer the lighter taste of vegan mayo. Use whichever you have on hand or prefer. For this recipe specifically, either works perfectly.
More Beginner-Friendly Recipes
- Brunch Potato Recipe Make Ahead – Another make-ahead champion that teaches you how to build flavor through layering, perfect once you’ve mastered this chickpea base.
- BBQ Tempeh Recipe – Uses similar techniques of building warm spices and balanced flavors with a plant-based protein, great next-level learning.
- Black Pepper Tofu Recipe – Another beginner-friendly spice-layering exercise using different proteins, expanding your foundation.
You’ve done it. You’ve made a restaurant-quality chickpea salad curry that tastes like you’ve been cooking professionally for years, and honestly, the technique work you just completed applies to so many other dishes. Your first attempt might not have been perfect—and that’s actually how you learn—but you now understand texture control, spice balancing, and the