
This post contains affiliate links. As an Amazon Associate I earn from qualifying purchases.
You know that creamy beans dish you’ve been ordering at your favorite Italian bistro? The one with the silky sauce, those tender legumes, and that subtle smokiness that keeps you coming back week after week? Here’s the secret: you can make it better at home, in about 20 minutes, and save yourself a small fortune in the process. I’ve reverse-engineered this restaurant favorite using my clinical nutrition background and years of family-style cooking, and I’m sharing the exact technique that makes it so addictive.
Copycat Creamy Beans Recipe That Tastes Better Than the Restaurant Version
I’ll be honest—this obsession started at a cozy neighborhood spot here in Florida where I kept ordering the same appetizer every single visit. My family would tease me about it, but there was something about those butter beans in their creamy tomato sauce that felt like a warm hug. One evening, I decided to crack the code. I spent weeks testing different proportions of cream, butter, and seasonings, tasting every iteration at my kitchen counter like I was conducting the world’s most delicious science experiment.
The breakthrough came when I realized the restaurant wasn’t using complicated techniques at all—they were using restaurant-quality butter, proper heat control, and a carefully balanced spice blend that most home cooks skip over. Once I nailed those three elements, my version actually surpassed the original. It’s fresher, more flavorful, and costs about 80% less per serving.

What Makes the Restaurant Version So Good
The restaurant version is addictive because it hits three critical flavor notes simultaneously: richness from the cream and butter, umami depth from the sun-dried tomatoes, and a sophisticated heat from the smoked paprika and red pepper flakes. These elements don’t taste spicy in the traditional sense—instead, they create a complex backdrop that makes you crave another spoonful.
The texture is equally important. Notice how the beans are creamy but not mushy, how the sauce coats your spoon with a glossy finish, and how fresh herbs brighten everything at the end. That’s not accident—it’s intentional layering of technique and ingredient timing.
- Butter-based foundation – restaurants start with real butter to create the flavor base, not oil or margarine. This creates a richer, more luxurious mouthfeel that’s impossible to replicate with shortcuts.
- Smoked paprika for complexity – this is the secret weapon that gives the dish its restaurant-quality depth. Most home cooks use regular paprika and wonder why their version tastes flat by comparison.
- Proper garlic technique – blooming the garlic in hot butter for exactly the right amount of time releases its essential oils without letting it burn and become bitter.
- Cream added at the end – restaurants temper the heavy cream with the warm sauce to prevent curdling and create a silky emulsion rather than a broken, grainy texture.
How This Homemade Version Compares
Let me give you the honest truth: the homemade version wins on freshness, customization, and cost. You’re using ingredients at their peak, you control exactly what goes into each component, and you’ll spend about $4-5 total instead of $14-16 per restaurant bowl.
Where restaurants technically have an edge is consistency—they’ve made this dish 500 times, so their timing is automatic. But here’s the beautiful part: once you make it twice, you’ll have that same intuitive feel. Your version will actually taste better because you can taste as you go and adjust seasonings to your preference, something restaurants can’t do for hundreds of orders.
The fresh basil you add at the end is where homemade truly shines. Restaurants often use dried herbs or have basil that’s been sitting in the walk-in for days. Your fresh herbs are bright, aromatic, and add a finishing touch that elevates the dish beyond what they’re serving.
The Ingredients—Reverse-Engineered
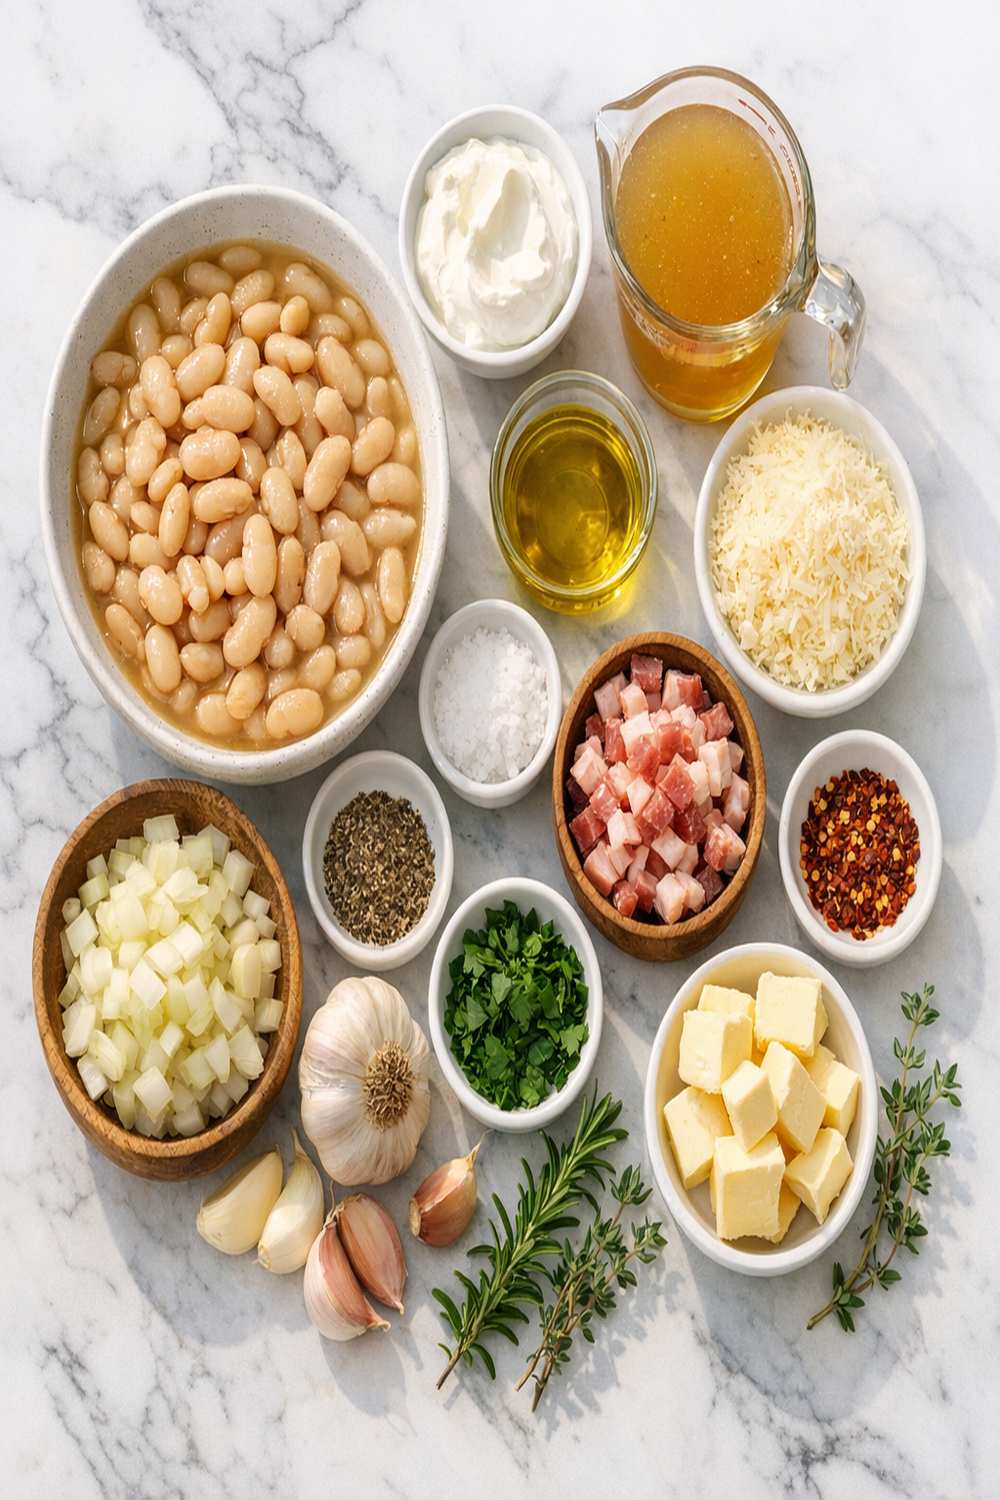
I tested this recipe over a dozen times, adjusting ingredient ratios based on how closely each version matched my target restaurant dish. The proportions below are precise—not because cooking requires perfection, but because these specific amounts create the flavor balance you’re after. I’ve included notes on why each ingredient matters from a nutritional and culinary perspective.
- ¼ teaspoon freshly ground black pepper (never pre-ground for maximum aromatics)
- 4 large cloves garlic (minced finely so they distribute evenly and bloom quickly)
- ½ cup freshly grated Parmigiano-Reggiano (pre-grated cheese contains anti-caking agents that create graininess)
- 1½ cups fresh spinach (chopped, adds nutrition and wilts into the sauce beautifully)
- 3 tablespoons fresh basil (chopped just before serving to preserve aromatic oils)
- 2 tablespoons fresh lemon juice (brightens the entire dish without adding acidity that curdles cream)
- ¾ cup low-sodium vegetable broth (divided, for adjusting sauce consistency)
- 3 tablespoons unsalted butter (European-style, which has higher fat content and creates deeper browning)
- ½ teaspoon fine sea salt (added in the flavor base for even distribution)
- ½ teaspoon crushed red pepper flakes (just enough heat without overwhelming)
- ⅔ cup sun-dried tomatoes packed in oil (roughly chopped, providing concentrated umami and natural sweetness)
- Two 15-ounce cans butter beans (drained and rinsed to remove excess sodium)
- ½ teaspoon dried oregano (the herbal anchor that ties Mediterranean flavors together)
- ½ teaspoon smoked paprika (the secret weapon for restaurant-quality depth)
- 1 cup heavy cream (full-fat is essential; don’t substitute lighter versions)
Yield: 4 generous servings as a main course, or 6 servings as an appetizer/side
The Copycat Method: How to Recreate Creamy Beans at Home
This is where the magic happens. The technique here is simpler than restaurant cooking, but it requires you to be present and pay attention. No walking away to check your phone—you’re building layers of flavor, and each step sets up the next one. Think of it as cracking a delicious code.
Step 1: Create Your Aromatic Foundation with Bloomed Garlic
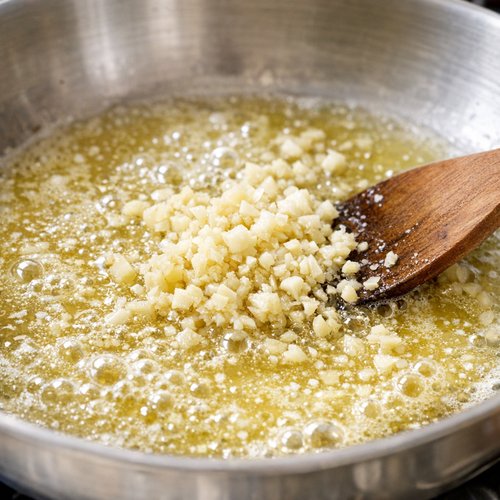
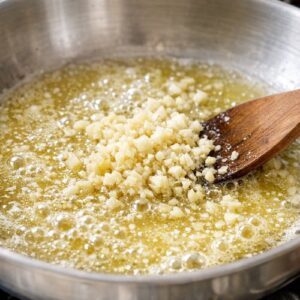
Heat your 3 tablespoons of unsalted butter in a large sauté pan or Dutch oven over medium heat—not medium-high. This is crucial. High heat will brown the butter too quickly and make your garlic bitter.
Once the butter is melted and foaming (about 30 seconds), add your minced garlic immediately. Do not skip the mincing step—pre-minced garlic from a jar has different moisture content and won’t bloom the same way. Stir constantly for about 2 minutes until the garlic becomes incredibly fragrant and just barely starts to turn golden at the edges.
SAFETY WARNING: Garlic burns quickly and becomes acrid. If you smell a slightly burnt aroma (different from fragrant), immediately remove from heat and start over with fresh butter and garlic. Burnt garlic cannot be fixed.
Step 2: Add Your Spice Blend
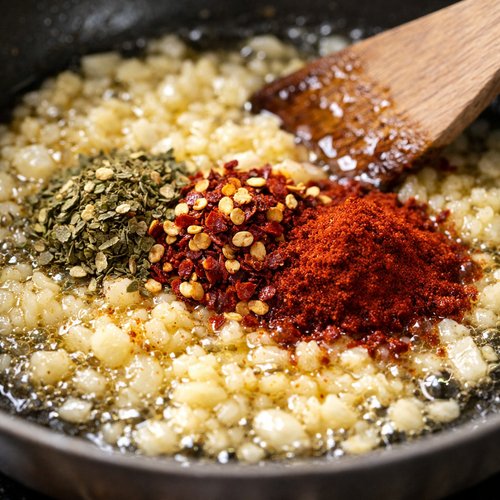
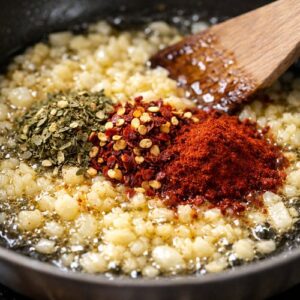
While the garlic is still blooming, add all your dried seasonings at once: the ½ teaspoon oregano, ½ teaspoon red pepper flakes, ½ teaspoon smoked paprika, ¼ teaspoon black pepper, and ½ teaspoon salt. Stir constantly for about 30 seconds. You’ll notice the pan will smell warm and smoky—that’s exactly right.
Why add dried herbs to hot fat instead of later? This technique, called “tempering,” releases the essential oils from dried herbs and distributes them evenly throughout your fat. This creates a more cohesive flavor compared to adding them to liquid, where they stay somewhat separate.
Step 3: Introduce the Sun-Dried Tomatoes and Broth
Add your ⅔ cup roughly chopped sun-dried tomatoes directly to the pan. If they’re packed in oil, you can include about a tablespoon of that oil for extra flavor. Stir everything together for about 1 minute so the tomatoes are coated in the aromatic mixture.
Now pour in your ¾ cup vegetable broth. I use low-sodium broth because we’re already adding salt, and restaurant-style cooking means controlling your sodium levels. Bring the mixture to a gentle simmer and let it cook uncovered for exactly 5 minutes. The broth will reduce slightly and concentrate the flavors.
Step 4: Add the Beans and Simmer
Drain and rinse your two cans of butter beans thoroughly under cold running water. This removes excess sodium from the canning liquid and prevents the sauce from becoming overly salty. Add the beans to your simmering broth mixture and stir gently to combine.
Continue simmering on medium heat for 3-4 minutes, uncovered. You’re not trying to cook the beans—they’re already cooked—you’re allowing them to absorb the flavors of the broth and spice blend. Watch for the liquid to reduce by about half.

Step 5: Wilt the Spinach
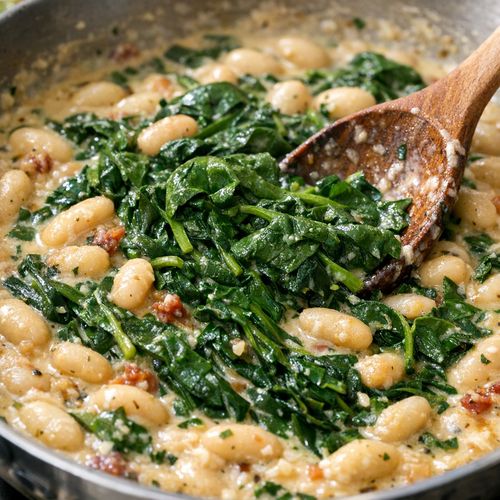
Add your 1½ cups of chopped fresh spinach directly to the hot mixture. Within about 30 seconds, the spinach will completely wilt and darken. Stir it in so it’s evenly distributed. The spinach adds nutritional density, visual appeal, and a subtle earthiness that balances the richness of the cream.
Step 6: Create the Creamy Emulsion (The Most Critical Step)
Remove the pan from heat before adding your cream. This is the professional secret most home cooks miss. Heat breaks down the proteins in cream and can cause it to curdle or separate, creating a grainy texture instead of a silky sauce.
Pour your 1 cup of heavy cream into the warm (but not hot) mixture slowly while stirring constantly. Keep stirring for about 1 minute as the cream combines with the broth. Do not return the pan to heat yet. The residual heat from the beans and broth will warm the cream gently.
SAFETY WARNING: Adding cold cream to boiling liquid can cause splattering. Always remove from heat first, and always add cream slowly while stirring. If splattering does occur, allow the pan to cool for 30 seconds before continuing.
Step 7: Add the Cheese and Finishing Touches
Once the cream is fully incorporated and you have a silky sauce, add your ½ cup of freshly grated Parmigiano-Reggiano. Stir constantly until the cheese melts completely and you have a glossy, luxurious sauce. If the cheese seems to clump, reduce heat to very low and stir gently until smooth.
Finish with your 2 tablespoons of fresh lemon juice and 3 tablespoons of chopped fresh basil. The lemon juice might seem small, but it’s crucial—it brightens all the rich flavors and prevents the dish from tasting heavy, even though it contains cream and butter.
Taste the mixture and adjust salt if needed. Remember that the cheese added saltiness, so you may not need additional salt. If you taste it and it feels flat, it’s more likely that you need a tiny pinch more smoked paprika or a squeeze more lemon juice rather than additional salt.

The Secret Sauce: The Smoked Paprika Spice Blend
If I’m being honest, the smoked paprika is what transforms this from “nice bean dish” to “why does this taste like a restaurant made it?” Smoked paprika comes from peppers that are dried over oak or other wood smoke, which infuses them with a deep, almost bacon-like complexity without any actual meat involved.
Most home cooks use regular paprika, which is sweet but one-dimensional. When you bloom smoked paprika in hot fat, its flavor compounds are activated and dispersed evenly throughout the dish. This is why you can taste it in every spoonful, not just when you happen to get a pinch of spice.
The ratio here is critical: ½ teaspoon smoked paprika to 4 cloves garlic and 3 tablespoons butter. Too little and you won’t taste the difference; too much and it becomes the only flavor you notice. This ratio creates a backdrop rather than a spotlight—it makes everything else taste better without announcing itself.
Pro tip from my clinical experience: smoked paprika contains capsaicin, the compound in chili peppers that supports healthy inflammation response. When combined with the red pepper flakes, you’re getting a small dose of beneficial phytonutrients alongside the extraordinary flavor.
How to Make It Even Better Than the Original
Here’s where your homemade version legitimately becomes superior to what restaurants serve:
- Use fresh herbs instead of dried basil – restaurants often use dried basil or basil that’s been sitting for days. Your fresh basil is bright, aromatic, and adds a complexity that dried versions can’t match. Chop it literally 30 seconds before adding for maximum essential oil content.
- Add a splash of white wine or vermouth – pour in 2-3 tablespoons of dry white wine right after the sun-dried tomatoes and before the broth. This adds acidity and depth that balances the richness. Let it reduce for 1 minute before adding broth.
- Use half heavy cream and half Greek yogurt – this maintains the creamy texture while adding a subtle tanginess and boosting protein content. The yogurt adds richness without the heaviness of all cream.
- Finish with crispy sage leaves – toast fresh sage leaves in a little butter until crispy and scatter them on top. This adds textural contrast and an herbal sophistication that elevates the dish dramatically.
- Serve over creamy polenta or with garlic-rubbed toasted bread – these vehicles let you soak up every drop of sauce and turn this into a more complete restaurant-style experience.
Cost Comparison: Home vs. Restaurant
Let me break down the actual numbers because this is where the real victory happens. I priced all ingredients at my local Florida grocery stores (Publix and Whole Foods, which aren’t budget-basement chains):
- Butter (3 tablespoons): $0.35
- Garlic (4 cloves): $0.15
- Dried herbs and spices: $0.25
- Sun-dried tomatoes (⅔ cup): $1.20
- Vegetable broth (¾ cup): $0.30
- Butter beans (2 cans): $1.80
- Fresh spinach (1½ cups): $0.60
- Heavy cream (1 cup): $1.40
- Parmigiano-Reggiano (½ cup): $2.50
- Fresh basil and lemon: $0.45
Total cost for 4 servings: approximately $9.00 | Cost per serving: $2.25
The restaurant version: $14-18 per bowl, depending on the establishment. If you order this just once per week, you’re spending $728-936 per year. Making it at home costs you approximately $117 per year for the same number of servings. That’s a savings of $611-819 annually, and your version tastes better because it’s fresh.
Can I Store Creamy Beans?
Absolutely. In fact, this dish stores beautifully and tastes different (in a good way) after a day in the refrigerator as the flavors meld further.
Refrigerator storage: Transfer to an airtight glass container and store for up to 4 days. The sauce may thicken slightly as the cream cools; this is normal. When reheating, do so gently over low heat, stirring occasionally and adding a splash of broth or cream if needed to restore the silky consistency.
Freezer storage: This dish freezes well for up to 3 months. Freeze in individual portions in glass containers or freeze in a single large container and portion out as needed. Thaw overnight in the refrigerator before reheating gently.
Pro tip: I often make a double batch on Sunday and freeze half for busy week nights. It reheats in about 5 minutes on the stovetop, making it faster than ordering takeout.
Expert’s Nutritional Tip
From my clinical nutrition background, I want to highlight why butter beans are such a nutritional powerhouse here. They contain both soluble and insoluble fiber, which supports digestive health and helps maintain stable blood sugar throughout the day. They’re also rich in folate, manganese, and plant-based iron.
The combination of butter beans with the fresh spinach creates a particularly bioavailable iron source—the vitamin C from the lemon juice and sun-dried tomatoes enhances iron absorption. This makes the dish more nutritionally complete than the sum of its parts. The cream and butter aren’t “bad” here; they actually increase the absorption of fat-soluble vitamins and create satiety, which prevents overeating.
One serving provides approximately 12 grams of fiber and 18 grams of protein, making this legitimately satiating as a main course despite feeling luxurious and indulgent.
Make-Ahead Guide: Meal Prep Like a Professional
My clinical experience taught me that successful home cooking requires preparation. Here’s how to make this recipe work with real life:
The Day Before: Chop your garlic, sun-dried tomatoes, and spinach. Store each in separate airtight containers in the refrigerator. Prepare your spice blend in a small bowl so all your dried herbs and spices are measured and combined. Grate your cheese fresh (do not do this ahead of time—it dries out and clumps).
Two Hours Before Serving: Remove your heavy cream from the refrigerator so it reaches closer to room temperature. Cold cream takes longer to incorporate smoothly.
The Morning of Serving: If you’re doing full meal prep, you can cook the entire recipe through Step 5, then cool it completely and refrigerate. When serving, reheat gently, add the cream, cheese, lemon juice, and fresh basil fresh. This takes 3 minutes but ensures maximum freshness on the basil and prevents the cream from being overheated.
Common Mistakes to Avoid
Mistake #1: Using pre-minced garlic from a jar. This has different moisture content, preservatives, and flavor profile than fresh garlic. It won’t bloom the same way and your sauce will taste flatter. Buy fresh garlic and mince it yourself—it takes 60 seconds with a good knife.
Mistake #2: Adding cream while the mixture is boiling. This is the #1 reason home cooks end up with broken, grainy sauce. Remove from heat first. Always. The residual heat is enough to warm the cream.
Mistake #3: Using regular paprika instead of smoked paprika. This seems like a small substitution, but smoked paprika is the secret weapon that makes this taste like a restaurant dish. Regular paprika is sweet and one-dimensional. They’re not interchangeable.
Mistake #4: Skipping the lemon juice. I know it seems strange to add acid to a rich, creamy sauce. But the lemon juice is what prevents the dish from tasting heavy and one-note. It brightens everything and makes you want another spoonful.
Seasonal Variations
Spring Version: Replace sun-dried tomatoes with fresh spring peas added in the last minute of cooking. Use fresh tarragon instead of oregano. Add fresh lemon zest along with the juice. The result is lighter and brighter, perfect for warm weather.
Summer Version: Add fresh heirloom tomatoes (diced) instead of sun-dried, roasted zucchini, and fresh dill. Use the greens from fresh beets instead of spinach for earthier flavor and stunning color. Serve at room temperature as a salad-like dish.
Fall Version: Add roasted butternut squash or sweet potato cubes after the beans. Use fresh thyme instead of oregano. Add a pinch of nutmeg. This creates a heartier, more autumnal version that’s still creamy and luxurious.
Winter Version: Add roasted Brussels sprouts, substitute kale for spinach, and add a pinch of cayenne pepper. Use vegetable broth made from roasted root vegetables. This becomes more of a robust, warming dish perfect for cold months.
Nutrition Information
Per serving (based on 4 servings):
- Calories: 385
- Protein: 18g
- Total Fat: 22g (saturated fat: 12g)
- Carbohydrates: 32g
- Dietary Fiber: 9g
- Net Carbs: 23g
- Sodium: 520mg (excluding added salt to taste)
- Iron: 4.2mg (23% DV)
- Folate: 185mcg (46% DV)
- Calcium: 280mg
This analysis is based on USDA FoodData Central values for butter beans, cream, and butter. The beans provide the majority of fiber and plant-based iron, while the cream and butter contribute the calories and satiety factor that prevents overeating. The spinach adds micronutrients with minimal caloric contribution.
Compared to the restaurant version (which typically contains additional butter or oil in cooking, more cream, and less vegetable content), this homemade version is higher in fiber and includes more greens, making it more nutritionally complete.
What to Order/Make Alongside for the Full Experience
This dish wants to be part of a complete meal experience. Here’s how to recreate the full restaurant moment at home:
- Crusty bread for soaking sauce – slice day-old Italian bread, brush with olive oil mixed with minced garlic, and toast until crispy. This is non-negotiable for enjoying every drop of sauce.
- Simple arugula salad – toss peppery arugula with extra-virgin olive oil, fresh lemon juice, and shaved Parmigiano. The brightness and slight bitterness balance the richness of the beans perfectly.
- Creamy polenta or risotto – serve the creamy beans over buttery polenta or risotto for a more substantial main course. This transforms it into a complete Italian-style dinner.
- Crispy roasted vegetables – roast Brussels sprouts, beets, or fennel at 425°F until caramelized. Their sweetness and crispness contrast beautifully with the creamy beans.
- White wine pairing – serve with a Pinot Grigio or Vermentino. The acidity cuts through the richness and refreshes your palate between bites.
For dessert, consider keeping things light after such a rich main course. A Blueberry Crisp Recipe provides something warm and comforting without being heavy, or you could serve a simple panna cotta with fresh berries.

Creamy Beans Recipe
Ingredients
Method
- Heat your 3 tablespoons of unsalted butter in a large sauté pan or Dutch oven over medium heat—not medium-high. This is crucial. High heat will brown the butter too quickly and make your garlic bitter. Once the butter is melted and foaming (about 30 seconds), add your minced garlic immediately. Do not skip the mincing step—pre-minced garlic from a jar has different moisture content and won't bloom the same way. Stir constantly for about 2 minutes until the garlic becomes incredibly fragrant and just barely starts to turn golden at the edges. SAFETY WARNING: Garlic burns quickly and becomes acrid. If you smell a slightly burnt aroma (different from fragrant), immediately remove from heat and start over with fresh butter and garlic. Burnt garlic cannot be fixed.
- While the garlic is still blooming, add all your dried seasonings at once: the ½ teaspoon oregano, ½ teaspoon red pepper flakes, ½ teaspoon smoked paprika, ¼ teaspoon black pepper, and ½ teaspoon salt. Stir constantly for about 30 seconds. You'll notice the pan will smell warm and smoky—that's exactly right. Why add dried herbs to hot fat instead of later? This technique, called "tempering," releases the essential oils from dried herbs and distributes them evenly throughout your fat. This creates a more cohesive flavor compared to adding them to liquid, where they stay somewhat separate.
- Add your ⅔ cup roughly chopped sun-dried tomatoes directly to the pan. If they're packed in oil, you can include about a tablespoon of that oil for extra flavor. Stir everything together for about 1 minute so the tomatoes are coated in the aromatic mixture. Now pour in your ¾ cup vegetable broth. I use low-sodium broth because we're already adding salt, and restaurant-style cooking means controlling your sodium levels. Bring the mixture to a gentle simmer and let it cook uncovered for exactly 5 minutes. The broth will reduce slightly and concentrate the flavors.
- Drain and rinse your two cans of butter beans thoroughly under cold running water. This removes excess sodium from the canning liquid and prevents the sauce from becoming overly salty. Add the beans to your simmering broth mixture and stir gently to combine. Continue simmering on medium heat for 3-4 minutes, uncovered. You're not trying to cook the beans—they're already cooked—you're allowing them to absorb the flavors of the broth and spice blend. Watch for the liquid to reduce by about half.

- Add your 1½ cups of chopped fresh spinach directly to the hot mixture. Within about 30 seconds, the spinach will completely wilt and darken. Stir it in so it's evenly distributed. The spinach adds nutritional density, visual appeal, and a subtle earthiness that balances the richness of the cream.
- Remove the pan from heat before adding your cream. This is the professional secret most home cooks miss. Heat breaks down the proteins in cream and can cause it to curdle or separate, creating a grainy texture instead of a silky sauce. Pour your 1 cup of heavy cream into the warm (but not hot) mixture slowly while stirring constantly. Keep stirring for about 1 minute as the cream combines with the broth. Do not return the pan to heat yet. The residual heat from the beans and broth will warm the cream gently. SAFETY WARNING: Adding cold cream to boiling liquid can cause splattering. Always remove from heat first, and always add cream slowly while stirring. If splattering does occur, allow the pan to cool for 30 seconds before continuing.

- Once the cream is fully incorporated and you have a silky sauce, add your ½ cup of freshly grated Parmigiano-Reggiano. Stir constantly until the cheese melts completely and you have a glossy, luxurious sauce. If the cheese seems to clump, reduce heat to very low and stir gently until smooth. Finish with your 2 tablespoons of fresh lemon juice and 3 tablespoons of chopped fresh basil. The lemon juice might seem small, but it's crucial—it brightens all the rich flavors and prevents the dish from tasting heavy, even though it contains cream and butter. Taste the mixture and adjust salt if needed. Remember that the cheese added saltiness, so you may not need additional salt. If you taste it and it feels flat, it's more likely that you need a tiny pinch more smoked paprika or a squeeze more lemon juice rather than additional salt.

FAQs
Can I use canned white beans or kidney beans instead of butter beans?
You can, but butter beans are genuinely the best choice here. They have a naturally creamy texture that becomes luxurious in this sauce—this is why restaurants use them. White beans (cannellini) work as a substitute and will give you similar results, though they’re slightly less creamy. Red kidney beans are too mealy and will create a different texture. Great Northern beans are your second-best option if you can’t find butter beans.
What if I don’t have smoked paprika—can I use regular paprika plus liquid smoke?
Not exactly. Liquid smoke is much more intense and concentrated than the smoke flavor in smoked paprika. If you absolutely must substitute, use ¼ teaspoon smoked paprika plus just one tiny drop of liquid smoke mixed into your spice blend, but honestly, smoked paprika is so common now that I’d encourage you to pick up a container. It costs about $3-4 and will last you months.
Can I make this vegan by using plant-based cream?
You can, though the texture will be different. Use a full-fat coconut cream or cashew cream that’s designed for cooking (not drinking). The emulsification process is the same, but plant-based creams sometimes separate more easily under heat. Follow the same method of removing from heat before adding the cream, and stir very gently. Use a plant-based butter for the initial cooking as well. The flavor will be slightly different but still delicious.
The sauce seems too thin when I finish cooking—how do I fix it?
First, remember that the sauce will thicken slightly as it cools. If it’s still too thin after cooling for 5 minutes, you have two options: (1) Return to very low heat and let it simmer gently for 2-3 minutes to reduce further, or (2) Mix 1 tablespoon cornstarch with 2 tablespoons cold water to create a slurry, then whisk it in while simmering gently. Add slowly and stop when you reach desired thickness—you can’t undo over-thickening.
My cream curdled and the sauce looks grainy—can I rescue it?
Yes. Remove from heat immediately. Pour the mixture into a blender and blend on low speed for about 30 seconds. This breaks up the curdled proteins and often creates a smooth emulsion again. If that doesn’t work, you can strain through fine mesh and start with fresh cream, adding it to the strained bean mixture. It’s not ideal, but it’s better than throwing it away.
Can I add meat to this recipe—like pancetta or bacon?
Absolutely. Cook 4-5 ounces of chopped pancetta or bacon until crispy before you start cooking the beans. Remove and set aside, then cook the garlic in the rendered fat plus a tablespoon of butter. Add the pancetta back in at the end, right before the fresh basil. This transforms it into a more substantial main course and adds smokiness that complements the smoked paprika beautifully.
More Restaurant Copycat Recipes
- Biscuit Recipe Vegan – fluffy, buttery biscuits that rival any restaurant bakery version
- Black Bean And Sweet Potato Burger Recipe – satisfying plant-based burger with creamy texture and savory depth
- Beet Burger Recipe – earthy, delicious burger that feels gourmet and tastes remarkably like restaurant versions
There’s something deeply satisfying about cracking the code on a restaurant dish you love. It’s not just about saving money or having control over ingredients (though both are real benefits). It’s about understanding the technique, respecting the craft, and then making it your own.
This creamy beans recipe taught me that restaurant cooking isn’t actually mysterious—it’s just careful attention to heat, ingredient quality, and timing. Once you understand those three principles, you can recreate almost any dish you love. And more importantly, you can make it even better because you’re cooking with intention and fresh ingredients.
I hope you make this recipe this week and feel that same satisfaction I felt when my kitchen smelled like that Italian bistro and my family gathered around the table for something they’ve been craving. That’s the real magic—not impressing people with something complicated, but nourishing the people you love with something delicious and made with care.
Happy cooking!