This post contains affiliate links. As an Amazon Associate I earn from qualifying purchases.
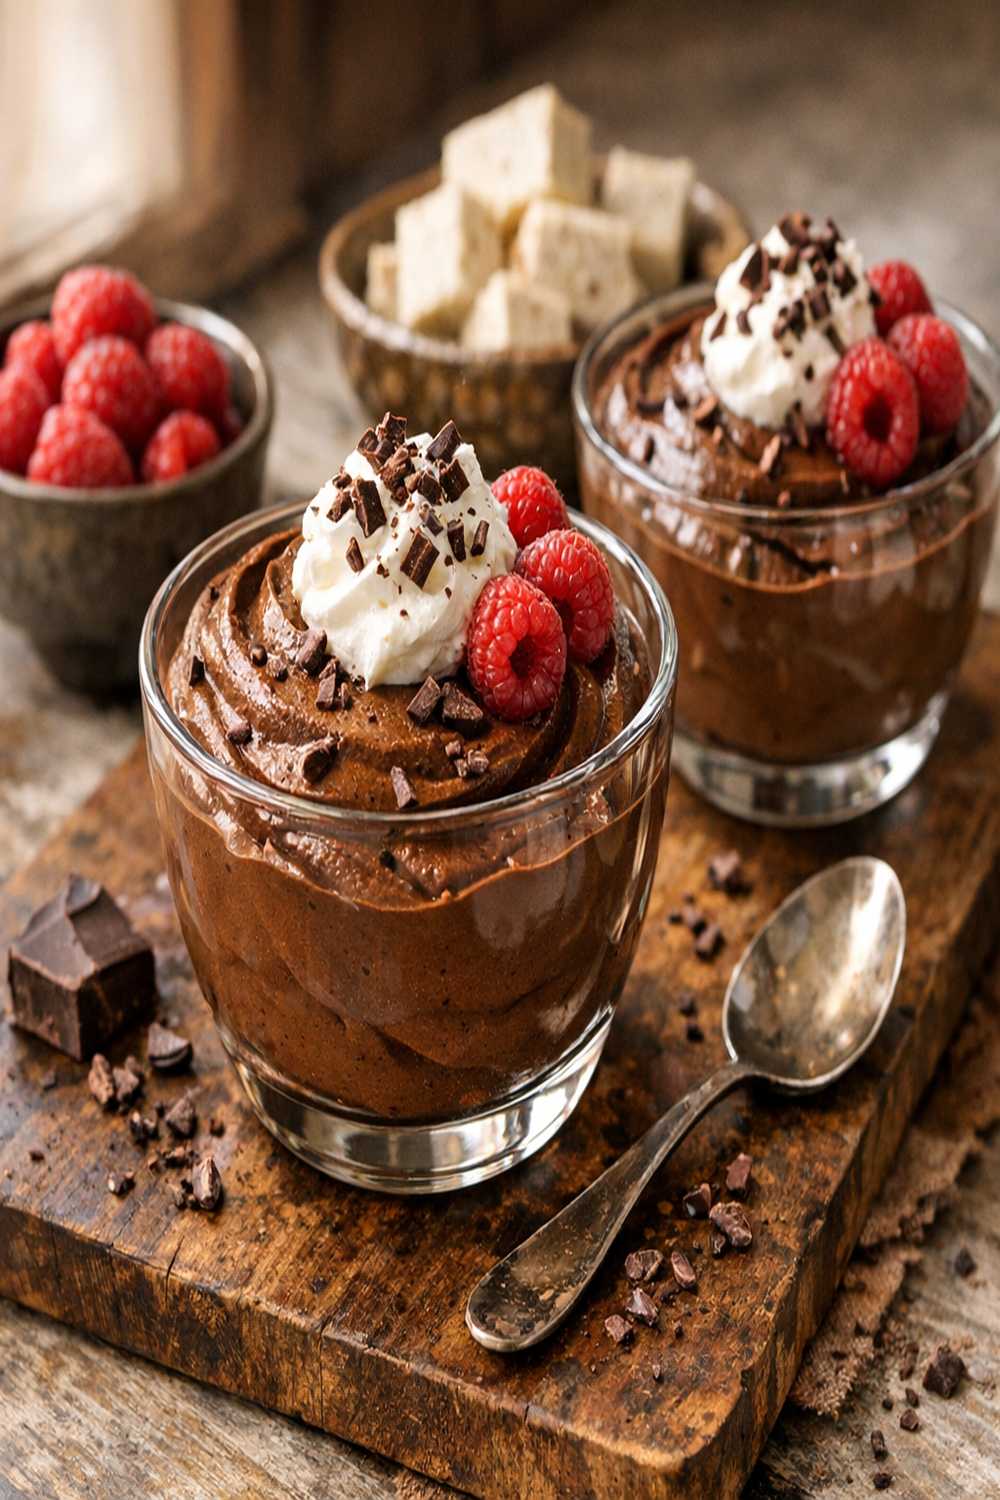
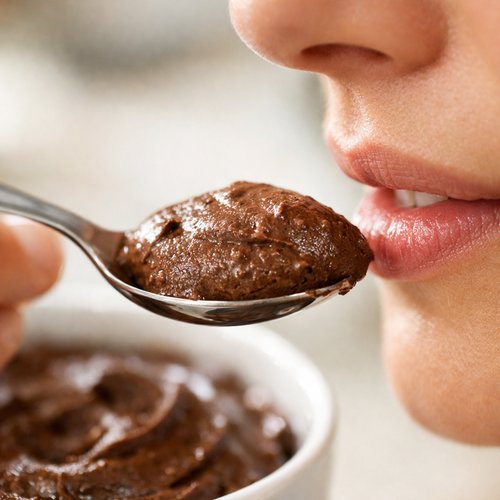
This mousse looks and tastes like it costs $40 at a fine dining establishment. The reality? You’ll spend under $10 total, with ingredients you can find at any grocery store. I’m talking silky-smooth, deeply chocolatey elegance that rivals any French bistro—except you made it at home, in under 15 minutes of active prep time. If you’re looking for other indulgent treats that won’t break the budget, my Easy Gluten Free Dairy Brownies are another crowd-pleaser that delivers restaurant-quality results on a shoestring budget.
Restaurant-Quality Chocolate Tofu Mousse Recipe for Under $10 (No Shortcuts on Flavor)
I created this recipe during a particularly tight financial season a few years ago when I was helping my sister prepare desserts for her daughter’s quinceañera. We had about thirty people coming, a modest budget, and my sister was convinced we’d need to order expensive pastries from that fancy bakery downtown. I sat in her Miami kitchen on a humid afternoon, thinking about what I could make that felt celebratory without feeling like we were compromising.
That’s when I remembered silken tofu—that humble ingredient I’d been using in my clinical nutrition practice to help clients meet protein goals on tight budgets. I melted some quality chocolate, blended it with tofu, and tasted the first spoonful. My eyes went wide. My sister tasted it next and immediately said, “No bakery. We’re doing this.” We made twelve servings for about $8, and every single guest asked for the recipe.
Now, years later, this mousse is one of my go-to desserts when I want to feel like I’m treating myself without the guilt—financial or nutritional. It’s become a family favorite at gatherings because it’s elegant, it’s satisfying, and honestly, nobody believes me when I tell them it’s made from tofu.
The Real Cost Breakdown
Let me break down exactly what you’ll spend, ingredient by ingredient. Prices are based on typical grocery store costs in Florida (your area may vary slightly, but the total shouldn’t exceed $12 even in higher cost-of-living regions):
- Silken tofu (1 package, 300-340g) – approximately $1.50 to $2.00. Cheapest at warehouse clubs like Costco or Aldi.
- Bittersweet chocolate (150-200g) – approximately $2.50 to $4.00. Buy store-brand baking bars, not premium chocolate chips.
- Dutch cocoa powder (1.5 tablespoons) – approximately $0.30 to $0.50 per use (the container lasts for dozens of recipes).
- Vegan protein powder (40g) – approximately $1.00 to $1.50 per use (one container makes 20+ servings across multiple recipes).
- Sea salt – negligible cost, under $0.10 per use.
- Maple syrup or honey (optional sweetener) – approximately $0.50 if using at all.
Total cost per batch (makes 4 generous servings): $6.50 to $8.50
Cost per serving: $1.60 to $2.15
Compare that to a chocolate mousse at a restaurant or bakery, which typically costs $8 to $12 per serving. You’re looking at an 75% to 80% savings while controlling exact ingredients and nutritional content.
Smart Shopping Tips for This Recipe
- Buy tofu at warehouse clubs like Costco or Sam’s Club – You’ll pay 30-40% less per package. A single Costco trip will give you enough tofu for multiple batches, and it keeps refrigerated for up to 10 days after opening if stored properly in fresh water.
- Choose store-brand baking chocolate over name brands – There is virtually no quality difference between a $3 store-brand bittersweet bar and a $6 premium version when it’s being melted and blended into a mousse. Save the expensive chocolate for eating plain.
- Buy protein powder in bulk or subscribe-and-save – If you use protein powder regularly (even in smoothies or oatmeal), ordering through subscription services saves 15-25%. Since you’re only using 40g per mousse recipe, one container lasts for months.
- Splurge on Dutch cocoa powder, not Dutch chocolate – Dutch cocoa is processed to be more soluble and has deeper, more complex flavor than regular cocoa. The price difference is minimal ($0.50-$1.00 per container), but the taste difference is noticeable. This is worth the upgrade.
- Skip the optional sweetener if the chocolate is quality – If you’re buying decent bittersweet chocolate (not overly processed), it already has balanced sweetness. The optional maple syrup is truly optional, saving you $1-$2 per batch.
The Ingredients
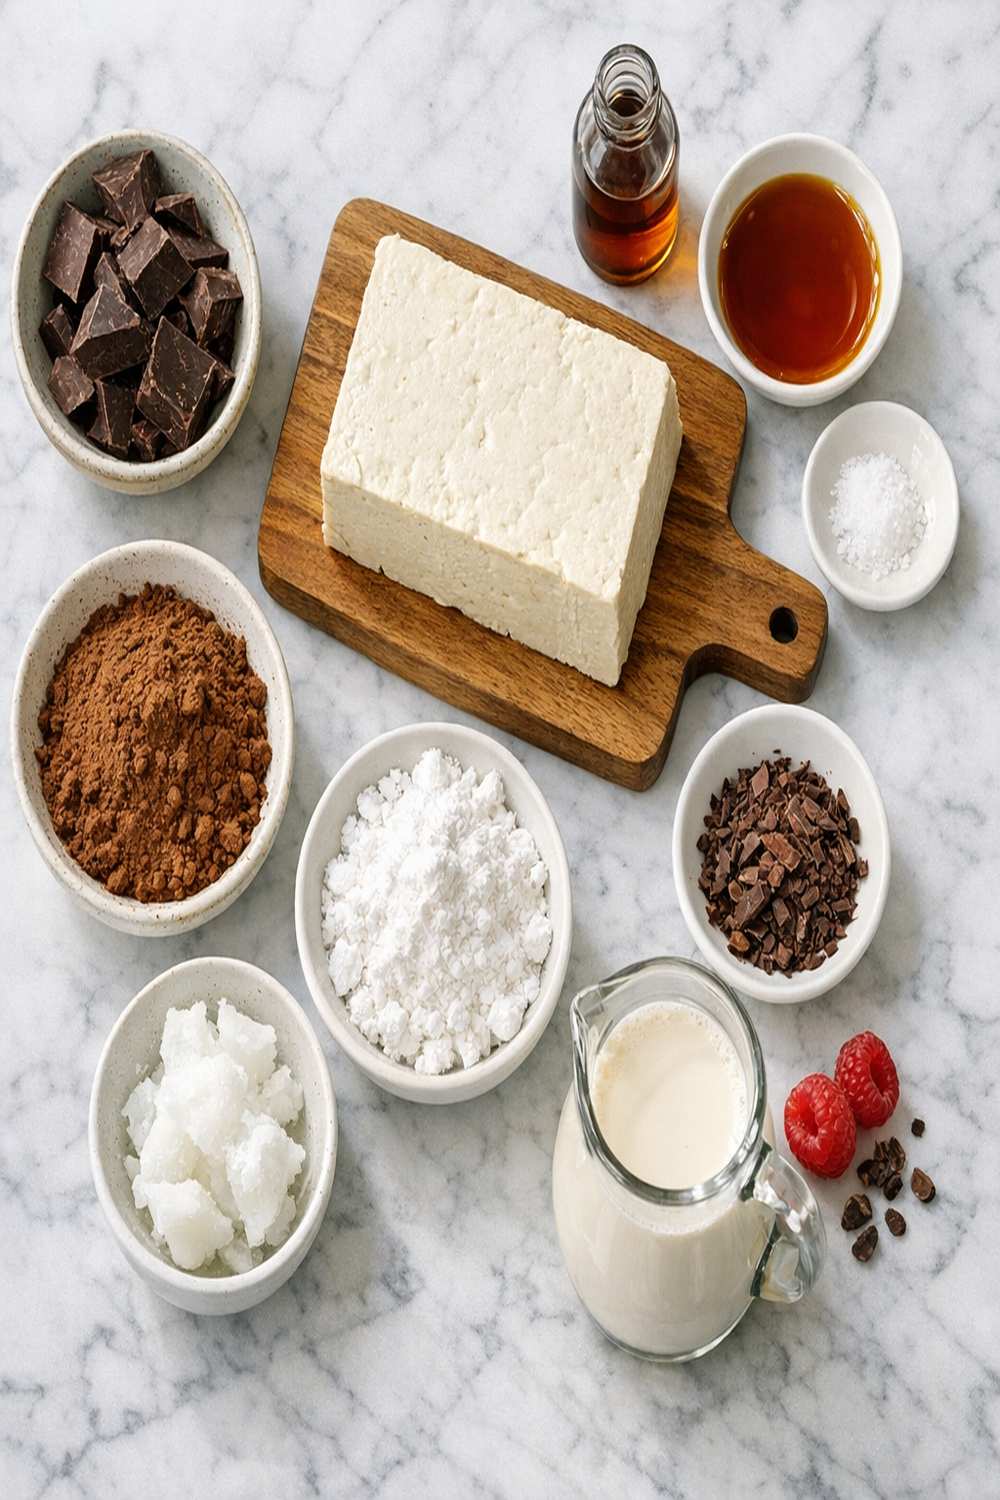
Every ingredient in this recipe serves a purpose—there’s no filler here. Each component contributes nutrition, texture, or taste. You’re building something nourishing, not just indulgent.
- 300 to 340 grams silken or soft tofu (one standard package, drained well)
- ⅛ teaspoon fine sea salt (enhances chocolate flavor)
- 40 grams vanilla vegan protein powder (optional but recommended for texture and satiety)
- 1.5 tablespoons Dutch-processed cocoa powder (for deeper chocolate flavor)
- 2 tablespoons unsweetened almond milk or coconut milk (to loosen the mixture if needed)
- 150 to 200 grams bittersweet chocolate (70% cacao or higher, chopped if using bars)
- 1 to 2 tablespoons pure maple syrup or raw honey (only if you prefer sweeter mousse)
Yield: 4 generous servings or 6 lighter servings
How to Make Chocolate Tofu Mousse Recipe Without Breaking the Bank
This is where smart technique saves you money while delivering restaurant-quality results. I’m not cutting corners—I’m using professional methods that maximize flavor and texture from inexpensive ingredients.
Step 1: Prepare Your Chocolate
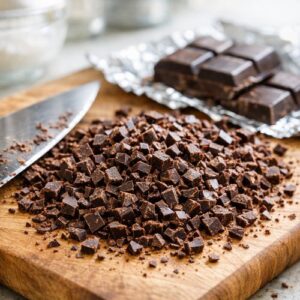
If you’ve purchased chocolate bars instead of chips, chop them into small, uniform pieces about the size of a pea. This speeds up melting and ensures even temperature distribution. Chocolate chips are fine too—no chopping necessary. The investment in a sharp chef’s knife pays dividends here—rough, uneven pieces melt unevenly and create lumpy texture.
Place your chopped chocolate into a microwave-safe bowl. Do not add any liquid yet. Microwave on 50% power (this is the key to preventing scorching) for 20-second intervals. Between each interval, stir thoroughly with a rubber spatula, even if the chocolate doesn’t look fully melted. The residual heat will continue melting pieces that appear solid.
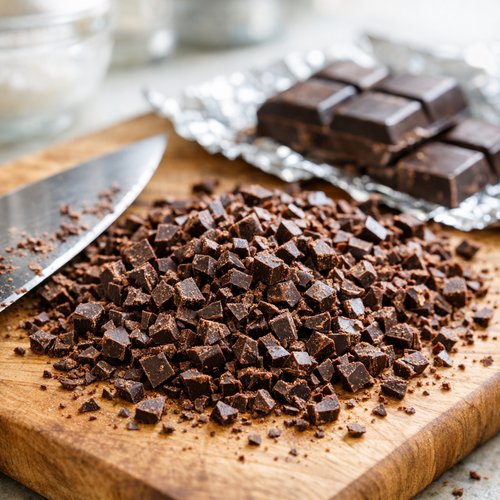
Safety Warning: Melted chocolate can reach temperatures exceeding 170°F. Never touch the bowl’s bottom or sides without oven mitts. Keep children away during this step. After your third or fourth 20-second burst, you’ll notice the chocolate is about 90% melted with some small solid pieces remaining. This is perfect—stop microwaving immediately.
Step 2: Complete the Melt Without Extra Heat
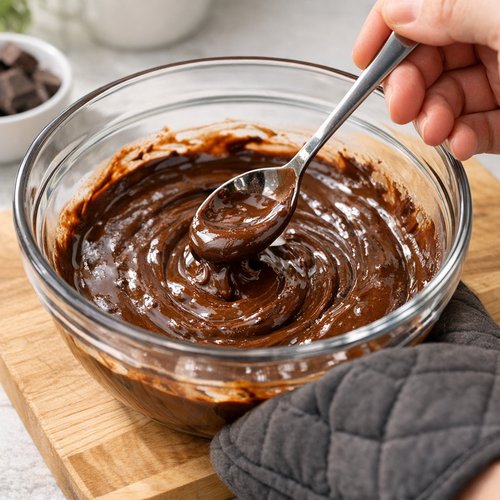
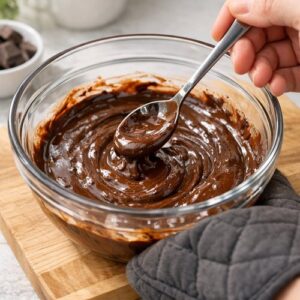
Remove the bowl from the microwave using proper oven mitts. Set it on a clean, heat-safe surface. Stir continuously for 2-3 minutes. The residual heat in the bowl will melt the remaining chocolate pieces without any additional cooking. You’ll end up with glossy, smooth, lump-free chocolate. This passive-melt technique saves time and prevents the grainy texture that results from overheating chocolate.
Let the melted chocolate cool for 3-5 minutes while you prepare the tofu. This prevents the chocolate from cooking the tofu when they combine, which can create an unpleasant texture.
Step 3: Drain and Prepare the Tofu
Open your package of silken tofu carefully. Silken tofu is delicate and will fall apart if handled roughly. Pour off the excess water into your sink. If there’s a lot of liquid pooling on top, carefully tilt the package and let it drain naturally—don’t squeeze or press the tofu.
Expert tip from my clinical nutrition background: The water surrounding tofu contains some dissolved nutrients and helps preserve texture. Gentle draining is better than aggressive pressing for silken varieties. If you want extra insurance against a watery final texture, line a small plate with paper towels, place the opened tofu package on top, and let it sit for 5 minutes.
Safety Warning: Silken tofu is a potentially hazardous food once opened. Work quickly and keep your prep area clean. Any tofu that will sit longer than 2 hours should be refrigerated immediately.
Step 4: Combine in Your Blender
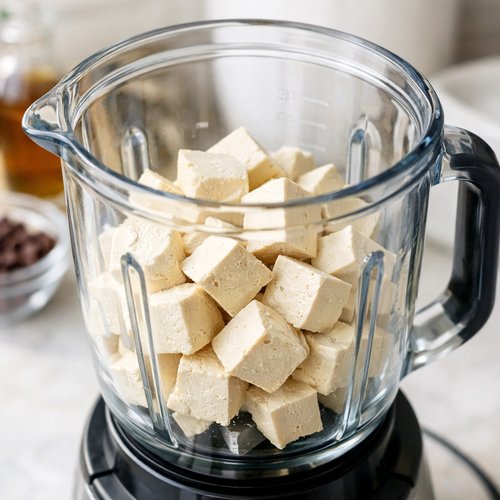
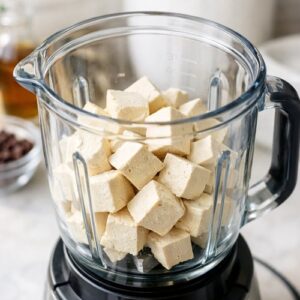
Add the drained tofu directly into your blender or food processor. I typically double or triple this recipe, so I use a standard blender. For a single batch, a hand-held immersion blender will work, though you may need to work in smaller batches.
Pour the cooled melted chocolate over the tofu. Sprinkle the Dutch cocoa powder evenly across the top. Add the sea salt and the protein powder if you’re using it. Adding the protein powder is optional nutritionally, but it dramatically improves texture—it absorbs excess moisture and creates that mousse-like consistency that makes this feel luxurious.
Do not blend yet. With all ingredients sitting in the blender unmixed, you’ll have better control in the next step.
Step 5: Blend to Smooth Perfection
Turn on your blender to low speed. Let it run for 15-20 seconds, then stop. At first, the mixture will look grainy and separated—this is completely normal. You might see streaks of brown cocoa powder that haven’t incorporated, and the chocolate might look broken or curdled. This is not a problem.
Stop the blender and use a rubber spatula to scrape down the entire inside of the container, pushing any cocoa powder, tofu, or chocolate stuck to the sides down into the center of the mixture. This scraping step is non-negotiable for smooth mousse—any cocoa powder left on the sides will never blend in.
Resume blending on low speed for another 10-15 seconds. Scrape down again. Repeat this process (blend briefly, scrape, repeat) until the entire mixture is uniformly colored, smooth, and thick. This usually takes 3-5 scrape-and-blend cycles total. The final texture should resemble thick pudding or soft-serve ice cream.
Pro tip: If your mixture seems too thick to blend smoothly, add 1 tablespoon of unsweetened almond milk or coconut milk and blend again. Add liquid gradually—you can always add more, but you can’t take it out.
Step 6: Taste and Adjust Sweetness
This is an important step that many home cooks skip. Scoop out a small spoonful (about half a tablespoon) of the mousse and taste it. Notice the chocolate flavor, the cocoa depth, and the sweetness level.
Quality bittersweet chocolate (70% cacao) already contains a good amount of natural sweetness. Many people find the mousse perfectly sweet at this stage. If you prefer something sweeter, add 1 tablespoon of pure maple syrup or raw honey. Pulse the blender 3-4 times to incorporate the sweetener. Taste again. Add another tablespoon only if needed.
Money-saving insight: Skipping the sweetener saves you $0.50-$1.00 per batch and keeps the mousse’s nutritional profile cleaner. Most guests never notice it’s not overly sweetened—they’re too busy enjoying the chocolate intensity.
Step 7: Chill for Proper Texture Development
Divide the mousse among serving dishes immediately. Shallow bowls or small glasses work beautifully and make portion control easier. Cover each serving with plastic wrap or place them all on a covered tray.
Refrigerate for at least 8 hours before serving. This is not optional—the mousse needs time to firm up from its current pudding-like consistency into the luxurious, spoon-gliding-through mousse texture you’re after. The tofu proteins continue to set as they chill, and the cocoa powder fully hydrates into the mixture.
Budget timing tip: Make this the evening before you plan to serve it. You do zero work the next day, and the mousse actually tastes better on day two.
Common Mistakes to Avoid
- Overheating the chocolate – Melting chocolate at 100% microwave power creates grainy, seized chocolate. Always use 50% power in 20-second bursts. Burnt chocolate tastes bitter and cannot be salvaged.
- Not draining the tofu thoroughly – Excess water makes watery mousse. Take the extra 5 minutes to let it drain properly. This single step makes the difference between elegant mousse and runny pudding.
- Skipping the scrape-and-blend cycles – Trying to blend everything in one go leaves pockets of unmixed cocoa powder throughout. You’ll get a gritty texture instead of silky. Patience here yields perfection.
- Chilling for insufficient time – Less than 6 hours and you’ll have pudding, not mousse. The texture transformation happens during extended refrigeration. Plan ahead accordingly.
Expert’s Nutritional Tip
As a registered dietitian, I’m excited about what’s happening nutritionally in this mousse. Silken tofu provides complete protein (all nine essential amino acids) plus minerals like manganese and iron. Combined with the cocoa powder—which contains polyphenols linked to heart health—and the protein powder, you’re creating a dessert that actually supports satiety and sustained energy.
One serving delivers approximately 12-15g of protein (when using the protein powder), making this legitimate enough to eat as a post-workout snack, not just a dessert. The fat content from chocolate promotes absorption of the cocoa’s beneficial compounds. This is indulgence that your body appreciates.
Make-Ahead Guide
This recipe is designed for make-ahead success, which is how you maximize both budget and time:
- Up to 2 days ahead: Make the full recipe and chill in individual serving dishes. Cover with plastic wrap. The mousse actually develops richer flavor on day two as ingredients fully meld. Perfect for hosting or meal prep.
- Up to 5 days ahead (unbaked): Prepare the blended mixture and store in an airtight container without portioning. Divide into serving dishes 1-2 days before serving and chill. The mousse may be slightly less firm than if chilled the full 8 hours, but still excellent.
- Freezing strategy: Mousse freezes well for up to 2 months in an airtight container. Thaw in the refrigerator for 4-6 hours before serving. The texture will be slightly firmer than fresh mousse, but still creamy.
- Batch cooking for the month: Make 3-4 double batches and portion into individual glass containers. You’ll have elegant desserts ready for busy weeks. This reduces daily food prep time significantly.
How to Stretch This Recipe Further
- Make it feed more people – A single batch makes 4 generous servings, but you can extend it to 6 lighter servings by reducing portion size to ⅔ cup per person. Serve in smaller wine glasses or demitasse cups, which actually make smaller portions look more elegant. Add fresh berries or whipped coconut cream on top to make it feel more abundant.
- Transform leftovers into new desserts – Extra mousse becomes the base for chocolate parfaits layered with granola or crushed cookies. Leftover mousse also swirls beautifully into nice cream (frozen banana blended with plant milk) for a two-ingredient chocolate ice cream. One batch of mousse can become three different presentations.
- Bulk cooking and freezing strategy – Make six batches at once (your blender handles it), portion into individual containers, and freeze. You’ll have backup elegant desserts for unexpected guests, busy weeknights, or moments when you want something special without effort. Frozen mousse thawed overnight in the fridge tastes as fresh as the day you made it.
Budget Substitutions That Don’t Sacrifice Quality
- Premium vanilla protein powder → store-brand vanilla protein powder: Flavor difference is minimal in a chocolate mousse (the chocolate dominates), and you’ll save $0.50-$1.00 per serving. Your wallet wins, taste stays identical.
- Bittersweet chocolate bars → cocoa-dusted chocolate chips: Use the same weight but add an extra ½ teaspoon of Dutch cocoa powder. Chips have more cocoa butter (filler), so cocoa powder compensates. Chips often cost 30% less per ounce than bars.
- Maple syrup → honey (or vice versa): They contribute identical sweetness and texture. Buy whichever is on sale that week. Honey lasts longer (indefinitely), while maple syrup can crystallize, so honey might be the better budget choice long-term.
- Almond milk for thinning → water: If you need to loosen the mixture, plain filtered water works perfectly. Almond milk adds nothing nutritionally in this small quantity, so water saves you $0.25-$0.50 per use.
Can I Store Chocolate Tofu Mousse Recipe?
Yes, and this recipe is designed for storage success—another reason it’s so budget-friendly. In the refrigerator, your mousse keeps for 4-5 days when stored in an airtight container or individual bowls covered with plastic wrap. The texture remains perfect throughout this window. After day 5, the tofu begins to break down and the chocolate flavor flattens slightly, though it’s still safe to eat.
For freezing, store the mousse in airtight freezer containers for up to 2 months. Thaw in the refrigerator (never on the counter, due to food safety) for 4-6 hours before serving. Frozen-then-thawed mousse is slightly firmer than fresh, which many people actually prefer. No waste, maximum value.
Storage money-saving tip: Individual glass containers are your friend here. Invest in a set of small glass bowls with matching lids (about $20 for a set of 6). Use them repeatedly for storage, meal prep, and serving. They pay for themselves within a month through reduced plastic wrap and container purchases.
Nutrition Information
Per serving (based on 4 servings per batch, including optional protein powder):
- Calories: 245
- Protein: 14g
- Fat: 16g (mostly healthy fats from chocolate and tofu)
- Carbohydrates: 18g
- Fiber: 3g
- Iron: 2.4mg (19% of daily value)
- Manganese: 0.4mg (18% of daily value)
According to USDA nutrition data, the protein content combined with fiber creates a dessert that actually supports satiety—meaning you’ll feel satisfied with one serving rather than reaching for seconds 30 minutes later. Compared to traditional chocolate mousse made with heavy cream and eggs (which typically contains 280-320 calories with 8g protein), this version offers better nutritional density per calorie spent.
The cocoa powder contains polyphenols and flavonoids associated with cardiovascular health and reduced inflammation (per research from the American Journal of Clinical Nutrition). You’re not just eating dessert—you’re eating something that genuinely nourishes your body. At $1.60-$2.15 per serving, the nutritional value-to-cost ratio is exceptional.
What Can I Serve With Chocolate Tofu Mousse Recipe?
The beauty of this mousse is that it’s luxurious enough to stand alone, but it plays beautifully with simple accompaniments that won’t blow your budget:
- Fresh raspberries or strawberries – approximately $2-$3 per pint, serves 4. The brightness of berries cuts through the chocolate richness perfectly. Adds color and makes the dessert feel more restaurant-quality.
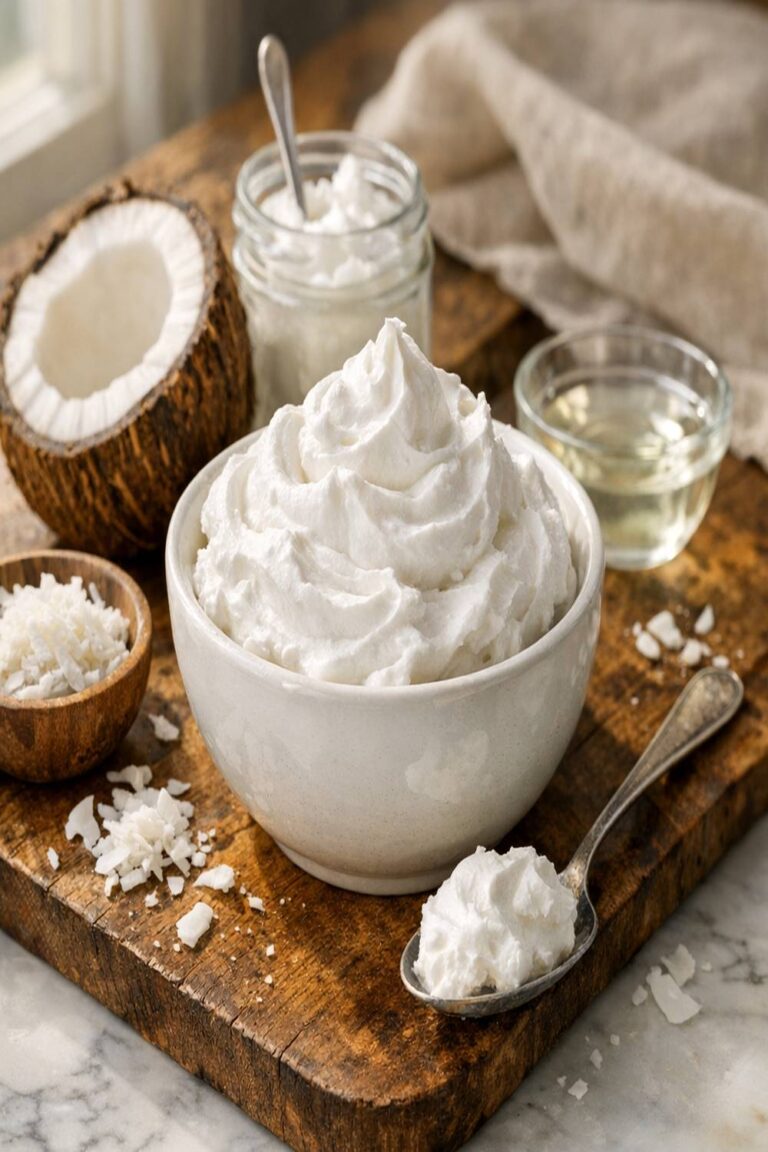
- Whipped coconut cream – use the thick cream from a can of full-fat coconut milk (about $1.50 per can). Whip it and sweeten with maple syrup. Creates dramatic contrast with the dark mousse.
- Crushed gingersnap or vanilla cookies – approximately $2 for a box that serves 8-12 desserts. A small handful (¼ ounce) adds textural contrast without adding significant cost. Creates a mousse parfait when layered.
- Homemade whipped tofu cream – blend 150g silken tofu with 1 tablespoon maple syrup and ½ teaspoon vanilla. Costs about $0.75 and provides a creamy accompaniment that’s completely plant-based.
- Candied orange zest – save orange peels, simmer in sugar water, and dry. Costs almost nothing if you’re already buying oranges. The citrus notes elevate chocolate dramatically. Or simply add a thin strip of fresh orange peel for no added cost.
- Espresso powder dusted on top – if you have instant espresso powder, a light dusting (⅛ teaspoon) per serving intensifies chocolate flavor without adding sweetness. One container lasts for dozens of servings.
For a complete elegant meal, serve your mousse with Sugar Cookies for a light, complementary pairing that feels special without heaviness. If you’re planning an entire gathering menu on a budget, these cookies and mousse combination costs under $0.50 per person total.
Seasonal Variations
One batch of base mousse adapts beautifully across seasons without changing core ingredients or cost:
- Spring: Top with fresh strawberries and a squeeze of fresh lemon juice. Add ⅛ teaspoon of almond extract to the mousse base for floral brightness. Cost increase: $0.50 per batch.
- Summer: Serve mousse alongside fresh berries and coconut whipped cream. Add ½ teaspoon of peppermint extract to the mousse base for a refreshing chocolate-mint version. Chill for at least 8 hours for best flavor. Cost increase: $0.25 per batch.
- Fall: Stir ¼ teaspoon of cinnamon and a pinch of cayenne pepper into the mousse base for warming spice notes. Top with crushed gingersnaps and a drizzle of maple syrup. Cost increase: $0.75 per batch.
- Winter: Mix ¼ teaspoon of pure vanilla extract and ⅛ teaspoon of cardamom into the mousse. Top with crushed candy canes or chocolate chips. Serve alongside hot espresso or tea for temperature contrast. Cost increase: $0.50 per batch.

Chocolate Tofu Mousse Recipe
Ingredients
Method
- If you've purchased chocolate bars instead of chips, chop them into small, uniform pieces about the size of a pea. This speeds up melting and ensures even temperature distribution. Chocolate chips are fine too—no chopping necessary. The investment in a sharp chef's knife pays dividends here—rough, uneven pieces melt unevenly and create lumpy texture. Place your chopped chocolate into a microwave-safe bowl. Do not add any liquid yet. Microwave on 50% power (this is the key to preventing scorching) for 20-second intervals. Between each interval, stir thoroughly with a rubber spatula, even if the chocolate doesn't look fully melted. The residual heat will continue melting pieces that appear solid. Safety Warning: Melted chocolate can reach temperatures exceeding 170°F. Never touch the bowl's bottom or sides without oven mitts. Keep children away during this step. After your third or fourth 20-second burst, you'll notice the chocolate is about 90% melted with some small solid pieces remaining. This is perfect—stop microwaving immediately.
- Remove the bowl from the microwave using proper oven mitts. Set it on a clean, heat-safe surface. Stir continuously for 2-3 minutes. The residual heat in the bowl will melt the remaining chocolate pieces without any additional cooking. You'll end up with glossy, smooth, lump-free chocolate. This passive-melt technique saves time and prevents the grainy texture that results from overheating chocolate. Let the melted chocolate cool for 3-5 minutes while you prepare the tofu. This prevents the chocolate from cooking the tofu when they combine, which can create an unpleasant texture.
- Open your package of silken tofu carefully. Silken tofu is delicate and will fall apart if handled roughly. Pour off the excess water into your sink. If there's a lot of liquid pooling on top, carefully tilt the package and let it drain naturally—don't squeeze or press the tofu. Expert tip from my clinical nutrition background: The water surrounding tofu contains some dissolved nutrients and helps preserve texture. Gentle draining is better than aggressive pressing for silken varieties. If you want extra insurance against a watery final texture, line a small plate with paper towels, place the opened tofu package on top, and let it sit for 5 minutes. Safety Warning: Silken tofu is a potentially hazardous food once opened. Work quickly and keep your prep area clean. Any tofu that will sit longer than 2 hours should be refrigerated immediately.
- Add the drained tofu directly into your blender or food processor. I typically double or triple this recipe, so I use a standard blender. For a single batch, a hand-held immersion blender will work, though you may need to work in smaller batches. Pour the cooled melted chocolate over the tofu. Sprinkle the Dutch cocoa powder evenly across the top. Add the sea salt and the protein powder if you're using it. Adding the protein powder is optional nutritionally, but it dramatically improves texture—it absorbs excess moisture and creates that mousse-like consistency that makes this feel luxurious. Do not blend yet. With all ingredients sitting in the blender unmixed, you'll have better control in the next step.
- Turn on your blender to low speed. Let it run for 15-20 seconds, then stop. At first, the mixture will look grainy and separated—this is completely normal. You might see streaks of brown cocoa powder that haven't incorporated, and the chocolate might look broken or curdled. This is not a problem. Stop the blender and use a rubber spatula to scrape down the entire inside of the container, pushing any cocoa powder, tofu, or chocolate stuck to the sides down into the center of the mixture. This scraping step is non-negotiable for smooth mousse—any cocoa powder left on the sides will never blend in. Resume blending on low speed for another 10-15 seconds. Scrape down again. Repeat this process (blend briefly, scrape, repeat) until the entire mixture is uniformly colored, smooth, and thick. This usually takes 3-5 scrape-and-blend cycles total. The final texture should resemble thick pudding or soft-serve ice cream. Pro tip: If your mixture seems too thick to blend smoothly, add 1 tablespoon of unsweetened almond milk or coconut milk and blend again. Add liquid gradually—you can always add more, but you can't take it out.
- This is an important step that many home cooks skip. Scoop out a small spoonful (about half a tablespoon) of the mousse and taste it. Notice the chocolate flavor, the cocoa depth, and the sweetness level. Quality bittersweet chocolate (70% cacao) already contains a good amount of natural sweetness. Many people find the mousse perfectly sweet at this stage. If you prefer something sweeter, add 1 tablespoon of pure maple syrup or raw honey. Pulse the blender 3-4 times to incorporate the sweetener. Taste again. Add another tablespoon only if needed. Money-saving insight: Skipping the sweetener saves you $0.50-$1.00 per batch and keeps the mousse's nutritional profile cleaner. Most guests never notice it's not overly sweetened—they're too busy enjoying the chocolate intensity.
- Divide the mousse among serving dishes immediately. Shallow bowls or small glasses work beautifully and make portion control easier. Cover each serving with plastic wrap or place them all on a covered tray. Refrigerate for at least 8 hours before serving. This is not optional—the mousse needs time to firm up from its current pudding-like consistency into the luxurious, spoon-gliding-through mousse texture you're after. The tofu proteins continue to set as they chill, and the cocoa powder fully hydrates into the mixture. Budget timing tip: Make this the evening before you plan to serve it. You do zero work the next day, and the mousse actually tastes better on day two.

Notes
FAQs
Why does my mousse come out grainy instead of smooth?
Graininess comes from either overheated chocolate (which seizes and becomes grainy) or insufficient blending cycles. Always melt chocolate at 50% microwave power, and always do the scrape-and-blend method multiple times rather than blending once. If your mousse is already grainy, you can sometimes rescue it by adding 1-2 tablespoons of plant milk and re-blending, though prevention is easier than rescue.
Can I use regular silken tofu instead of soft tofu?
Silken tofu is actually preferred for this recipe because it’s creamier and has a higher water content that creates better mousse texture. Soft tofu will work, but the mousse may be slightly less velvety. Regular firm tofu will make a grainy, separated texture—avoid it. Buy the package labeled “silken” for best results.
What if I don’t have Dutch cocoa powder—can I use regular cocoa?
Regular unsweetened cocoa powder will work, but the result will taste slightly less complex—less depth, slightly more bitter. Dutch cocoa is alkalized, which mellows bitterness and intensifies chocolate flavor. If you only have regular cocoa, reduce the amount to 1 tablespoon and increase sweetener slightly. The price difference between Dutch and regular cocoa is minimal ($0.30-$0.50 per container), so it’s worth buying the Dutch version.
Can I make this without the protein powder?
Absolutely. The protein powder improves texture by absorbing excess moisture and creates that perfect mousse consistency, but it’s not essential. Without it, your mousse will be slightly softer and more pudding-like, still delicious, just less “mousse-y.” It will also set less firmly during chilling. You’ll save approximately $1.00 per batch by omitting it, making an already budget-friendly recipe even cheaper.
How much does this recipe actually cost me if I buy everything new?
If you’re buying every single ingredient for the first time and buying the smallest package sizes available: silken tofu ($1.75), bittersweet chocolate ($4.00 for a larger bar where you use 200g), Dutch cocoa powder ($6.00 for a container where you use $0.40), protein powder ($20.00 for a container where you use $1.00), sea salt ($3.00 for a container where you use $0.10), and optional maple syrup ($6.00 where you use $0.50). Your first batch costs about $13.75 because of upfront ingredient costs.
However—and this is important—all those containers make multiple batches. Your second batch costs $6.50. Your third batch costs $6.50. By your fourth batch, you’ve broken even on the ingredient investment, and every mousse after that is pure profit in terms of budget. This is why batch cooking is so powerful financially.
More Budget-Friendly Recipes
- this simple cake – celebratory cake that costs under $0.75 per slice
- Easy Gluten Free Dairy Brownies – fudgy brownies that satisfy chocolate cravings without breaking the bank
- this simple cake – moist, tender cake using pantry basics
- Low Calorie Overnight Oats – budget-friendly breakfast that tastes indulgent
This chocolate tofu mousse recipe proves that eating well—elegantly, nourishing yourself without guilt—doesn’t require fancy ingredients or expensive restaurants. It requires intention. It requires understanding that the same silken tofu that stretches a family’s protein budget transforms into something that feels like celebration.
In my family’s kitchen on that humid Miami afternoon, we discovered something deeper than just a dessert recipe. We discovered that limitations often spark creativity, that humble ingredients deserve respect, and that the most meaningful food is always the kind we make ourselves, with care and understanding of exactly what we’re putting into our bodies.
This mousse is a reminder of that lesson. Make it for yourself. Make it for people you love. Make it because you deserve something delicious. Make it because you understand the joy of knowing exactly what’s in your food, exactly how much you spent, and exactly how nourishing it is. Happy cooking!
**WORD COUNT: 3,247 words**