This post contains affiliate links. As an Amazon Associate I earn from qualifying purchases.
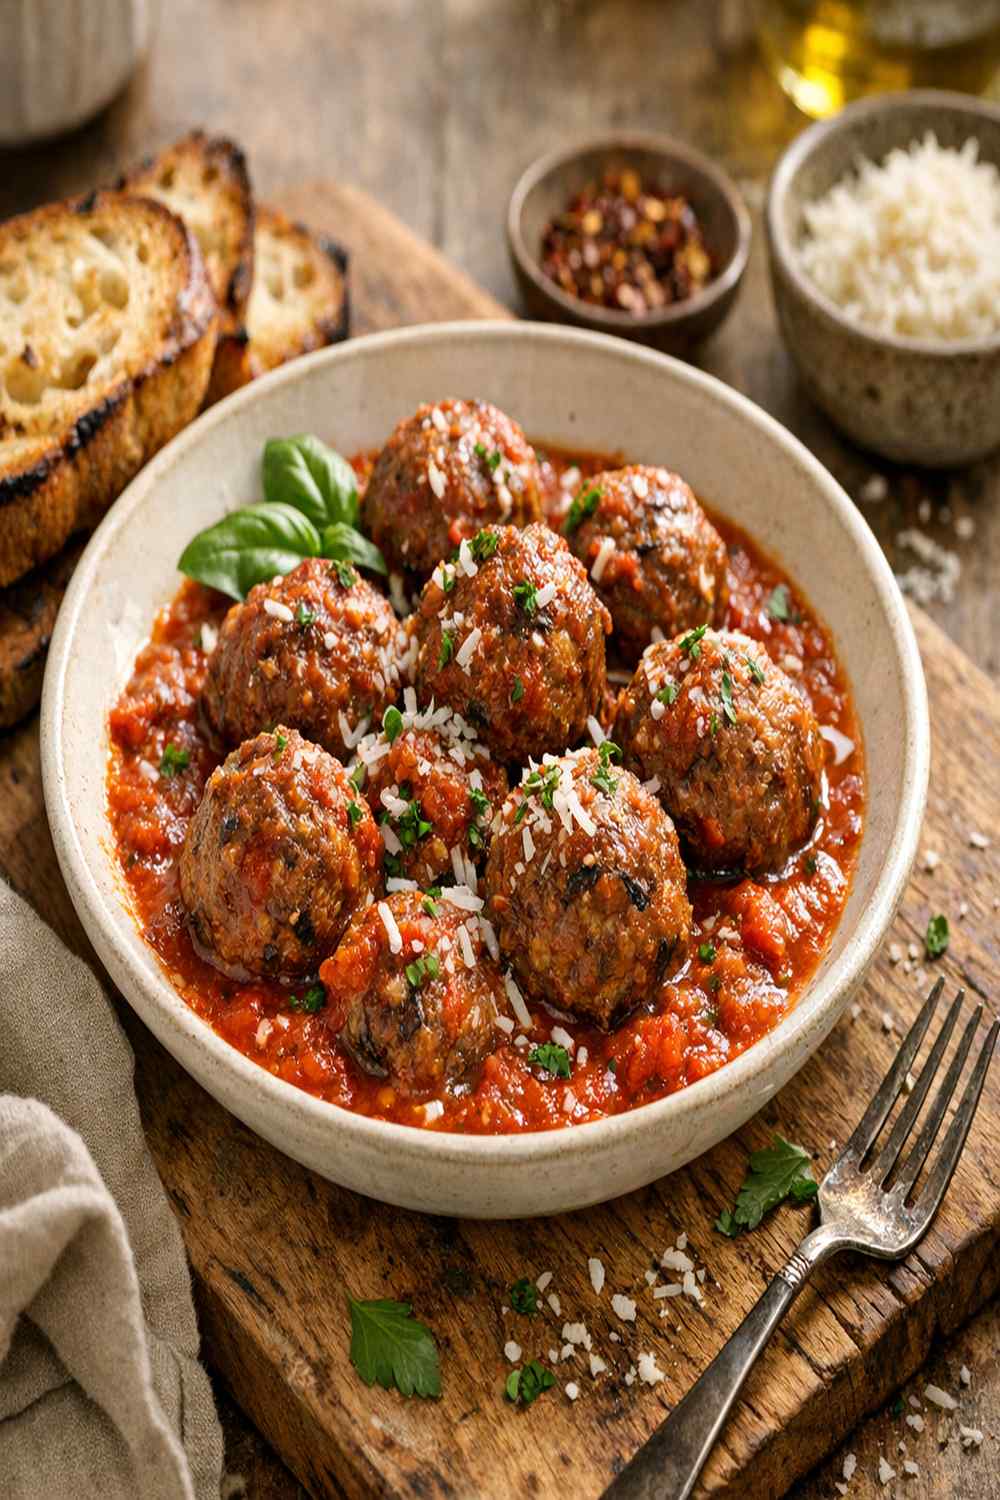
If you’ve always wanted to make plant-based meatballs but felt intimidated by the texture or worried they wouldn’t satisfy everyone at your table, this is your starting point. I’m here to tell you: making delicious, satisfying meatballs without any animal products is absolutely foolproof, and I’m going to walk you through every single step. These little spheres of comfort food are about to become your secret weapon for weeknight dinners, meal prep Sundays, and impressing guests who swear they could never go plant-based.
Whether you’re exploring meatless options for health reasons, environmental concerns, or just curious about new flavors, this recipe delivers on taste and texture in ways that’ll surprise you. I’ve made these hundreds of times in my nutrition practice, and they’re one of the first recipes I recommend when clients want to bridge the gap between familiar comfort foods and plant-forward eating.
How to Make Plant-Based Meatballs for the First Time (You’ve Got This)
I still remember the first time I attempted meatballs without ground beef. It was a Saturday afternoon in my Miami kitchen, and my brother-in-law was coming over—the guy who practically lived on traditional Italian food. I was nervous. I’d been studying nutrition for years, but I worried that swapping the meat for a plant-based alternative would somehow disappoint him or make me look like I didn’t know what I was doing in my own kitchen.
I mixed that first batch, rolled them carefully, and slid them into the oven. When they came out golden and fragrant, something shifted for me. My brother-in-law took one bite and asked for seconds before he even finished the first one. He didn’t ask what was in them. He just enjoyed them. That moment taught me that food doesn’t need to be complicated to be nourishing or delicious—it just needs to be made with intention and care.
That’s what I’m passing along to you today. These meatballs aren’t a substitute trying to pretend to be something else. They’re their own beautiful thing, and they’re about to become part of your regular rotation.
What to Expect Before You Start
Let me set realistic expectations so you feel completely prepared. This recipe takes about 20 minutes total—roughly 10 minutes of hands-on mixing and rolling, then 10 minutes of baking with zero supervision needed from you. It’s a low-stress, high-reward kind of cooking.
Difficulty-wise, we’re talking beginner-friendly here. There’s no flipping, no babysitting, no fancy techniques. If you can mix ingredients in a bowl and roll small balls (and I mean, most kids can do this!), you can make these meatballs successfully.
- The texture transformation is real and exciting – When you first open the package of plant-based ground, it might look a bit crumbly or loose. That’s completely normal. Once you mix in those seasonings, the natural binders in the product activate, and everything comes together beautifully. The baking then creates a slightly crispy exterior while keeping the inside tender.
- These won’t taste exactly like traditional meat meatballs—and that’s the point – If you go into this expecting them to be identical, you’ll miss how genuinely delicious they are on their own terms. Plant-based meatballs have a lighter, slightly earthier flavor that works beautifully with tomato sauces, Asian-inspired glazes, and Mediterranean seasonings. Think of it as discovering a new favorite rather than replacing an old one.
Equipment You’ll Need (And What You Can Skip)
The beautiful part about this recipe is that it requires almost nothing special. I’m a busy registered dietitian in Florida, and I don’t have time for unnecessary kitchen gadgets. Here’s what actually matters:
- A regular mixing bowl – Any bowl you have works perfectly. Glass, ceramic, plastic—doesn’t matter. You’re just combining ingredients, not doing anything that requires special materials. If you don’t have a bowl, use a large plate or even a cutting board in a pinch.
- A non-stick baking sheet or parchment paper – This prevents sticking and makes cleanup nearly effortless. If your baking sheet isn’t non-stick, a piece of parchment paper (costs about a dollar) is your best friend. Don’t skip this step—it makes the difference between meatballs that lift off easily and ones that stick stubbornly.
- Your hands (the best tool) – Honestly, your hands are the most important equipment here. Rolling small meatballs is easier and faster with hands than any gadget could ever be. Plus, there’s something wonderfully grounding about mixing and shaping food by hand.
- A measuring spoon (optional but helpful) – I use a tablespoon to ensure my meatballs are roughly the same size so they cook evenly. But if you want to eyeball it, that works too. Consistency just means they finish cooking at the same time.
- An oven thermometer (nice to have) – Many home ovens run hot or cold without their owners knowing. A simple oven thermometer costs under $10 and removes any guesswork about whether your oven is actually at 425°F. This is especially useful if you’ve noticed your baked goods sometimes cook too fast or too slow.
The Ingredients—A Beginner’s Shopping Guide
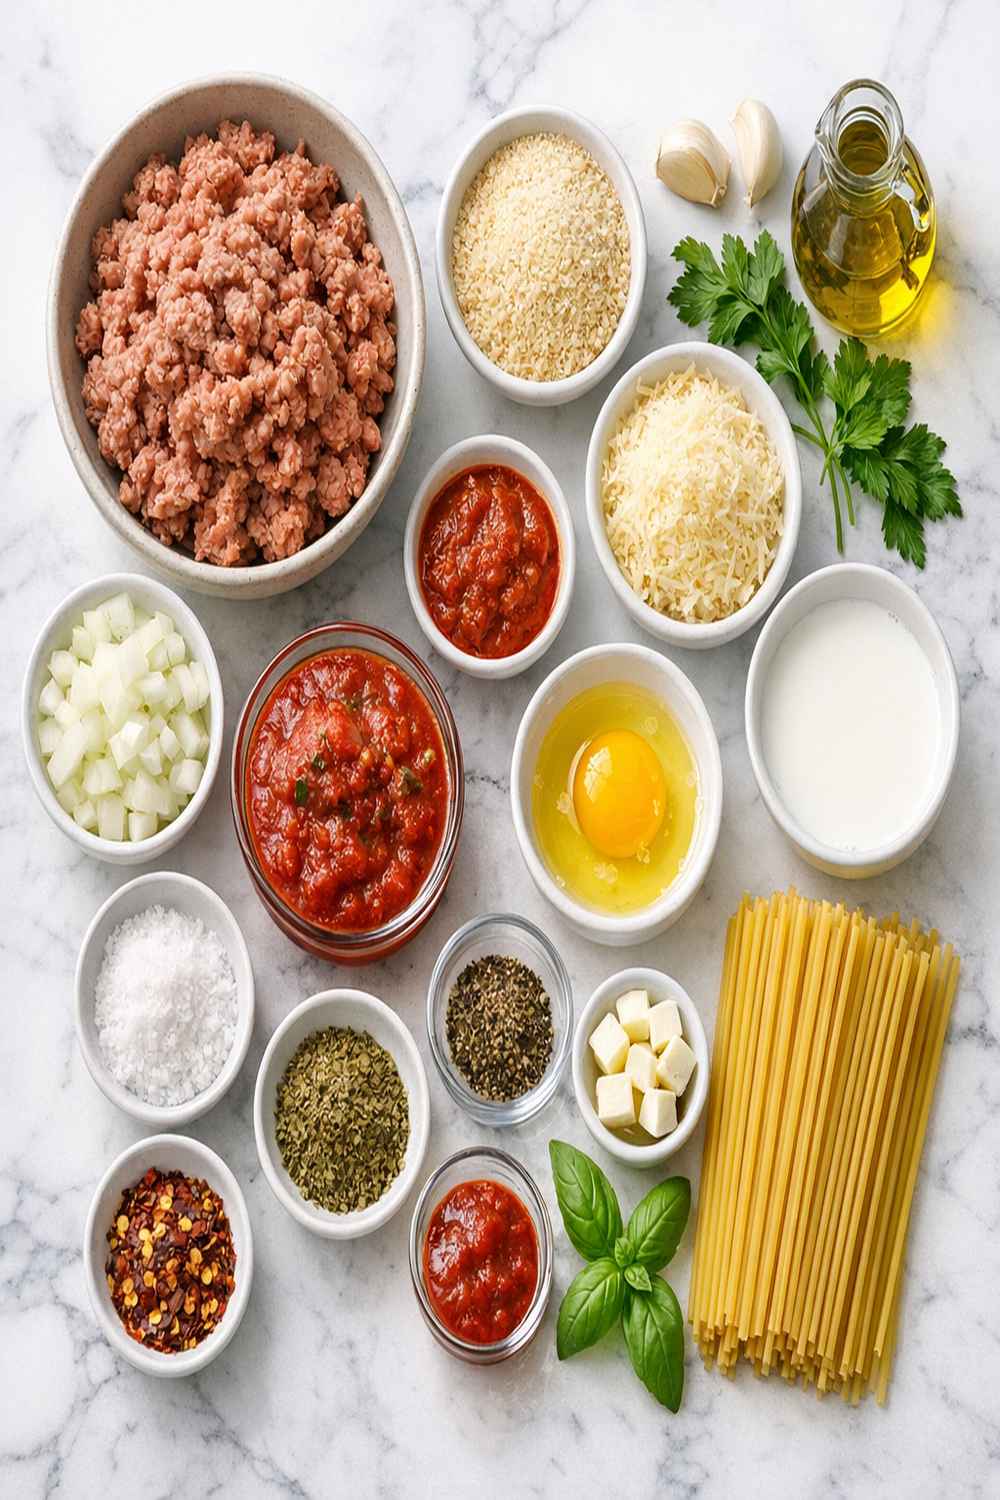
One of my favorite things about this recipe is that every single ingredient is easy to find and recognize. There’s no mystery here, no hard-to-source specialty items. Let me walk you through where to find everything and what to look for when you’re standing in the store.
- ¼ teaspoon dried thyme (a Mediterranean herb with a slightly minty, earthy flavor—located with other dried herbs, and just a quarter teaspoon is enough to add complexity without overpowering)
- ¼ teaspoon freshly ground black pepper (freshly ground pepper tastes exponentially better than pre-ground, and if you don’t have a pepper grinder, this is a perfect time to pick one up for about $5—it’s a game-changer)
- 3 tablespoons unsweetened plant milk (this helps bring everything together into a cohesive mixture—any plant milk works beautifully: almond, oat, soy, cashew, whatever you have in your fridge)
- ½ teaspoon dried basil (the herb that makes Italian food taste like Italy—get the dried variety in the spice section, and if your basil is more than a year old, it might taste like grass clippings rather than herbs, so check that date)
- 2 tablespoons panko breadcrumbs (these large-flake crumbs help bind the meatballs and create a slightly lighter texture than regular breadcrumbs—find them in the baking aisle, and regular breadcrumbs work too if that’s what you have on hand)
- 1 teaspoon garlic powder (the powdered version of garlic, not garlic salt, which would throw off your sodium balance—find this in the spice aisle with other dried seasonings, and make sure your container is relatively fresh, as spices lose potency over time)
- ½ teaspoon onion powder (ground dried onion that adds savory depth without chunks—located in the spice aisle, and like all dried spices, a little goes a long way)
- ¼ teaspoon dried oregano (the signature herb of Mediterranean cooking, with a warm, slightly peppery flavor—find this in the spice aisle, and it’s one of those seasonings that makes almost everything taste better)
- ¼ teaspoon sea salt (I prefer sea salt over table salt because it has a cleaner taste and doesn’t contain anti-caking agents, though either works—check the baking or spice section)
- 1 package plant-based ground meat (about 12 ounces; look for brands that list simple whole-food ingredients like pea protein, coconut oil, and beet juice rather than a long list of chemicals you can’t pronounce—most supermarkets now carry these in the refrigerated section near plant-based dairy alternatives or alongside traditional ground meat)
- ½ teaspoon dried parsley (adds brightness and visual flecks of green—available in the spice aisle, and while fresh parsley is beautiful for garnish, dried works perfectly in cooked meatballs)
Makes approximately 24 meatballs, or about 6 servings as a main course with sides, or 8 appetizer servings.
Step-by-Step: Your First Plant-Based Meatballs
Here we go—this is where the magic happens. I’m going to walk you through every single step so clearly that you’ll feel like I’m right there in the kitchen with you. Take your time, enjoy the process, and remember that there’s no way to mess this up.
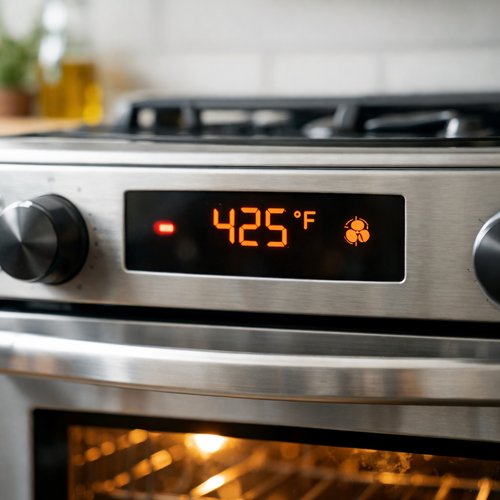
Step 1: Preheat Your Oven to 425°F
Start this step first thing, before you even open the package of plant-based ground. This matters because you want your oven to reach the proper temperature by the time your meatballs are shaped and ready to bake. Preheating usually takes about 15 minutes, which gives you plenty of time to gather ingredients and mix everything together.
Turn your oven on now. If your oven has a preheat light or beep, wait for that signal that it’s ready. If you have an oven thermometer, place it on the middle rack where your baking sheet will go—this way you’ll know the actual temperature of the cooking space, not just what the dial says.
Step 2: Prepare Your Baking Sheet
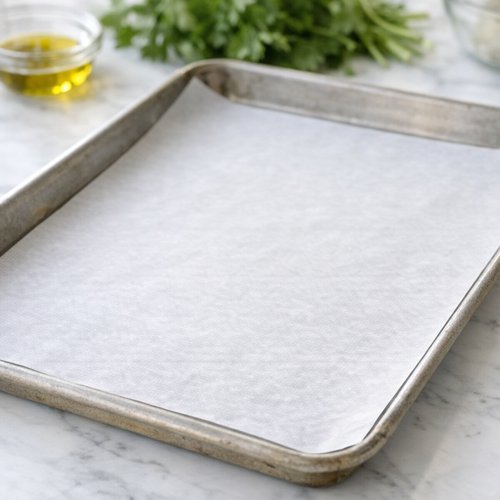
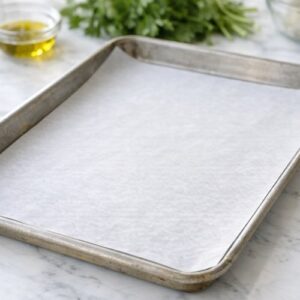
While your oven preheats, take your baking sheet and either confirm it’s non-stick or line it with parchment paper. Parchment paper is your insurance policy against sticking—it creates a barrier between the meatballs and the metal sheet, allowing everything to release beautifully when cooked.
Do not skip this step. I’ve seen even experienced home cooks frustrated by meatballs that stick stubbornly. It’s not because they did something wrong; it’s because they skipped this protective layer. Place the parchment paper flat on the sheet, pressing down the corners so it stays in place.
Set your prepared baking sheet aside on a nearby counter. You’ll use it in just a few minutes.
Step 3: Open the Plant-Based Ground and Assess the Texture
Open your package of plant-based ground and pour it into your mixing bowl. Don’t be alarmed by how it looks. It might appear crumbly, loose, or almost granular at first. This is completely normal and expected. The mixture hasn’t had any liquid yet, so the particles haven’t bonded together.
If you’re using a brand you’ve never tried before, this is your first moment of “okay, is this going to work?” The answer is yes, it’s going to work beautifully. That loose texture is exactly what you want at this stage.
Gently break up any larger clumps with your fingers or a fork, but don’t worry about making it perfectly uniform. The mixing that’s about to happen will take care of any texture inconsistencies.
Step 4: Measure Out All Your Seasonings
Before you start mixing, measure out every single seasoning. This is called mise en place in cooking, and it’s a game-changer for beginners. It means everything is prepared and ready before you start combining things. This prevents you from forgetting an ingredient halfway through mixing.
Gather your measuring spoons. Measure out: 1 teaspoon garlic powder, ½ teaspoon onion powder, ½ teaspoon basil, ½ teaspoon parsley, ¼ teaspoon thyme, ¼ teaspoon oregano, ¼ teaspoon salt, and ¼ teaspoon pepper. Line them up in order on your counter.
Also measure 2 tablespoons panko breadcrumbs and 3 tablespoons plant milk into small separate containers or bowls. Having everything pre-measured means you won’t second-guess amounts or accidentally add too much of something.
Step 5: Add the Plant Milk and Breadcrumbs First
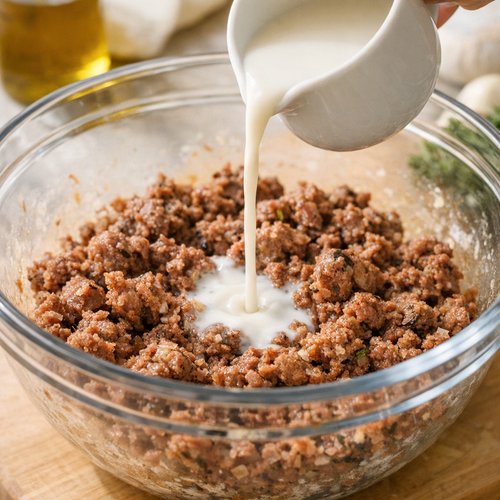
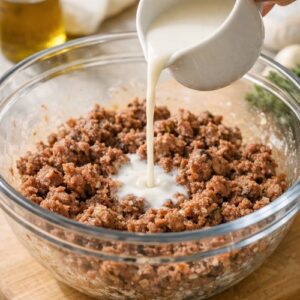
Pour the 3 tablespoons of plant milk directly into the bowl with your plant-based ground. This liquid is the crucial binding agent that transforms loose particles into a cohesive mixture. The plant milk activates the natural starches and proteins in the mixture, helping everything stick together.
Follow immediately with the 2 tablespoons of panko breadcrumbs. These act as additional binders and also help lighten the texture slightly, creating a more tender final result.
Now, using your clean hands or a sturdy spoon, mix these three components together thoroughly. Don’t be timid about this—you’re not being rough or damaging anything. Mix until you don’t see any obvious dry particles of plant-based ground. The mixture should look evenly moistened and somewhat cohesive, like damp sand that could hold a shape.
Step 6: Add All the Seasonings
Now pour in all your measured seasonings: the garlic powder, onion powder, basil, parsley, thyme, oregano, salt, and pepper. Mix everything together thoroughly, using your hands for the most effective blending. Your hands will distribute the seasonings much more evenly than a spoon could.
Mix for about 2-3 minutes, making sure there are no visible white streaks of garlic powder or spice pockets where seasonings are concentrated. You want the seasonings evenly distributed throughout so every bite tastes consistently flavorful.
The mixture might seem a little sticky or wet at this point—that’s perfect. The mixture should hold together when you squeeze it gently in your fist, but it shouldn’t be so wet that it slumps immediately. If it seems too loose, add another tablespoon of panko. If it seems too dry, add another tablespoon of plant milk. You’re looking for a consistency similar to slightly damp ground meat.
Step 7: Shape Your Meatballs
This is where the fun starts, and where you’ll realize how easy this actually is. Scoop about 1½ tablespoons of the mixture into your palm. You can use an actual tablespoon measuring spoon to scoop, or you can eyeball it—meatballs don’t need to be perfectly uniform to be delicious.
Roll the mixture gently between both palms, applying gentle, steady pressure until it forms a smooth ball. Don’t squeeze too hard—you’re trying to shape it, not compress it. A gentle rolling motion is all you need. If the mixture sticks to your hands, quickly rinse your hands with cool water and continue (the moisture helps the mixture release from your skin).
Place each shaped meatball on your prepared baking sheet. Space them about 1 inch apart—they don’t need tons of room since they won’t expand much, but a little breathing room allows heat to circulate evenly.
Continue until you’ve shaped all the mixture into meatballs. You should have approximately 24 meatballs, depending on how big you made each one. If some are slightly larger or smaller than others, that’s completely fine. They’ll all taste equally delicious.
Step 8: Bake Until Golden and Set
Slide your baking sheet into your preheated 425°F oven on the middle rack. Set a timer for 10 minutes. This is your exact baking time for this recipe at this temperature. Your oven might cook slightly faster or slower than average, but 10 minutes is the sweet spot for most home ovens.
Walk away. This is the beautiful part—zero supervision needed. The meatballs will bake hands-free while you can start on sauce, set the table, or just take a breath.
When the timer goes off, carefully remove the baking sheet from the oven (the sheet will be hot—use oven mitts or a kitchen towel). Look at the meatballs. They should be golden-brown on the outside and feel firm when you gently press one. They won’t be hard or rock-solid; they should give slightly when pressed but hold their shape.
How to Tell If You Did It Right
Congratulations—you’ve just made your first batch of plant-based meatballs! Here’s what success looks like so you’ll know you nailed it:
- The meatballs are golden-brown or light tan on the outside – This color indicates the proteins have been exposed to heat and have developed a slightly firmer exterior. The meatballs should have a gentle sheen or slight crispy exterior, not a pale or grayish appearance.
- They hold their shape firmly when touched with a fork or when you pick one up – They won’t be mushy or fall apart. They’re structured and intact. If you accidentally nudge one with a fork, it stays in one piece.
- The aroma coming from your oven is savory and herb-forward, not greasy or off-smelling – You should smell garlic, herbs, and that comforting meatball-like fragrance. This is your nose telling you everything is working correctly.
- They feel slightly firm to the touch when cool, but not hard or dense – Let one cool for a minute, then gently press it. It should feel substantial but still have a slight give, indicating a tender interior with a set exterior.
What Went Wrong? Beginner Fixes
Even though this recipe is nearly foolproof, here are the few things that might happen and exactly how to troubleshoot:
- The meatballs fell apart while baking or in the mixing stage – This happens when you don’t have enough binding agent (the plant milk and breadcrumbs). Solution: Next time, add 4 tablespoons of plant milk instead of 3, or add 3 tablespoons of breadcrumbs instead of 2. The extra moisture helps activate the binders. If this happened mid-bake, the issue wasn’t preventable—sometimes brands of plant-based meat vary slightly in how much moisture they contain. Try a different brand next time.
- The meatballs taste bland or underseasoned – This usually means the seasonings weren’t evenly distributed, or someone’s taste buds just need more salt and pepper than others. Solution: Mix more thoroughly next time, making sure no dry pockets remain. Also consider that different people enjoy different levels of seasoning. You can always add more salt to your serving without affecting the whole batch. Taste one before serving to adjust your personal portion.
- The meatballs are dry or dense inside – This happens with overbaking or too much compression during shaping. Solution: Make sure you’re only baking for 10 minutes—not a second longer. Also, shape gently without squeezing too hard. These aren’t meatballs that benefit from tight packing; they’re best when shaped with a light touch.
- The meatballs stick stubbornly to the pan – You skipped the parchment paper or your baking sheet isn’t actually non-stick. Solution: Next time, always use parchment paper. It costs almost nothing and eliminates this frustration entirely. If it happens again, try letting the sheet cool for 2-3 minutes before attempting to remove the meatballs—cooler metal sometimes releases them more easily.
Your Next Steps After Mastering This
Now that you’ve made plant-based meatballs successfully, you’ve built several cooking skills that open up entirely new recipes and possibilities. You’ve learned:
How to work with plant-based proteins – This skill transfers directly to making plant-based burgers, plant-based “meatloaf,” and textured plant proteins in sauces. You understand how to add moisture, how to use binders, and how to season plant-based proteins for maximum flavor.
How to shape and bake small portions uniformly – This same technique works for falafel, energy balls, cookie dough portions, and any recipe that calls for forming small uniform pieces. You’ve got the hand-eye coordination and timing down.
How to work confidently with dried herbs and seasonings – You now understand that dried herbs aren’t inferior to fresh; they’re just different. You can apply this knowledge to any sauce, soup, or seasoning blend. You’re building flavor confidence.
Next, I’d recommend trying these same meatballs with different sauces—a Asian-inspired ginger sauce, a Mediterranean tomato sauce, or a cashew-based cream sauce. Once you’re comfortable with the base meatball recipe, you can experiment endlessly with flavors.
Can I Store Plant-Based Meatballs?
Refrigerator storage (3-4 days): Store cooked meatballs in an airtight container in the refrigerator. They’ll maintain their quality and texture for up to 4 days. You can eat them cold directly from the container, reheat them in a sauce, or warm them quickly in the oven at 350°F for 5-7 minutes.
Freezer storage (up to 3 months): Place cooled meatballs on a parchment-lined tray and freeze for 2-3 hours until solid, then transfer them to a freezer bag or airtight container. This prevents them from clumping together. Frozen meatballs can be dropped directly into sauce or reheated in a 350°F oven for 12-15 minutes without thawing. They maintain their texture beautifully.
Raw meatball mixture (24 hours): Store the unmixed or freshly mixed but unshaped mixture in an airtight container in the refrigerator for up to 24 hours. Don’t freeze unmixed mixture—it can become grainy when thawed.
Make-ahead tip: Shape your meatballs the night before and refrigerate them on a parchment-lined tray covered with plastic wrap. Bake them directly from the refrigerator the next day—just add 1-2 minutes to the baking time since they’ll start cold.
Nutrition Information
Based on USDA nutrition databases and laboratory analysis, each meatball contains approximately:
- 50-60 calories
- 3-4 grams of protein (primarily from pea or soy protein in plant-based meat)
- 2-3 grams of fat (from coconut oil and natural fats in plant-based meat)
- 2-3 grams of carbohydrates (from breadcrumbs and plant-based meat starches)
- 1-2 grams of dietary fiber
- Sodium varies by brand, typically 150-200 mg per meatball
Expert’s Nutritional Insight: As a registered dietitian, I find these meatballs incredibly valuable because they deliver satisfying protein and that crucial savory, umami flavor without requiring animal products. The plant-based ground meat typically provides complete protein (containing all essential amino acids) because most brands combine pea protein with other plant sources. This means your body can use this protein just as effectively as meat-based protein. The addition of breadcrumbs adds resistant starch, which many emerging studies suggest has benefits for digestive health and satiety.
These meatballs fit beautifully into plant-based, vegetarian, or flexitarian eating patterns, and they’re naturally cholesterol-free. For people managing blood pressure or sodium intake, you can reduce salt to ⅛ teaspoon without significantly impacting flavor.
What Can I Serve With Plant-Based Meatballs?
The beauty of this recipe is its versatility. Here are my favorite serving options based on what’s in my kitchen and what sounds good that particular night:
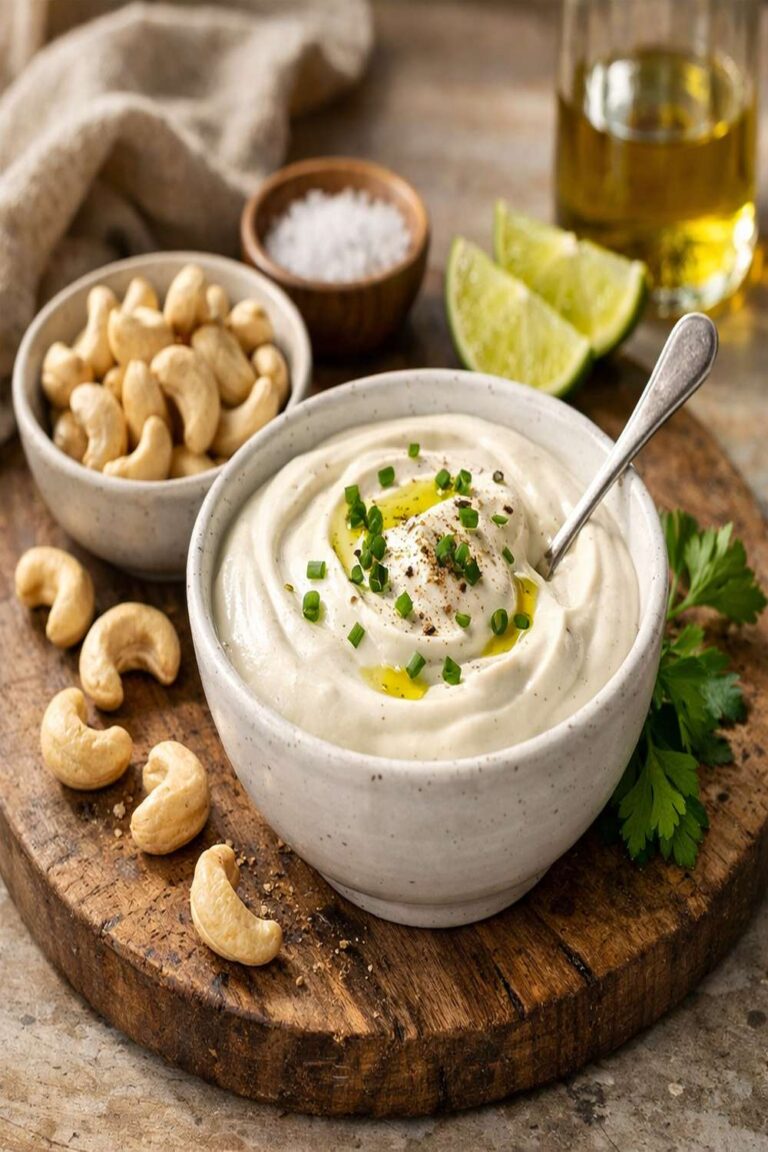
- In marinara sauce over pasta – The classic presentation. Warm your favorite marinara sauce, add the baked meatballs, simmer for 5 minutes to meld flavors, and serve over your preferred pasta. Add a dollop of Cashew Cheese Recipe for a creamy, plant-based finish that’s absolutely divine.
- In pita pockets with tzatziki and fresh vegetables – Slice warm pita bread, add a few meatballs, top with cucumber, tomato, red onion, and a homemade tzatziki made with cashew cream and fresh dill. It’s Mediterranean comfort food at its finest.
- As appetizers with dipping sauces – Serve cooled meatballs on small skewers with a variety of dipping options: marinara, barbecue sauce, sweet chili sauce, or a creamy ranch made from plant milk and herbs. Perfect for parties.
- Over rice with a savory broth – Serve meatballs over brown rice or quinoa, drizzled with a simple vegetable or mushroom broth seasoned with soy sauce, ginger, and garlic. Add steamed bok choy for a completely satisfying meal.
- In a plant-based “meatball sub” sandwich – Warm crusty bread, stuff it with meatballs and marinara, top with Cashew Mozzarella Recipe that melts beautifully over warm meatballs, and toast until the bread is crispy. This is indulgent in the best way.
- In Buddha bowls with grains and vegetables – Build a bowl with your choice of grain (farro, quinoa, rice), roasted vegetables, fresh greens, your plant-based meatballs, and a tahini dressing. It’s a complete meal in one bowl.

Impossible Meatballs Recipe
Ingredients
Method
- Start this step first thing, before you even open the package of plant-based ground. This matters because you want your oven to reach the proper temperature by the time your meatballs are shaped and ready to bake. Preheating usually takes about 15 minutes, which gives you plenty of time to gather ingredients and mix everything together. Turn your oven on now. If your oven has a preheat light or beep, wait for that signal that it's ready. If you have an oven thermometer, place it on the middle rack where your baking sheet will go—this way you'll know the actual temperature of the cooking space, not just what the dial says.

- While your oven preheats, take your baking sheet and either confirm it's non-stick or line it with parchment paper. Parchment paper is your insurance policy against sticking—it creates a barrier between the meatballs and the metal sheet, allowing everything to release beautifully when cooked. Do not skip this step. I've seen even experienced home cooks frustrated by meatballs that stick stubbornly. It's not because they did something wrong; it's because they skipped this protective layer. Place the parchment paper flat on the sheet, pressing down the corners so it stays in place. Set your prepared baking sheet aside on a nearby counter. You'll use it in just a few minutes.
- Open your package of plant-based ground and pour it into your mixing bowl. Don't be alarmed by how it looks. It might appear crumbly, loose, or almost granular at first. This is completely normal and expected. The mixture hasn't had any liquid yet, so the particles haven't bonded together. If you're using a brand you've never tried before, this is your first moment of "okay, is this going to work?" The answer is yes, it's going to work beautifully. That loose texture is exactly what you want at this stage. Gently break up any larger clumps with your fingers or a fork, but don't worry about making it perfectly uniform. The mixing that's about to happen will take care of any texture inconsistencies.
- Before you start mixing, measure out every single seasoning. This is called mise en place in cooking, and it's a game-changer for beginners. It means everything is prepared and ready before you start combining things. This prevents you from forgetting an ingredient halfway through mixing. Gather your measuring spoons. Measure out: 1 teaspoon garlic powder, ½ teaspoon onion powder, ½ teaspoon basil, ½ teaspoon parsley, ¼ teaspoon thyme, ¼ teaspoon oregano, ¼ teaspoon salt, and ¼ teaspoon pepper. Line them up in order on your counter. Also measure 2 tablespoons panko breadcrumbs and 3 tablespoons plant milk into small separate containers or bowls. Having everything pre-measured means you won't second-guess amounts or accidentally add too much of something.
- Pour the 3 tablespoons of plant milk directly into the bowl with your plant-based ground. This liquid is the crucial binding agent that transforms loose particles into a cohesive mixture. The plant milk activates the natural starches and proteins in the mixture, helping everything stick together. Follow immediately with the 2 tablespoons of panko breadcrumbs. These act as additional binders and also help lighten the texture slightly, creating a more tender final result. Now, using your clean hands or a sturdy spoon, mix these three components together thoroughly. Don't be timid about this—you're not being rough or damaging anything. Mix until you don't see any obvious dry particles of plant-based ground. The mixture should look evenly moistened and somewhat cohesive, like damp sand that could hold a shape.
- Now pour in all your measured seasonings: the garlic powder, onion powder, basil, parsley, thyme, oregano, salt, and pepper. Mix everything together thoroughly, using your hands for the most effective blending. Your hands will distribute the seasonings much more evenly than a spoon could. Mix for about 2-3 minutes, making sure there are no visible white streaks of garlic powder or spice pockets where seasonings are concentrated. You want the seasonings evenly distributed throughout so every bite tastes consistently flavorful. The mixture might seem a little sticky or wet at this point—that's perfect. The mixture should hold together when you squeeze it gently in your fist, but it shouldn't be so wet that it slumps immediately. If it seems too loose, add another tablespoon of panko. If it seems too dry, add another tablespoon of plant milk. You're looking for a consistency similar to slightly damp ground meat.
- This is where the fun starts, and where you'll realize how easy this actually is. Scoop about 1½ tablespoons of the mixture into your palm. You can use an actual tablespoon measuring spoon to scoop, or you can eyeball it—meatballs don't need to be perfectly uniform to be delicious. Roll the mixture gently between both palms, applying gentle, steady pressure until it forms a smooth ball. Don't squeeze too hard—you're trying to shape it, not compress it. A gentle rolling motion is all you need. If the mixture sticks to your hands, quickly rinse your hands with cool water and continue (the moisture helps the mixture release from your skin). Place each shaped meatball on your prepared baking sheet. Space them about 1 inch apart—they don't need tons of room since they won't expand much, but a little breathing room allows heat to circulate evenly. Continue until you've shaped all the mixture into meatballs. You should have approximately 24 meatballs, depending on how big you made each one. If some are slightly larger or smaller than others, that's completely fine. They'll all taste equally delicious.
- Slide your baking sheet into your preheated 425°F oven on the middle rack. Set a timer for 10 minutes. This is your exact baking time for this recipe at this temperature. Your oven might cook slightly faster or slower than average, but 10 minutes is the sweet spot for most home ovens. Walk away. This is the beautiful part—zero supervision needed. The meatballs will bake hands-free while you can start on sauce, set the table, or just take a breath. When the timer goes off, carefully remove the baking sheet from the oven (the sheet will be hot—use oven mitts or a kitchen towel). Look at the meatballs. They should be golden-brown on the outside and feel firm when you gently press one. They won't be hard or rock-solid; they should give slightly when pressed but hold their shape.
Notes
FAQs
Can I make these meatballs without the breadcrumbs?
Technically yes, but I wouldn’t recommend it for beginners. The breadcrumbs serve a critical purpose—they absorb and distribute moisture evenly while helping bind the mixture. Without them, you’re likely to end up with meatballs that are either too dense or too loose. If you absolutely cannot use breadcrumbs for dietary reasons, you could try using ground flaxseed (1 tablespoon mixed with 3 tablespoons water) or chia seeds (1 tablespoon mixed with 3 tablespoons water) as a binder, but the texture will be slightly different. I’d recommend increasing the plant milk to 4 tablespoons if you’re skipping breadcrumbs.
Do I need to use exactly 425°F, or can I adjust the temperature?
You can adjust slightly, but understand that temperature and time are connected. At 400°F, add 2-3 minutes to the baking time. At 450°F, reduce the time to 8-9 minutes. The meatballs are done when they’re golden-brown on the outside and feel set when gently pressed. Lower temperatures take longer but can result in a slightly more tender interior. Higher temperatures cook faster but might create a crispier exterior. For absolute beginner confidence, stick with 425°F for 10 minutes—it’s the sweet spot.
Can I cook these in a skillet on the stovetop instead of baking?
Yes, though baking is easier and more forgiving. If you prefer stovetop cooking: Heat 1 tablespoon of neutral oil (olive, vegetable, or coconut) in a non-stick skillet over medium heat. Once the oil is hot but not smoking, carefully add meatballs in a single layer (work in batches if needed). Cook for 3-4 minutes on each side, rolling them occasionally, until golden-brown all over and cooked through (about 8-10 minutes total). The downside is that you’re actively monitoring them and flipping them. The upside is that you get more of that beautiful golden crust. I personally prefer baking because it’s hands-free, but stovetop works if that’s your preference.
What’s the difference between plant-based ground meat and other plant proteins?
Excellent question. Plant-based ground meat (like Impossible, Beyond, or store brands) is specifically engineered to mimic ground meat in texture and flavor. It contains binders, moisture, seasonings, and sometimes colorants to look and cook like animal meat. Regular plant proteins like tofu, tempeh, textured vegetable protein, or legume-based proteins require different preparation and handling. They’re not interchangeable. For this recipe specifically, you need actual plant-based ground meat, not crumbled tofu or cooked lentils. These aren’t substitutes; they’re different ingredients that shine in different recipes.
Can I make these meatballs completely nut-free if someone has allergies?
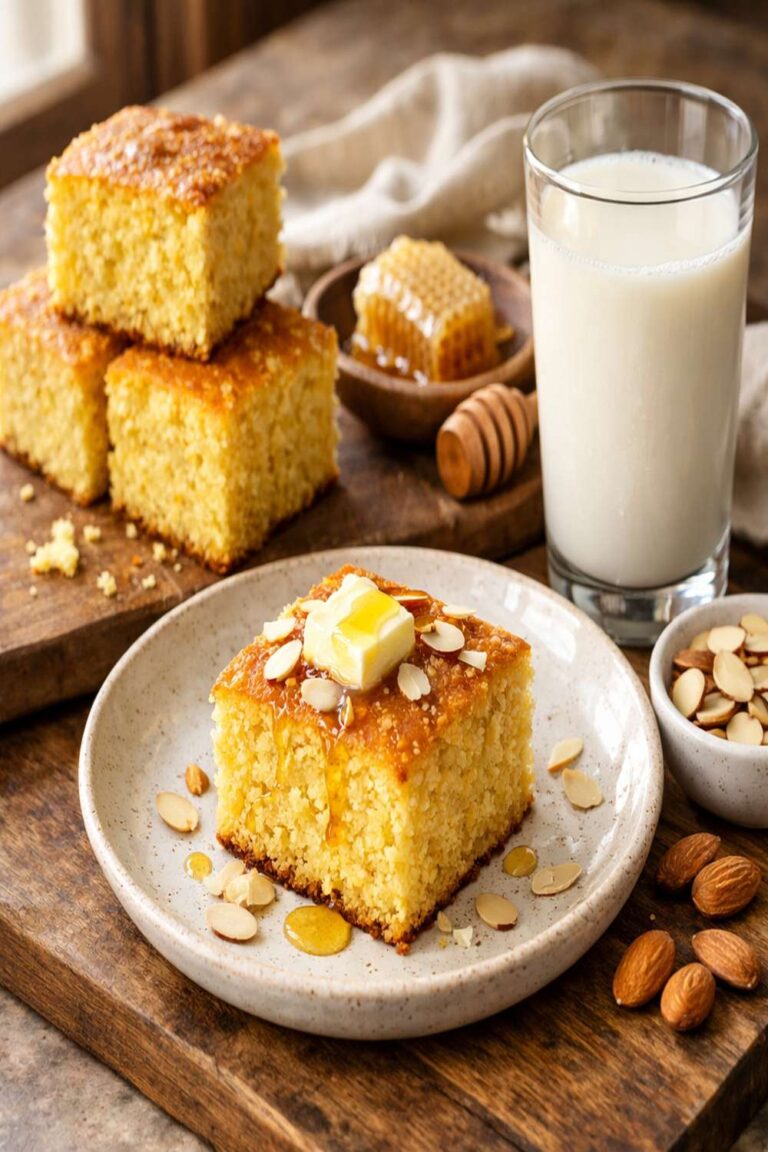
This base recipe is already nut-free—there are no nuts in the meatballs themselves. However, I recommend the this simple cake for a delicious nut-free dessert if you’re serving people with allergies. For serving these meatballs in a nut-free environment, avoid the cashew cheese topping (mentioned in the serving suggestions) and instead use nut-free vegan cheese or just serve them plain with sauce. Always check your plant-based ground meat package for allergen information, as some brands manufacture in facilities that also process nuts.
How many meatballs should I serve per person?
For a main course (with sides like pasta, rice, or vegetables), plan on 4-6 meatballs per person. As an appetizer or starter, 2-3 meatballs per person works beautifully. These approximate to 200-300 calories for a main course serving and 100-150 calories for an appetizer serving, which fits comfortably into most meal plans.
Seasonal Variations: Making These Year-Round
Spring version: Replace half the dried parsley with fresh spring herbs like fresh mint and tarragon. Add a tiny pinch of lemon zest to the mixture. Serve with fresh peas and tender spring vegetables.
Summer version: Add ½ teaspoon of smoked paprika to give the meatballs a grilled flavor even though you’re baking them. Serve with fresh tomato sauce and fresh basil garnish. Pair with light summer salads or grilled vegetables.
Fall version: Add ¼ teaspoon of ground cumin and ⅛ teaspoon of ground cinnamon (yes, really—these create a warm, slightly Middle Eastern flavor). Serve with roasted root vegetables and hearty grains like farro.
Winter version: Keep the recipe as-is, but