This post contains affiliate links. As an Amazon Associate I earn from qualifying purchases.
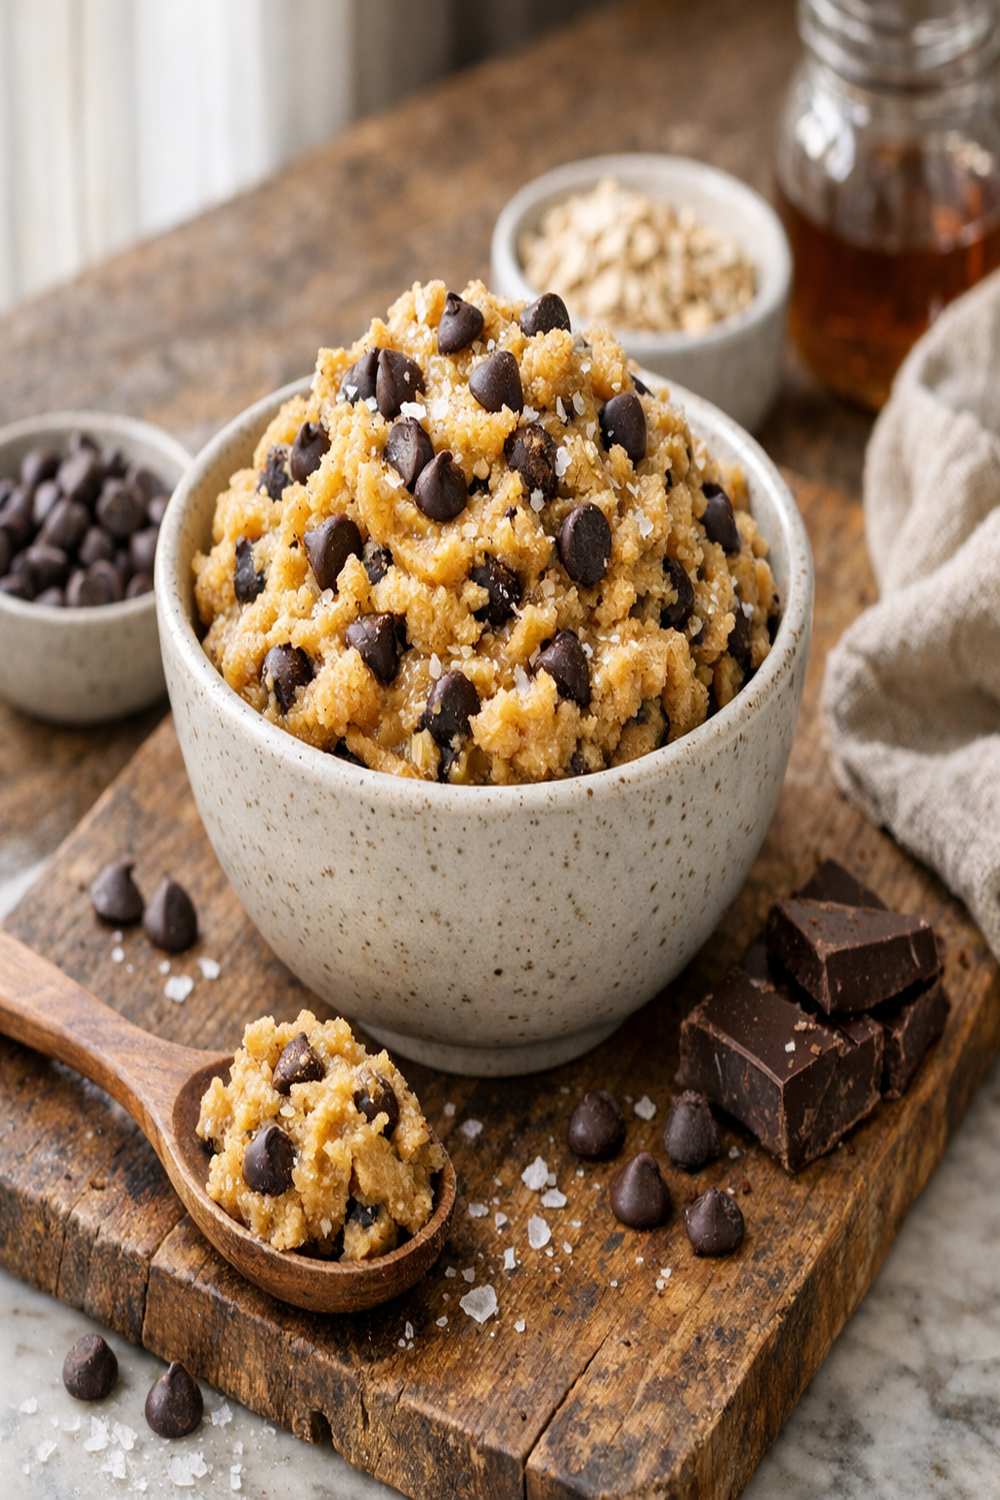
I’m going to be honest with you—cookie dough has always been my weakness. That raw, buttery, chocolatey moment before the oven even gets involved? Pure magic. But for years, I felt guilty about eating it because of the raw flour and eggs. Then I discovered this vegan cookie dough recipe, and everything changed. Make this once on a Sunday afternoon, portion it into small glass containers, and you’ll have an elegant, nutritionally balanced dessert ready to grab whenever those 3 p.m. cravings hit. No baking required, no guilt, just wholesome indulgence that actually nourishes your body. If you’re looking for other no-buss vegan treats, my this simple cake is another reader favorite that meal preps beautifully.
Cookie Dough Vegan Recipe: Make Once, Enjoy All Week
I’ll never forget the Sunday afternoon my niece asked me why I couldn’t just eat the cookie dough without baking it. She was maybe seven years old, sitting on my kitchen counter in Miami, and that simple question sparked something in me. At that moment, I realized I’d spent years as a registered dietitian worrying about food safety and nutrition facts when I should’ve been problem-solving ways to make people happy. That’s when I started experimenting with heat-treated flour and vegan butter to create a safe, delicious cookie dough you could actually eat straight from the bowl.
What began as a kitchen experiment for my niece became a game-changer for my meal prep clients who wanted something sweet without the commitment of baking. This recipe is foolproof, requires no special equipment, and scales beautifully for the entire week ahead. Better yet, it’s completely shelf-stable for up to five days when stored properly—which means Monday’s portion tastes just as good as Friday’s.
Why This Recipe Is Perfect for Meal Prep
- Zero cooking time saves 45 minutes across your week – no oven preheating, no baking time, no cooling period. Everything happens in a mixing bowl, and you’re done in under 10 minutes total.
- Maintains perfect texture throughout the week – unlike baked cookies that go stale, this vegan cookie dough actually stays creamy and luxurious when properly sealed. The vegan butter creates a stable emulsion that doesn’t separate or harden.
- One batch transforms into five different dessert moments – eat it plain on Monday, layer it into parfaits on Wednesday, use it as a dip for fruit on Thursday, and fold it into nice cream on the weekend. Same base ingredient, completely different experiences.
- Perfect portion control without deprivation – each pre-portioned serving gives you that satisfying cookie dough indulgence (roughly 150-180 calories) without the “I ate an entire batch” guilt that comes with traditional baking.
Your Weekly Meal Plan With This Recipe
Here’s exactly how I build a week around this single batch of cookie dough. The beauty is that you’re not eating the same thing five times—you’re getting five completely different experiences from one smart prep session. This is the kind of strategic eating that helps you stay consistent with your health goals without feeling restricted.
- Monday lunch: Plain Cookie Dough with Fresh Berries – Portion out 3 tablespoons into a small bowl, top with fresh raspberries and a drizzle of maple syrup. Eat with a spoon for that nostalgic, indulgent moment.
- Wednesday afternoon snack: Cookie Dough Fruit Dip – Let your portion sit at room temperature for 5 minutes to soften slightly, then use apple slices, pear wedges, and almonds as dippers. The creaminess makes you feel like you’re having dessert, but you’re actually hitting multiple food groups.
- Thursday breakfast: Cookie Dough Nice Cream Base – Blend your portion with half a frozen banana, a splash of almond milk, and a pinch of sea salt. You’ve just transformed cookie dough into a protein-forward breakfast that keeps you full until lunch.
- Friday evening: Cookie Dough Yogurt Parfait – Layer your cookie dough with coconut yogurt and granola for a sophisticated dessert that looks like you spent an hour in the kitchen but took exactly three minutes to assemble.
- Saturday: Cookie Dough Chocolate Shake – Blend your final portion with unsweetened cocoa powder, vegan milk, and ice for a fudgy treat that satisfies without any processed ingredients.
The Ingredients—Scaled for a Full Week
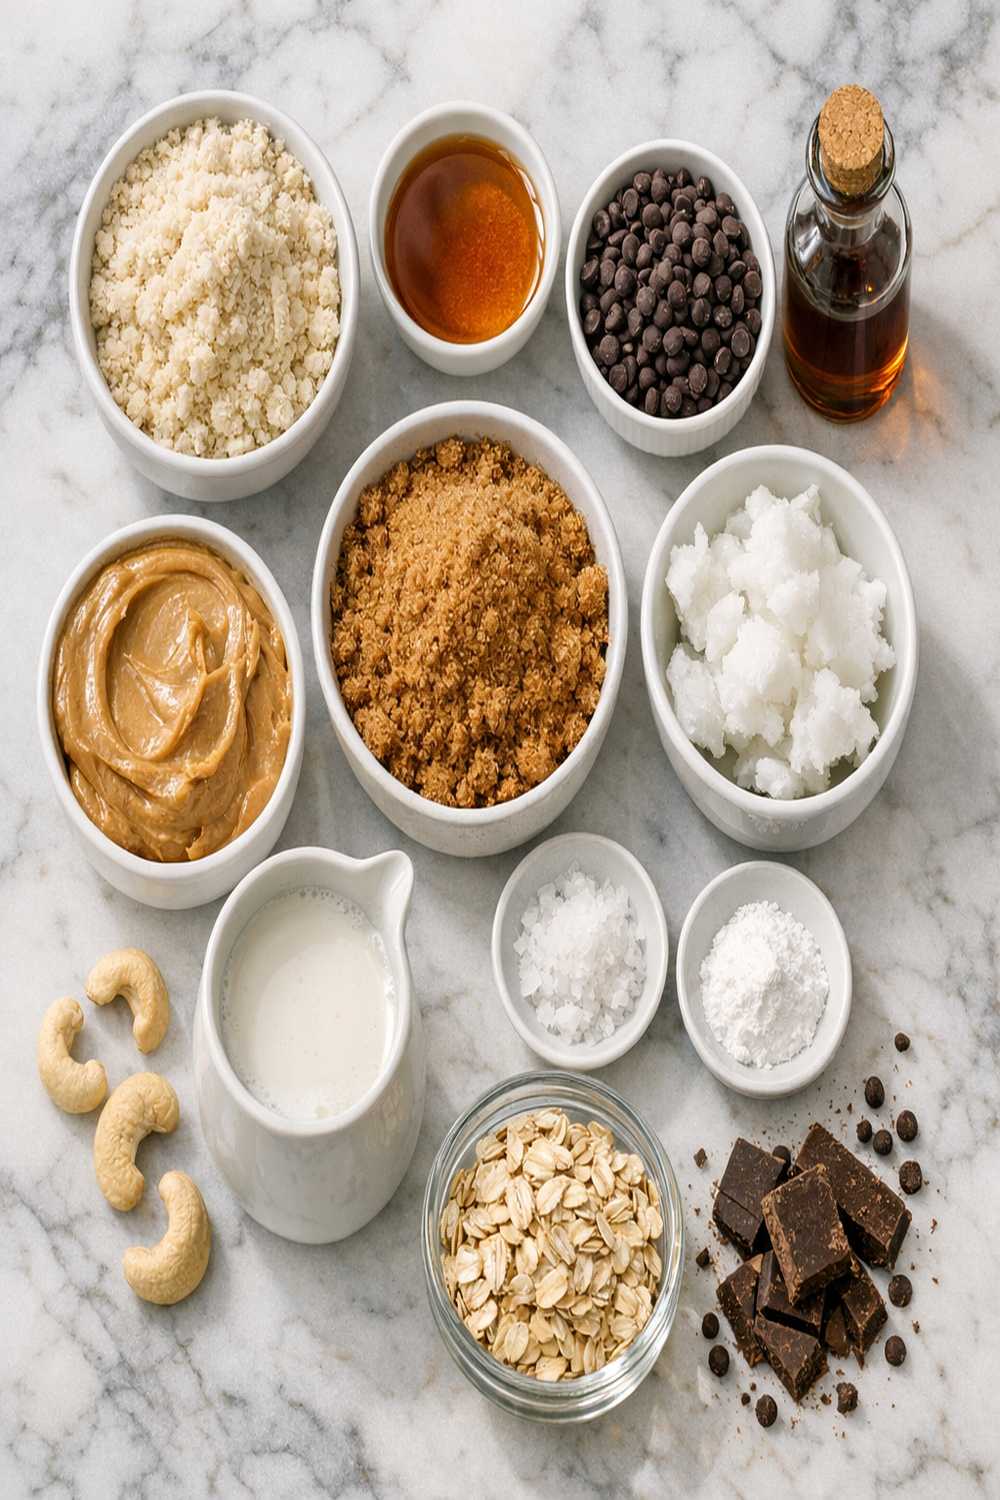
I’ve scaled this recipe to make approximately seven to eight individual servings, which gives you one satisfying portion per day with a little buffer for taste-testing (and trust me, you’ll want to taste-test this one). All of these ingredients are shelf-stable staples that I keep on hand year-round in my Florida kitchen, and they work together to create a perfectly balanced treat that doesn’t spike your blood sugar or leave you feeling heavy.
- 2 cups all-purpose flour, heat-treated (most critical ingredient—must be food-safety treated before using raw; see Step 1 for detailed instructions)
- 1 teaspoon natural almond extract, optional (adds a sophisticated, almost marzipan note that deepens the cookie dough flavor profile)
- 2 teaspoons pure vanilla extract, not imitation (imitation becomes bitter after a few days; pure vanilla stays fragrant and smooth)
- ¾ cup light brown sugar, packed firmly (provides moisture and chewiness; won’t clump if stored in an airtight container)
- 1 cup vegan butter, softened to room temperature (contains plant-based fats that stay creamy without dairy; store in a cool cupboard and it’ll last 3-4 weeks after opening)
- 6 tablespoons white granulated sugar (creates the perfect sweetness balance without overwhelming vegan butter’s delicate flavor)
- 1 cup vegan dark chocolate chips, refined sugar-free if possible (melts beautifully into the dough and stays stable throughout the week when refrigerated)
- ¼ teaspoon sea salt (brightens sweetness and prevents one-dimensional flavor; use fine sea salt to distribute evenly)
- 3 tablespoons unsweetened almond milk or milk of choice (keeps mixture creamy without excess moisture that causes separation)
The Meal Prep Process: How to Make Cookie Dough Vegan Recipe in Bulk
As a registered dietitian, I’ve learned that meal prep isn’t about being perfect—it’s about building a system that actually works with your life, not against it. This process takes approximately 12-15 minutes from start to finish, and there’s zero cleanup stress because you’re using one mixing bowl and one spatula. I like to make this on a Sunday afternoon while listening to a podcast, so the time disappears and I’m actually enjoying the process instead of rushing through it.
Step 1: Heat-Treat Your Flour for Food Safety
This is the non-negotiable step that makes raw cookie dough safe. Raw flour can contain E. coli or salmonella, which is why I always treat it before using it in any recipe where it won’t be baked. You have two options, and I prefer the oven method because it’s more reliable and takes only six minutes.
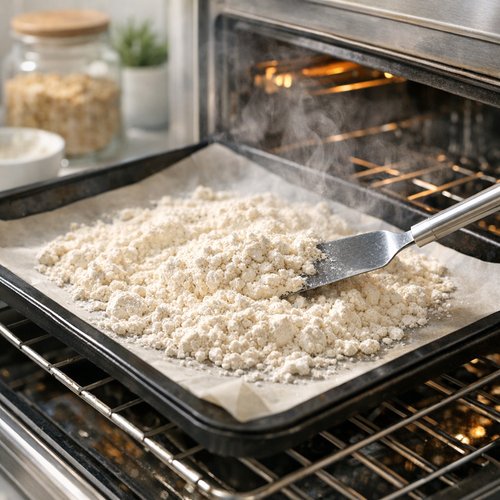
Oven method (my preference): Preheat your oven to 350°F. Spread your two cups of flour evenly on a rimmed baking sheet—don’t pile it up or use a small plate. Bake for exactly 6-8 minutes until it reaches an internal temperature of 165°F when measured with a food thermometer. The flour will smell toasted but won’t change color noticeably. Let it cool completely on the baking sheet (this takes about 10 minutes) before using. This is the safest method because you’re guaranteed the entire batch reaches the proper temperature.
Microwave method (faster but requires attention): Place your flour in a microwave-safe bowl and microwave on high in 30-second intervals, stirring between each interval, until it reaches 165°F on an instant-read thermometer. This typically takes 90-120 seconds total depending on your microwave’s power. The flour may become slightly clumpy—this is normal and will incorporate smoothly into your dough.
Expert tip from my clinical nutrition background: Heat-treated flour is completely safe and doesn’t change the nutritional profile of your finished dough. The protein content stays identical, the carbohydrate structure is unaffected, and the only difference is the elimination of harmful bacteria. Once cooled, your treated flour is indistinguishable from raw flour in terms of texture or taste.
Step 2: Cream Your Butter and Sugars Together
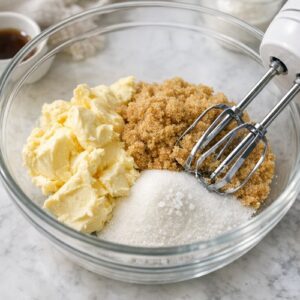
While your flour is cooling, add your softened vegan butter, light brown sugar, white sugar, and sea salt to a large mixing bowl. Using an electric mixer on medium speed, beat for exactly 2-3 minutes until the mixture becomes pale, fluffy, and noticeably lighter in color. This creaming process is what creates the fluffy texture—you’re incorporating tiny air pockets that make the finished dough feel luxurious rather than dense.
Timing matters here. If you under-mix (less than 2 minutes), your dough will be grainy and separated. If you over-mix (more than 4 minutes), the vegan butter can become greasy and break down. Watch for the mixture to double in volume and lighten by about two shades—that’s your signal you’ve nailed it.
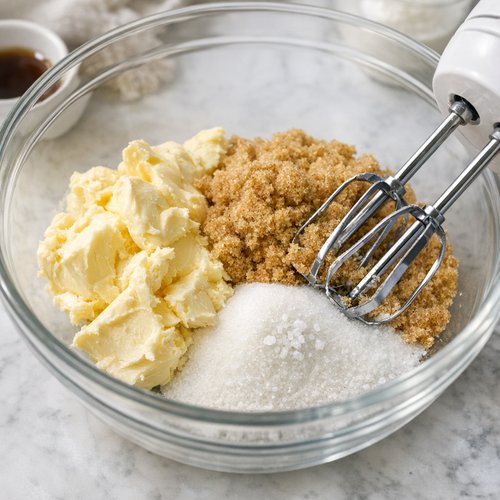
Make-ahead efficiency tip: You can prepare this mixture up to 24 hours ahead and keep it covered in the refrigerator. When you’re ready to continue, let it sit at room temperature for 5 minutes before adding the remaining ingredients. This is perfect for meal preppers who want to break the process into two short sessions.
Step 3: Add Vanilla, Almond Extract, and Milk
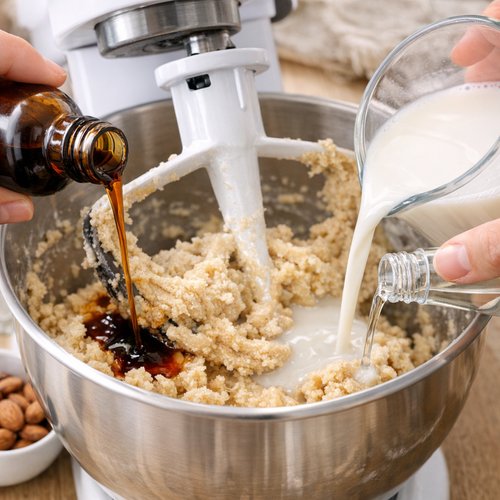
Reduce your mixer speed to low and add your two teaspoons of vanilla extract, one teaspoon of almond extract (if using), and three tablespoons of almond milk. Mix for about 45 seconds until completely combined and the mixture looks smooth. You should see no streaks of extract left behind, and the milk should be fully incorporated so there’s no liquid pooling at the bottom of the bowl.
This step hydrates your dough slightly and ensures even flavor distribution. The vegan milk also helps stabilize the emulsion, which is why your finished dough stays creamy instead of separating or breaking down as the week progresses.
Step 4: Fold in Your Cooled Heat-Treated Flour
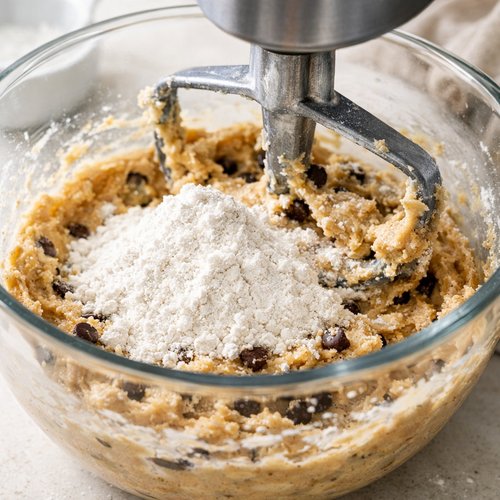
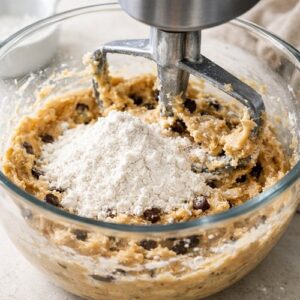
Once your flour has cooled completely, add it to your wet mixture in two additions. Start the mixer on the lowest speed and add half your flour, mixing just until it’s incorporated (about 30 seconds). Add the remaining flour and mix for another 30 seconds until no white streaks are visible. Do not overmix at this stage. Overmixing develops gluten, which makes your cookie dough tough and dense instead of soft and creamy.
Your dough will look crumbly and slightly dry at this moment—this is completely normal. Stop the mixer and grab a rubber spatula to do the final incorporating by hand.
Step 5: Fold in Your Chocolate Chips by Hand
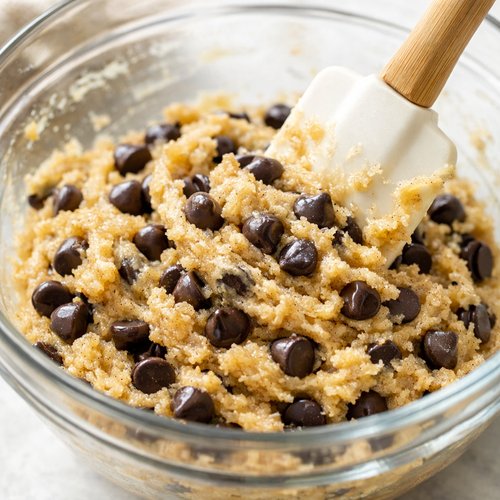
Using a rubber spatula, gently fold your chocolate chips into the dough with about 12-15 strokes. You want to see the chips distributed throughout, but you don’t want to crush them or overmix the dough. The folding motion creates the perfect texture—creamy, cohesive, and studded with chocolate throughout. This is the moment where it stops being “ingredients in a bowl” and becomes actual cookie dough that you want to eat immediately.
Pro move for meal preppers: Reserve about ¼ cup of chocolate chips and fold them in at the very end. This gives you visible chocolate distribution on top of your portioned containers, which makes the visual appeal better when you’re grabbing a portion during the week. It’s a small thing, but presentation matters for food motivation.
Step 6: Portion Into Glass Containers
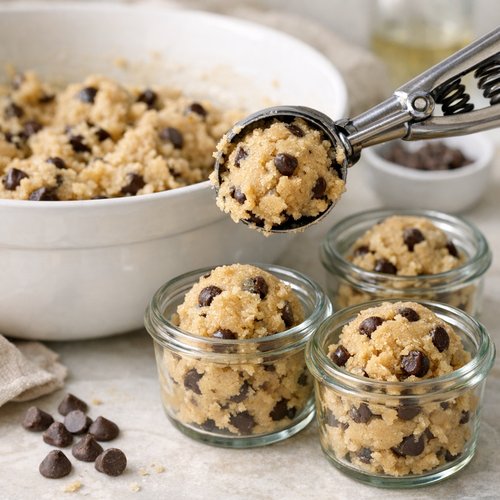
Transfer your finished dough to a large mixing bowl (to make portioning easier) and allow it to rest at room temperature for 2 minutes. Using an ice cream scoop or a tablespoon, divide your dough into seven to eight portions. I recommend using 3-ounce glass containers with tight-fitting lids—they’re microwave-safe, don’t absorb odors, and you can see exactly what’s inside without opening them.
Make sure each container has a tight seal and is labeled with the date (use a piece of painter’s tape and a permanent marker on the bottom—no labels to peel off later). Store immediately in the refrigerator, where your cookie dough will firm up slightly but remain perfectly spreadable and delicious.
Storage and Organization System
- Glass containers with airtight lids – I use 3-ounce glass ramekins with snap-top lids because they prevent air exposure that causes oxidation and flavor degradation. Glass doesn’t leach into fatty foods like plastic can, and you can actually see your portions at a glance. Avoid plastic containers for longer than three days because the vegan butter can absorb odors and flavors from surrounding foods.
- Portioning strategy for maximum freshness – Divide your batch into seven equal portions (roughly 3 tablespoons each, approximately 150-180 calories per serving). Store all portions together in a dedicated section of your refrigerator, preferably in the coldest zone (usually the back of a shelf, not the door). The consistent cold temperature keeps the dough perfectly creamy without any separation or hardening.
- Labeling system that actually works – Use painter’s tape on the bottom of each container and write the date prepared plus the date by which it should be eaten (five days from preparation). This removes guesswork during the week when you’re tired and just want to grab something. I also write the portion size (e.g., “3 tbsp”) so anyone in your household knows they’re getting one serving, not eating the entire week’s batch at once.
- Backup portion storage in the freezer – If you want to make eight to ten portions, freeze the extras immediately in airtight containers. They’ll keep for up to three months, and you can thaw them in the refrigerator overnight whenever you want an extra week of this treat available.
How to Reheat Without Losing Quality
Here’s the beautiful part about vegan cookie dough: you don’t need to reheat it at all. It’s perfectly delicious straight from the refrigerator, and the cold temperature actually enhances the creamy, luxurious texture. However, if your portions have firmed up a bit by day four or five (which they will slightly), here are your best strategies for restoring them to day-one texture.
Straight from the refrigerator: This is my absolute preferred method. Simply remove your container from the fridge and eat with a spoon. The cold dough actually feels more indulgent because it’s slightly firmer, and the chocolate chips have a pleasant snap to them. The vegan butter becomes more solid when cold, which creates a texture remarkably similar to actual cookie dough.
Room temperature sit (best for firm portions): If your dough feels too firm on days four or five, let it sit on the counter for 5-8 minutes while you’re doing something else (checking emails, making tea, whatever). This brings it back to that perfect spreadable consistency without any added effort. You’ll know it’s ready when you can press your spoon into it without resistance.
Microwave softening (use with caution): If you need immediate softness, transfer your portion to a small microwave-safe bowl and microwave on 50% power for 15-20 seconds. Check it at the 10-second mark because microwave power varies wildly. You want it softened, not melted—there’s a very fine line, and overshooting creates a separated, oily mess. This method works but I don’t recommend it because it’s easy to overheat and damage the texture.
Can I Freeze Cookie Dough Vegan Recipe?
Yes, and I actually think freezing is brilliant for meal preppers who want to extend their options. Here’s my complete freezing and thawing protocol based on food safety standards and texture preservation.
Freezing process: Portion your cookie dough into individual glass containers (exactly as described in Step 6). Allow the portions to sit in the refrigerator for at least 2 hours so they’re completely firm before freezing. This prevents any liquid separation. Wrap each container tightly with plastic wrap, then place them all into a large freezer bag labeled with “Cookie Dough” and the preparation date. Store in the coldest part of your freezer (usually the back) where the temperature remains stable at 0°F or below.
Freezer storage timeline: Your cookie dough will maintain peak quality for up to 12 weeks in the freezer. After 12 weeks, it won’t become unsafe, but the vegan butter can oxidize and develop a slightly off flavor, and the chocolate chips may become dry. I personally wouldn’t stretch past 10 weeks if you’re really particular about texture.
Thawing method (this matters): Move your frozen portions to the refrigerator the night before you plan to eat them. Allow them to thaw for at least 8 hours (overnight is perfect) at refrigerator temperature. This slow thawing prevents the vegan butter from separating and keeps the texture creamy instead of grainy. You’ll notice some liquid may have accumulated in the bottom of the container—this is condensation and is completely normal. Simply drain it off or mix it back in.
Do NOT thaw at room temperature. This is the cardinal rule of food safety with any dough product. Room temperature thawing allows bacteria to multiply in the sweet, fatty environment of your cookie dough. Refrigerator thawing is slow and safe, period.
Once thawed, your cookie dough is identical to freshly made dough and should be eaten within three days. Refreezing is not recommended because it creates texture breakdown.
Expert’s Nutritional Tip: Understanding Your Vegan Butter Choice
As someone with clinical nutrition training, I need to be transparent about vegan butter because it matters for both nutrition and taste. Not all vegan butters are created equal, and your choice directly impacts the final product.
What to look for: Choose vegan butter with a fat content of at least 80% (the same as dairy butter) like Miyoko’s, Earth Balance, or Naturli. These brands use coconut oil, palm oil, or a blend of plant-based oils that create the right texture and flavor profile. Avoid ultra-low-fat vegan butters (under 70% fat) because they contain excess water, which makes your cookie dough grainy and separated.
Nutrition breakdown: A typical vegan butter contains about 100 calories and 11 grams of fat per tablespoon, with similar saturation levels to dairy butter but from plant sources. According to USDA nutritional databases, plant-based saturated fats behave differently in the body than dairy-based saturated fats, though research is still evolving on the exact health implications. What matters for this recipe is that you’re using a product formulated with enough fat to create that creamy, luxurious texture.
Can you use dairy butter instead? Absolutely yes. If vegan isn’t your priority, standard unsalted butter creates an almost identical product with slightly richer flavor. Use the exact same measurements—butter and vegan butter have nearly identical densities, so no adjustments needed. The result will be slightly firmer when cold because dairy butter has a higher melting point, but otherwise identical.
Common Mistakes to Avoid
In my years of teaching nutrition and meal prep, I’ve watched people make these four mistakes repeatedly. Learn from their experience so your cookie dough turns out perfect every single time.
Mistake 1: Not heat-treating the flour thoroughly. I’ve had clients tell me they “kind of toasted” their flour or used it while still warm. Heat-treating requires reaching 165°F throughout the entire batch, not just on the surface. Use a food thermometer—seriously. This isn’t optional if you’re eating raw dough, and it takes an extra 30 seconds but prevents foodborne illness. Non-negotiable.
Mistake 2: Over-mixing after adding flour. People confuse “mixing until combined” with “mixing until perfectly smooth.” Stop mixing as soon as you can’t see white streaks. Those tiny specks of flour will incorporate as you fold in the chocolate chips. Over-mixing develops gluten, which makes your dough tough and dense. Creamy and slightly heterogeneous is what you’re after, not perfectly homogeneous.
Mistake 3: Using room-temperature stored cookie dough beyond day three. This dough contains no preservatives and no eggs, which means bacteria can grow in the sweet, fatty environment if temperatures fluctuate. Always store in the coldest part of your fridge, and honestly, consume by day five maximum. If you’re going to keep it longer, freeze it. There’s no gray area here—this is a food safety issue.
Mistake 4: Skipping the salt or using too little. The ¼ teaspoon of sea salt isn’t about making this savory—it’s about brightening the sweetness and preventing flavor flatness. I’ve seen people skip salt thinking it’s unnecessary in a sweet recipe, and the result is one-dimensional, cloying dough. Trust the salt. It’s transformative.
Nutrition Information
Based on USDA nutritional data and my portion calculations (one serving = approximately 3 tablespoons or 150-180 calories), here’s what you’re getting per serving:
Per serving nutrition: 165 calories | 10g fat (6g saturated) | 18g carbohydrates | 1g fiber | 12g sugar (8g added sugar) | 1g protein | 45mg sodium
This is genuinely balanced nutrition for a dessert, and here’s why I love it for meal preppers: one serving satisfies your sweet craving without causing blood sugar spikes because the fat and protein content buffers the sugar absorption. You’re not eating “empty calories” of processed cookie dough—you’re eating whole-food ingredients (vegan butter, flour, sugar, chocolate) in reasonable portions.
Weekly nutritional impact: If you eat one portion daily across the week, you’re consuming approximately 1,155 calories from cookie dough—reasonable within most nutritional frameworks. You’re getting consistently adequate fiber from the whole-grain flour options (if using them), and the vegan butter provides vitamin E and plant-based fats that support hormone and brain health.
For clients with specific dietary concerns (diabetes, pre-diabetes, or blood sugar sensitivity), this recipe can be adapted using monk fruit or allulose sweeteners in equal amounts. The texture changes slightly—it becomes denser—but remains delicious and significantly reduces the sugar impact.
What to Pair With Cookie Dough Vegan Recipe Throughout the Week
Cookie dough is beautiful on its own, but pairing it with complementary foods transforms it from a simple dessert into something that feels more intentional and sophisticated. Here’s how I structure my week around this treat to prevent boredom and ensure I’m hitting multiple food groups throughout the day.
- Monday: Pair with fresh berries and herbal tea – Raspberries or blackberries provide vitamin C and antioxidants that your body processes while you’re enjoying the indulgence. Pair with a cup of caffeine-free tea (chamomile or peppermint) and you’ve got a complete afternoon moment that feels luxurious and nourishing simultaneously.
- Tuesday: Pair with mixed nuts and fresh fruit – Add a small handful of almonds or walnuts alongside your cookie dough. The nuts provide protein and omega-3 fatty acids, while the dough gives you pleasure. It’s a sensible snack that doesn’t feel deprivation-based.
- Wednesday: Pair as a dip for vegetables and fruit – Use apple slices, pear wedges, celery sticks, and carrot rounds as dippers for your cookie dough (spread thinly on each). This transforms it into something your kids or partner might actually steal from you, and you’re sneaking vegetables into dessert.
- Thursday: Pair with coconut yogurt for a parfait – Layer your cookie dough with coconut or oat-based yogurt and granola. This creates a breakfast-adjacent dish that you could theoretically serve to company, which is the ultimate indicator that you’ve elevated your meal prep game.
- Friday: Pair with your choice of alternative milk in a blended shake – Blend your final portion with unsweetened almond milk, a tablespoon of almond butter, and ice for a fudgy protein shake that feels completely indulgent but requires zero additional cooking.
Looking for complementary recipes to round out your dessert options? My my go-to banana bread pairs beautifully with this cookie dough for a full breakfast spread, and my Apple Crisp Recipe Dairy Free offers another vegan option when you want something warm and comforting.
Seasonal Variations: Adapting Cookie Dough Throughout the Year
The base recipe is beautiful year-round, but I love adjusting it slightly based on seasonal ingredients and flavor profiles. Here’s how I adapt this recipe as the seasons change.
Spring variation (March-May): Reduce the chocolate chips to ¾ cup and add ¼ cup of freeze-dried strawberry pieces or raspberry pieces mixed in at the final folding stage. Add ½ teaspoon of fresh lemon zest to the wet ingredients. The result feels bright and seasonal without changing the fundamental structure.
Summer variation (June-August): This is when I sometimes use white chocolate chips instead of dark, and I add 2 tablespoons of coconut flour mixed into the regular flour. Add ½ teaspoon of coconut extract instead of almond extract. It’s lighter and more refreshing without being a completely different recipe.
Fall variation (September-November): Add 1 teaspoon of pumpkin pie spice to your dry ingredients and reduce chocolate chips to ¾ cup while adding ¼ cup of toffee chips. Some people think fall flavors are just for October, but I make this version through mid-November because it’s comforting and pairs perfectly with cooling temperatures.
Winter variation (December-February): Add ½ teaspoon of peppermint extract and use 100% dark chocolate chips (70% cacao or higher). The mint and dark chocolate combination tastes like holiday indulgence without requiring you to change much about the recipe. You can also stir in ¼ cup of crushed candy canes if you want that literal peppermint crunch.

Cookie Dough Vegan Recipe
Ingredients
Method
- This is the non-negotiable step that makes raw cookie dough safe. Raw flour can contain E. coli or salmonella, which is why I always treat it before using it in any recipe where it won't be baked. You have two options, and I prefer the oven method because it's more reliable and takes only six minutes. Oven method (my preference): Preheat your oven to 350°F. Spread your two cups of flour evenly on a rimmed baking sheet—don't pile it up or use a small plate. Bake for exactly 6-8 minutes until it reaches an internal temperature of 165°F when measured with a food thermometer. The flour will smell toasted but won't change color noticeably. Let it cool completely on the baking sheet (this takes about 10 minutes) before using. This is the safest method because you're guaranteed the entire batch reaches the proper temperature. Microwave method (faster but requires attention): Place your flour in a microwave-safe bowl and microwave on high in 30-second intervals, stirring between each interval, until it reaches 165°F on an instant-read thermometer. This typically takes 90-120 seconds total depending on your microwave's power. The flour may become slightly clumpy—this is normal and will incorporate smoothly into your dough. Expert tip from my clinical nutrition background: Heat-treated flour is completely safe and doesn't change the nutritional profile of your finished dough. The protein content stays identical, the carbohydrate structure is unaffected, and the only difference is the elimination of harmful bacteria. Once cooled, your treated flour is indistinguishable from raw flour in terms of texture or taste.

- While your flour is cooling, add your softened vegan butter, light brown sugar, white sugar, and sea salt to a large mixing bowl. Using an electric mixer on medium speed, beat for exactly 2-3 minutes until the mixture becomes pale, fluffy, and noticeably lighter in color. This creaming process is what creates the fluffy texture—you're incorporating tiny air pockets that make the finished dough feel luxurious rather than dense. Timing matters here. If you under-mix (less than 2 minutes), your dough will be grainy and separated. If you over-mix (more than 4 minutes), the vegan butter can become greasy and break down. Watch for the mixture to double in volume and lighten by about two shades—that's your signal you've nailed it. Make-ahead efficiency tip: You can prepare this mixture up to 24 hours ahead and keep it covered in the refrigerator. When you're ready to continue, let it sit at room temperature for 5 minutes before adding the remaining ingredients. This is perfect for meal preppers who want to break the process into two short sessions.
- Reduce your mixer speed to low and add your two teaspoons of vanilla extract, one teaspoon of almond extract (if using), and three tablespoons of almond milk. Mix for about 45 seconds until completely combined and the mixture looks smooth. You should see no streaks of extract left behind, and the milk should be fully incorporated so there's no liquid pooling at the bottom of the bowl. This step hydrates your dough slightly and ensures even flavor distribution. The vegan milk also helps stabilize the emulsion, which is why your finished dough stays creamy instead of separating or breaking down as the week progresses.

- Once your flour has cooled completely, add it to your wet mixture in two additions. Start the mixer on the lowest speed and add half your flour, mixing just until it's incorporated (about 30 seconds). Add the remaining flour and mix for another 30 seconds until no white streaks are visible. Do not overmix at this stage. Overmixing develops gluten, which makes your cookie dough tough and dense instead of soft and creamy. Your dough will look crumbly and slightly dry at this moment—this is completely normal. Stop the mixer and grab a rubber spatula to do the final incorporating by hand.
- Using a rubber spatula, gently fold your chocolate chips into the dough with about 12-15 strokes. You want to see the chips distributed throughout, but you don't want to crush them or overmix the dough. The folding motion creates the perfect texture—creamy, cohesive, and studded with chocolate throughout. This is the moment where it stops being "ingredients in a bowl" and becomes actual cookie dough that you want to eat immediately. Pro move for meal preppers: Reserve about ¼ cup of chocolate chips and fold them in at the very end. This gives you visible chocolate distribution on top of your portioned containers, which makes the visual appeal better when you're grabbing a portion during the week. It's a small thing, but presentation matters for food motivation.

- Transfer your finished dough to a large mixing bowl (to make portioning easier) and allow it to rest at room temperature for 2 minutes. Using an ice cream scoop or a tablespoon, divide your dough into seven to eight portions. I recommend using 3-ounce glass containers with tight-fitting lids—they're microwave-safe, don't absorb odors, and you can see exactly what's inside without opening them. Make sure each container has a tight seal and is labeled with the date (use a piece of painter's tape and a permanent marker on the bottom—no labels to peel off later). Store immediately in the refrigerator, where your cookie dough will firm up slightly but remain perfectly spreadable and delicious.

FAQs
Can I Make This Recipe Without a Stand Mixer?
Absolutely, though I’ll be honest—a hand mixer makes it significantly easier. If you only have a spoon, you can absolutely cream your butter and sugars together by hand using vigorous stirring for about 4-5 minutes until it’s pale and fluffy. Your arm will get tired, but it’s completely doable. The rest of the recipe involves minimal mixing, so you’re not in for a huge upper-body workout. For future baking projects, a simple hand mixer (they’re about $25-30) is one of the best meal prep investments you can make.
How Long Will This Cookie Dough Actually Last in the Refrigerator?
The vegan butter, flour, and chocolate chips are all shelf-stable, so your cookie dough will technically remain safe to eat for up to seven days when stored in an airtight container in a consistent cold temperature. However, I recommend consuming it within five days for peak texture and flavor. By day six, you might notice the chocolate chips become slightly dry or the dough’s texture shift subtly. When in doubt, freeze it. Frozen dough is better than questionable dough.
What If I Have a Nut Allergy? Can I Adapt This Recipe?
Yes, though you’ll need to modify two components. Use sunflower seed butter instead of almond butter (same measurement), and replace almond extract with vanilla extract only—use 2½ teaspoons vanilla total instead of combining it with almond extract. The result is slightly less complex in flavor profile but completely delicious and safe. All other ingredients in the base recipe are naturally nut-free.
Is There a Way to Make This Lower in Added Sugar?
You can substitute half of your white sugar with monk fruit sweetener or allulose in a 1:1 ratio. This reduces added sugar from about 12g per serving to around 6g per serving. The texture becomes slightly denser and less perfectly creamy because sugar contributes moisture and structure that sweetener substitutes don’t replicate exactly. I recommend making one small batch this way first to test whether you like it before committing your entire week’s meal prep to it. Some people love it; others find the texture difference too significant.
Can I Portion This and Eat It as Single Bites Instead of Scoops?
Honestly, yes, and this is a great strategy if you’re looking for portion control or want to use this as a party appetizer. Use a small cookie scoop (1-tablespoon size) to create individual balls, place them on parchment paper, and freeze them individually on a baking sheet. Once frozen solid (about 2 hours), transfer them to a freezer bag and eat them as needed—they’re like cookie dough truffles that you can grab individually. They’ll thaw to creamy perfection in about 5 minutes at room temperature, or you can eat them partially frozen for a different texture experience.
More Meal Prep Recipes You’ll Love
- Banana Cake Vegan Recipe – A make-ahead dessert that actually improves over a few days and pairs perfectly with this cookie dough for dessert variety
- Cashew Cheese Recipe – If you’re enjoying vegan recipes, this creamy cheese alternative meal preps beautifully for snacks and appetizers throughout the week
- Biscuit Recipe Vegan – Pair these with the cookie dough for a complete breakfast-meets-dessert experience, or enjoy them with meals throughout the week
Taking back control of your week through strategic