This post contains affiliate links. As an Amazon Associate I earn from qualifying purchases.
Whether you’re steering clear of dairy, following a vegan lifestyle, managing keto macros, or navigating gluten sensitivities, you don’t have to miss out on warm, tender scones fresh from the oven. I’ve spent years in clinical nutrition helping families adapt their favorite comfort foods, and I can tell you with certainty: dairy-free doesn’t mean flavor-free. My kitchen in sunny Florida has become ground zero for testing plant-based baking, and these scones have become the star of every weekend brunch. Whether you’re entertaining or feeding your own crew, this recipe works beautifully across every dietary preference.
In this guide, I’m sharing my foolproof approach to crafting scones that are tender, flaky, and completely customizable to your nutritional needs. You’ll find clear substitution charts, step-by-step instructions with safety warnings, and honest comparisons so you know exactly what to expect with each version.
The Ultimate Dairy-Free Scone Recipe for Every Diet (Keto, Vegan, Gluten-Free)
I’ll never forget the family gathering that sparked this obsession. My cousin Maria arrived for Sunday brunch, newly vegan, and I watched her eyes light up when I pulled a tray of warm scones from the oven. She held back—assuming they weren’t for her—until I handed her one with my homemade avocado spread recipe on the side. That one moment crystallized something for me: food shouldn’t create division at the table. It should bring people together, no matter what they eat or don’t eat.
From that day forward, I committed to mastering dairy-free baking through the lens of clinical nutrition. I learned that the real magic isn’t in what you remove—it’s in understanding the function of every ingredient and finding plant-based alternatives that honor that role. Flaxseeds bind moisture. Cold plant-based butter creates steam and flakiness. Quality plant milk adds richness without dairy. This isn’t compromise; it’s thoughtful adaptation.
Which Version Is Right for You?
Before we dive into the kitchen, let’s clarify which version aligns with your needs. Each adaptation maintains the tender crumb and buttery flavor of traditional scones while hitting specific nutritional targets. Here’s your quick guide:
- Standard Dairy-Free Version – Uses plant-based butter, almond milk, and flaxseeds. Perfect if you’re avoiding dairy but have no other restrictions. This is the foundation recipe I’ll walk you through step-by-step.
- Vegan Version – Everything is dairy-free plus egg-free (which this recipe already is). The flaxseeds act as your binding agent, replacing eggs entirely. No modifications needed from the base recipe—you’re already set!
- Keto Version – Substitute regular flour with almond flour or a keto baking blend, use a sugar substitute like erythritol, and keep the unsweetened almond milk. This will give you a denser, more crumbly texture that’s still delicious and keeps carbs under 5g per scone.
- Gluten-Free Version – Swap all-purpose flour with a 1:1 gluten-free baking flour that includes xanthan gum. Add an extra tablespoon of plant-based milk to account for different absorption rates. You’ll get a slightly more tender crumb with virtually no texture difference.
The Base Ingredients (Works for All Versions)
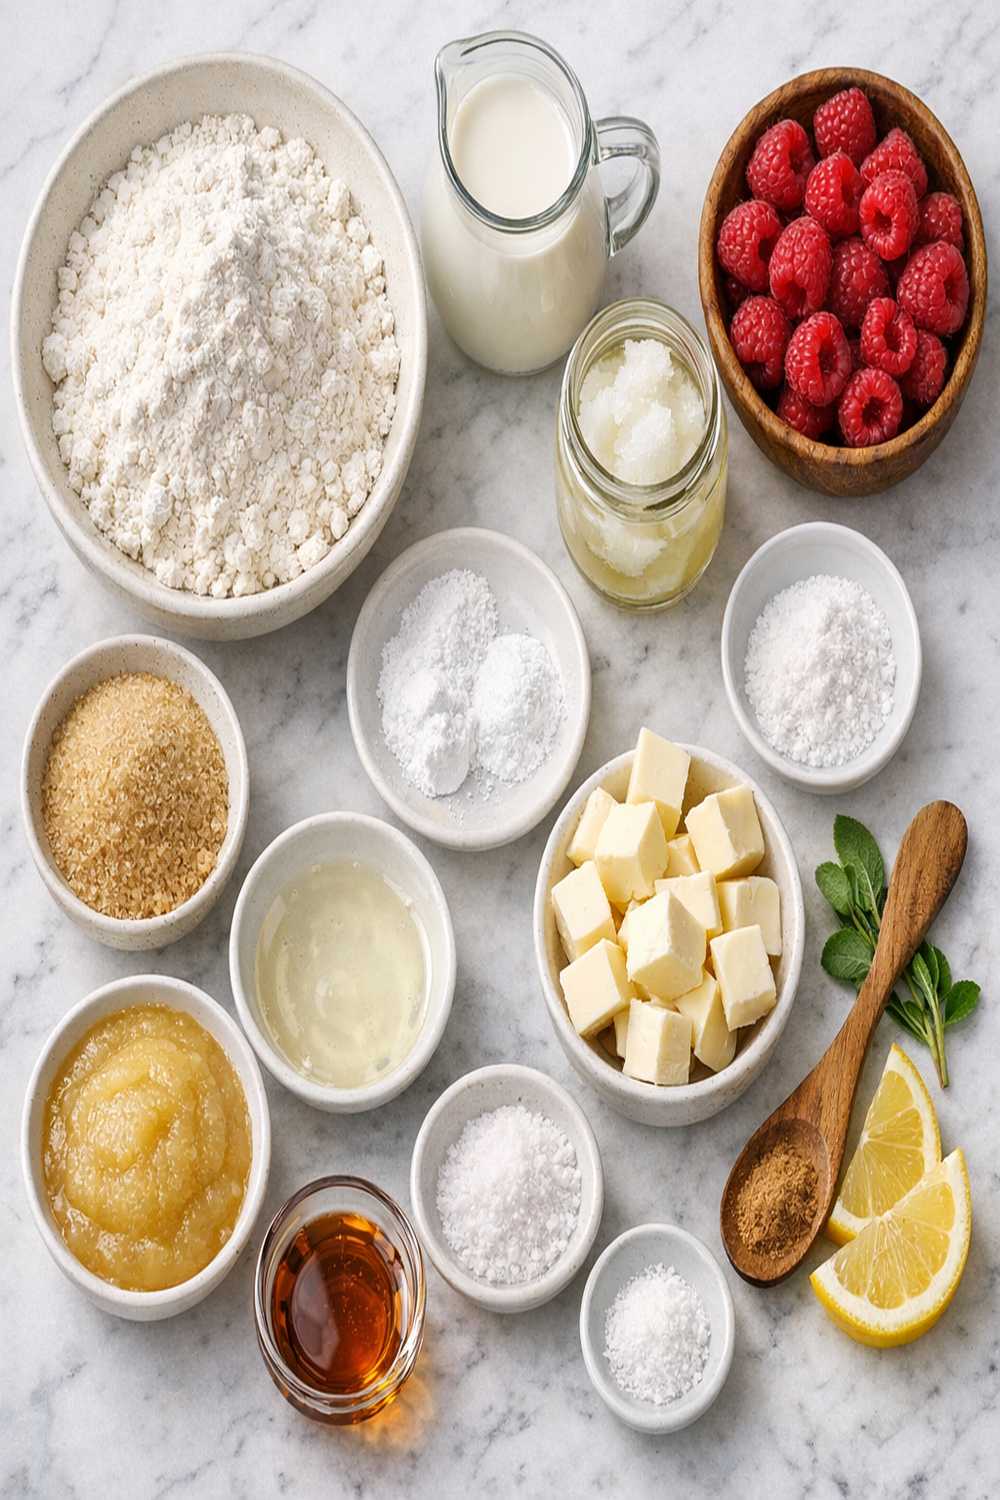
The beauty of this recipe is that the foundation stays consistent across dietary preferences. I’ve grouped these by function so you understand why each ingredient matters. This is the nutrition professional in me talking: knowing the role of each component helps you troubleshoot if something isn’t working in your kitchen.
For the Scones
- 1 tablespoon ground flaxseeds (combined with liquid, acts as binder—replaces eggs)
- ½ teaspoon fine sea salt (enhances sweetness and structure)
- 2 cups all-purpose flour (spooned and leveled, never packed—this ensures proper hydration)
- Finely grated zest from 1 lemon (brightens flavor without adding moisture)
- 1 tablespoon baking powder (aluminum-free preferred for cleaner taste)
- ½ cup granulated cane sugar (or coconut sugar for a deeper flavor)
- 8 tablespoons cold vegan butter or solid coconut oil (creates steam pockets for flakiness)
- 1 teaspoon pure vanilla extract (not imitation—the flavor difference is worth it)
- ½ cup unsweetened almond milk (plus up to ¼ cup more as needed for moisture)
- ¾ to 1 cup fresh or frozen blueberries (added at the end to prevent overdevelopment)
For the Glaze
- ½ teaspoon pure vanilla extract (ties flavor profile together)
- 1 cup powdered confectioners’ sugar (sifted to avoid lumps)
- 2 tablespoons almond milk (adjust quantity for desired consistency)
Yield: 8 generous scones
Dietary Substitution Chart
Here’s where the magic happens. Use this chart to adapt the recipe to your specific needs. I’ve tested each combination extensively, so you can trust these swaps will work without altering cooking times or temperatures.
- All-Purpose Flour → Keto: 1½ cups almond flour + ½ cup coconut flour (keeps texture lighter) | Vegan: No change | Gluten-Free: 2 cups 1:1 GF flour with xanthan gum included
- Granulated Sugar → Keto: ½ cup erythritol or monk fruit sweetener (won’t caramelize the same way, but texture remains excellent) | Vegan: No change | Gluten-Free: No change
- Blueberries → Keto: Use blackberries or raspberries instead (lower carb, similar structure) | Vegan: No change—frozen works beautifully | Gluten-Free: No change
- Almond Milk → Keto: Keep the same (unsweetened is critical) | Vegan: Can substitute oat, soy, or coconut milk—all work equally well | Gluten-Free: May need an extra tablespoon due to higher absorption in GF flours
- Vegan Butter → Keto: Use grass-fed ghee if not strictly vegan—creates superior flakiness, OR keep vegan butter and reduce by 1 tablespoon | Vegan: No change—choose butters without water content | Gluten-Free: No change
How to Make Dairy-Free Scones Your Way
I’m going to walk you through each step with the precision of someone who’s baked these hundreds of times in my kitchen. I’ll flag exactly where each dietary version diverges. The most critical element to success is keeping your ingredients cold and handling the dough minimally. This isn’t laziness—it’s the key to flakiness.
Step 1: Prepare Your Workspace and Oven
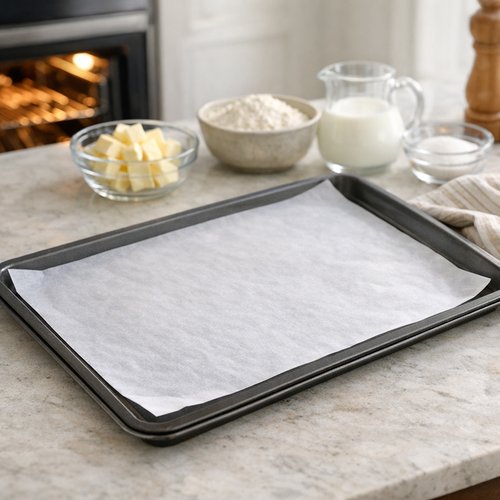
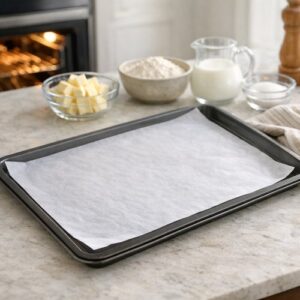
Preheat your oven to 400°F. Line a large baking sheet with parchment paper—this prevents sticking and ensures even browning on the bottom. Safety note: Ensure your oven racks are positioned in the center, with at least 2 inches of clearance above. This prevents the tops of your scones from browning too quickly.
While the oven heats, remove your vegan butter or coconut oil from the fridge and cut it into small cubes. Place these on a plate and return to the fridge. Cold fat is non-negotiable for flaky scones. You want it so cold that it doesn’t blend smoothly into the dry ingredients—instead, it creates tiny pockets that turn into steam during baking. For keto versions, this step is even more critical since you’re working with almond flour, which has different hydration properties.
Step 2: Combine Dry Ingredients
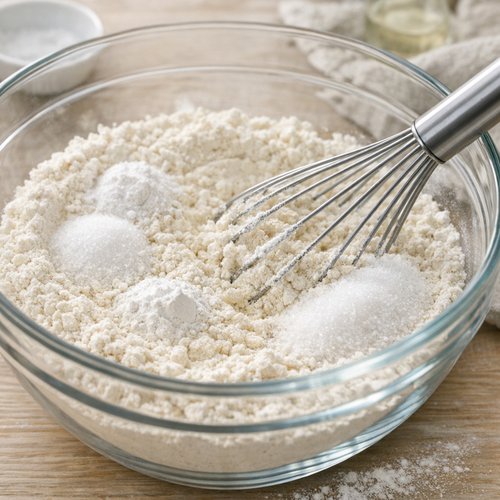
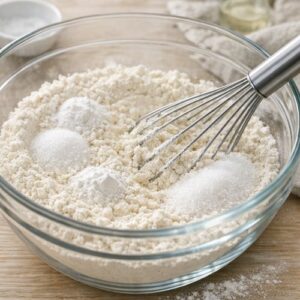
In a large mixing bowl, whisk together your flour, baking powder, salt, and sugar. If you’re making the gluten-free version, whisk vigorously for about 20 seconds—this distributes the xanthan gum evenly, which prevents gumminess. For keto versions: sift your almond and coconut flour combination through a fine mesh strainer before adding, as these flours compact easily and need aeration.
Add your ground flaxseeds to the dry mixture now. This is your binder, working similarly to eggs. The flaxseeds themselves don’t activate until they meet liquid, so combining them with the flour ensures even distribution. Pro tip from my clinical nutrition background: ground flaxseeds add omega-3 fatty acids and fiber, making this recipe more nutritionally complete than traditional scones.
Give everything a final gentle whisk. You’re looking for a uniform, light mixture with no clumps of baking powder visible.
Step 3: Cut in the Cold Fat
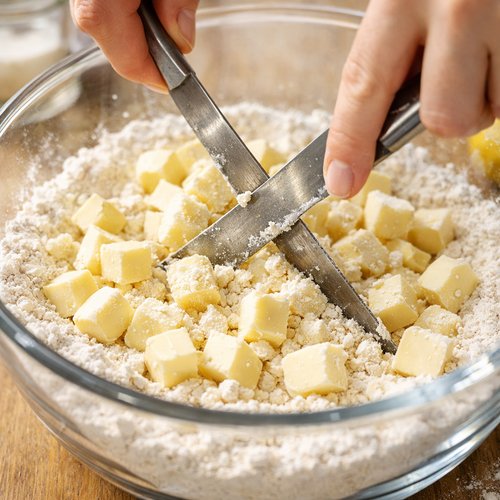
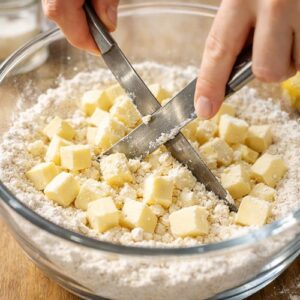
Remove your cold cubed butter from the fridge. Working quickly, add it to the dry ingredients. Using a pastry cutter, two knives held in an X formation, or your fingertips, work the cold butter into the flour until the mixture resembles coarse cornmeal with pea-sized pieces of butter still visible.
Critical technique: Your hands should be cool—run them under cold water and dry completely before starting. Warm hands will melt the butter, creating dense scones instead of flaky ones. This is the most common mistake I see, and it’s completely preventable. If at any point the mixture feels warm or you see the butter starting to blend smoothly, pop the bowl back in the fridge for 5 minutes.
For vegan versions: Vegan butter can have slightly different water content than dairy butter, so the texture might be slightly softer. If your mixture looks too wet, add another tablespoon of flour. For keto versions: Almond flour blends differently than wheat flour—you may see slightly smaller “pea-sized” butter pieces. This is fine. Don’t overmix trying to match the traditional flour texture.
Step 4: Add Liquid and Flavor
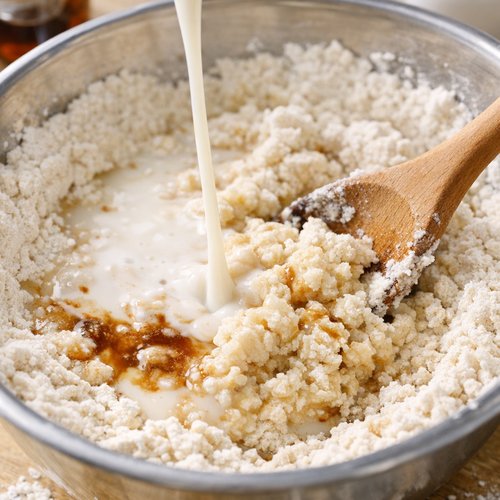
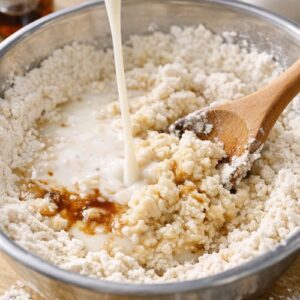
Pour your almond milk and vanilla extract into the dry mixture. Using a wooden spoon or rubber spatula, stir gently until just combined. The dough should look slightly shaggy and come together when pressed, but you shouldn’t see any dry flour streaks.
Safety alert: Do not overmix at this stage. Overworked dough develops gluten, creating tough, dense scones instead of tender ones. Stir just until the liquid is incorporated—this should take 15-20 gentle strokes, no more.
If the dough feels too dry and crumbly—meaning it doesn’t hold together when you squeeze a handful—add another tablespoon of almond milk and stir gently. The dough should feel like barely-moistened sand: crumbly but cohesive. For gluten-free versions: these doughs often need slightly more liquid because the flour absorbs differently. Start with an extra tablespoon and see how it feels.
For keto versions: the dough will feel drier due to almond flour’s lower water absorption. Add liquid one tablespoon at a time until it barely holds together when squeezed.
Step 5: Fold in the Fruit
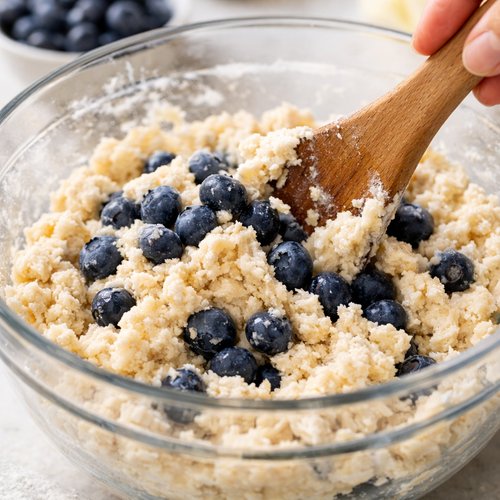
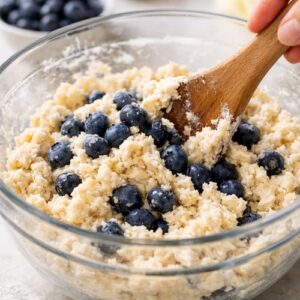
Gently fold in your blueberries (or your chosen fruit) using a folding motion—cutting down through the center of the dough, scraping along the bottom, and folding up and over itself. Repeat 4-5 times until the berries are evenly distributed. The folding motion prevents crushing the berries and activating their juices prematurely, which would stain and compromise the dough.
Add your lemon zest at this point. It disperses evenly during folding and won’t clump in specific areas. For vegan versions: the lemon zest adds brightness that complements the earthiness of plant-based ingredients beautifully.
Step 6: Shape the Dough
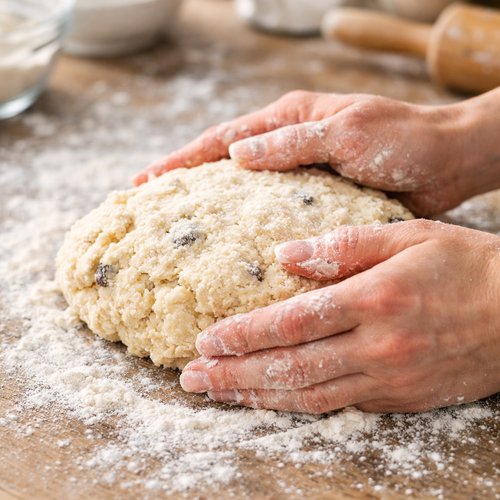
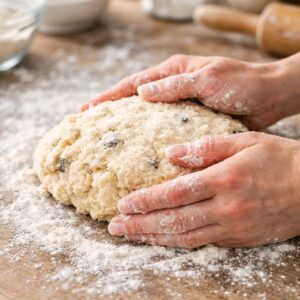
Lightly flour a clean work surface. Turn your dough out onto the floured area. Using your hands (lightly flour them if they’re sticky), gently knead the dough 3-4 times—just enough for it to come together into a cohesive mass. This is not bread dough. You’re not developing structure through kneading. You’re simply bringing the dough into one piece.
Flatten the dough with your hands or a rolling pin until it forms a circle approximately 1 inch thick. Thickness is crucial: too thin and your scones will be dry and cake-like; too thick and they won’t bake through before the top browns. Aim for consistent thickness throughout.
For gluten-free versions: the dough may be slightly stickier. Flour your hands generously and work quickly but gently. For keto versions: the dough will feel different—more crumbly, less elastic. This is normal. Push it together firmly, and it will hold when baked.
Step 7: Cut into Portions
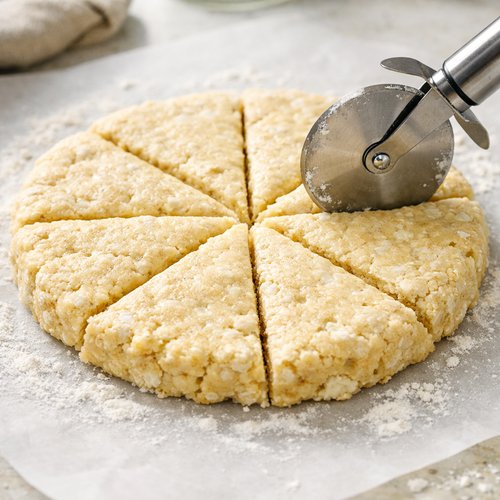
Using a pizza cutter or a large, sharp knife, cut your dough circle into 8 equal wedges, like you’re slicing a pizza. A pizza cutter is ideal because it doesn’t compress the edges the way a knife sometimes does. Avoid sawing motions—use a single, clean downward cut or rolling motion to prevent sealing the edges, which would prevent them from puffing in the oven.
Transfer your scones to the prepared baking sheet, spacing them about 2 inches apart. They’ll puff slightly during baking, and you want air circulation around each one.
Step 8: Bake Until Golden
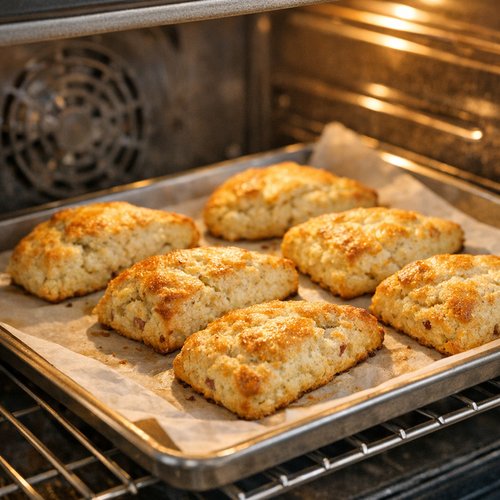
Place your baking sheet on the center rack of your preheated 400°F oven. Bake for 22-26 minutes, until the tops are lightly golden brown. Exact timing depends on your oven—every oven bakes slightly differently due to air circulation and heating element placement. Start checking at 20 minutes by looking at the top color, not by pressing the tops (which can deflate them).
Safety note: Use an oven mitt when checking—steam will escape rapidly when you open the oven door, and the baking sheet will be very hot. Keep hands clear of the door opening.
The scones are done when the tops are evenly light golden and a toothpick inserted into the center of one comes out clean or with just a few moist crumbs. For keto versions: these may not brown as visibly due to the sugar substitutes used. Look for the centers to feel set (not soft) when you gently tap the top.
Remove the baking sheet from the oven and let the scones cool on the sheet for 5 minutes before transferring to a cooling rack. This allows the structure to set without making them soggy from condensation. Resist the urge to eat them immediately—let them cool for at least 10 minutes before adding glaze or toppings, or you’ll lose the tender crumb as they’ll be too soft.
Step 9: Make the Simple Glaze (Optional)
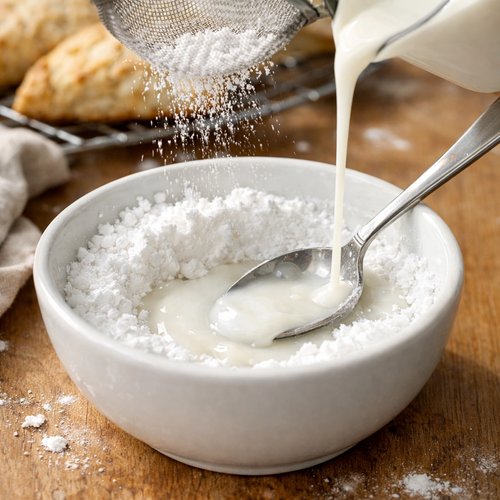
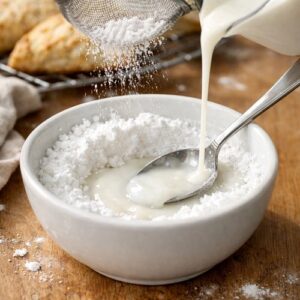
While your scones cool, sift your powdered sugar into a small bowl. Add almond milk one tablespoon at a time, stirring until you reach your desired consistency. For a thinner glaze that pools slightly, use the full 2 tablespoons of milk. For a thicker glaze that holds its shape, use just 1 tablespoon.
Stir in your vanilla extract. Once the scones have cooled slightly, drizzle the glaze over the tops using a fork or whisk. The glaze will set as it cools, creating a light, sweet finish.
For vegan versions: verify your powdered sugar is vegan (some contain bone char as a processing agent—check the package).
Expert’s Nutritional Insight: The Power of Flaxseeds in Plant-Based Baking
As a registered dietitian, I want to highlight why I chose ground flaxseeds as the binding agent in this recipe. They’re not just a trendy ingredient—they serve a specific function while adding real nutritional value. One tablespoon of ground flaxseeds provides approximately 1.5 grams of plant-based omega-3 fatty acids (alpha-linolenic acid), plus 2 grams of fiber. When combined with liquid, flaxseeds develop a gel-like coating that mimics the binding properties of eggs, creating structure in the dough.
What makes this particularly elegant is that flaxseeds activate after being mixed with liquid, so you have time to handle the dough before they fully gel. This means you won’t experience the dense, rubbery texture that can happen with some egg substitutes. Your scones stay tender and flaky. From a practical standpoint, I’ve also found that flaxseed-bound scones have better keeping quality—they stay fresher longer because the flaxseeds absorb and retain some moisture.
Nutrition Comparison Across Versions
Let me give you honest nutritional data for each version. These values are based on USDA nutrient databases and calculated per scone (out of 8 total), without glaze. Actual values may vary slightly based on your specific ingredients, but these are accurate representations.
- Standard Dairy-Free Version: Approximately 240 calories | 8g fat | 36g carbohydrates | 2.5g fiber | 3.5g protein | Calcium content varies based on plant milk used; look for fortified almond milk with at least 300mg per serving
- Vegan Version: Identical to standard (they’re the same recipe) | Approximately 240 calories | 8g fat | 36g carbohydrates | 2.5g fiber | 3.5g protein
- Keto Version: Approximately 180 calories | 12g fat | 8g net carbohydrates (14g total carbs minus 6g fiber) | 5.5g protein | This version is designed to fit a strict keto macronutrient ratio of roughly 65% fat, 30% protein, 5% carbs
- Gluten-Free Version: Approximately 245 calories | 8g fat | 38g carbohydrates | 2g fiber | 4g protein | Gluten-free flours sometimes have slightly higher carbohydrate content due to added starches, but this is negligible
From a clinical perspective, the standard and vegan versions provide better satiety due to the fiber content from whole wheat flour and ground flaxseeds. The keto version prioritizes macronutrient distribution for ketosis. The gluten-free version maintains comparable nutrition while accommodating digestive needs. None of these are “better” nutritionally—they’re optimized for different dietary goals.
How Each Version Tastes Different
I’m going to be completely honest with you about the flavor and texture variations, because I believe you deserve to know what to expect. Expectations matter when you’re adapting recipes.
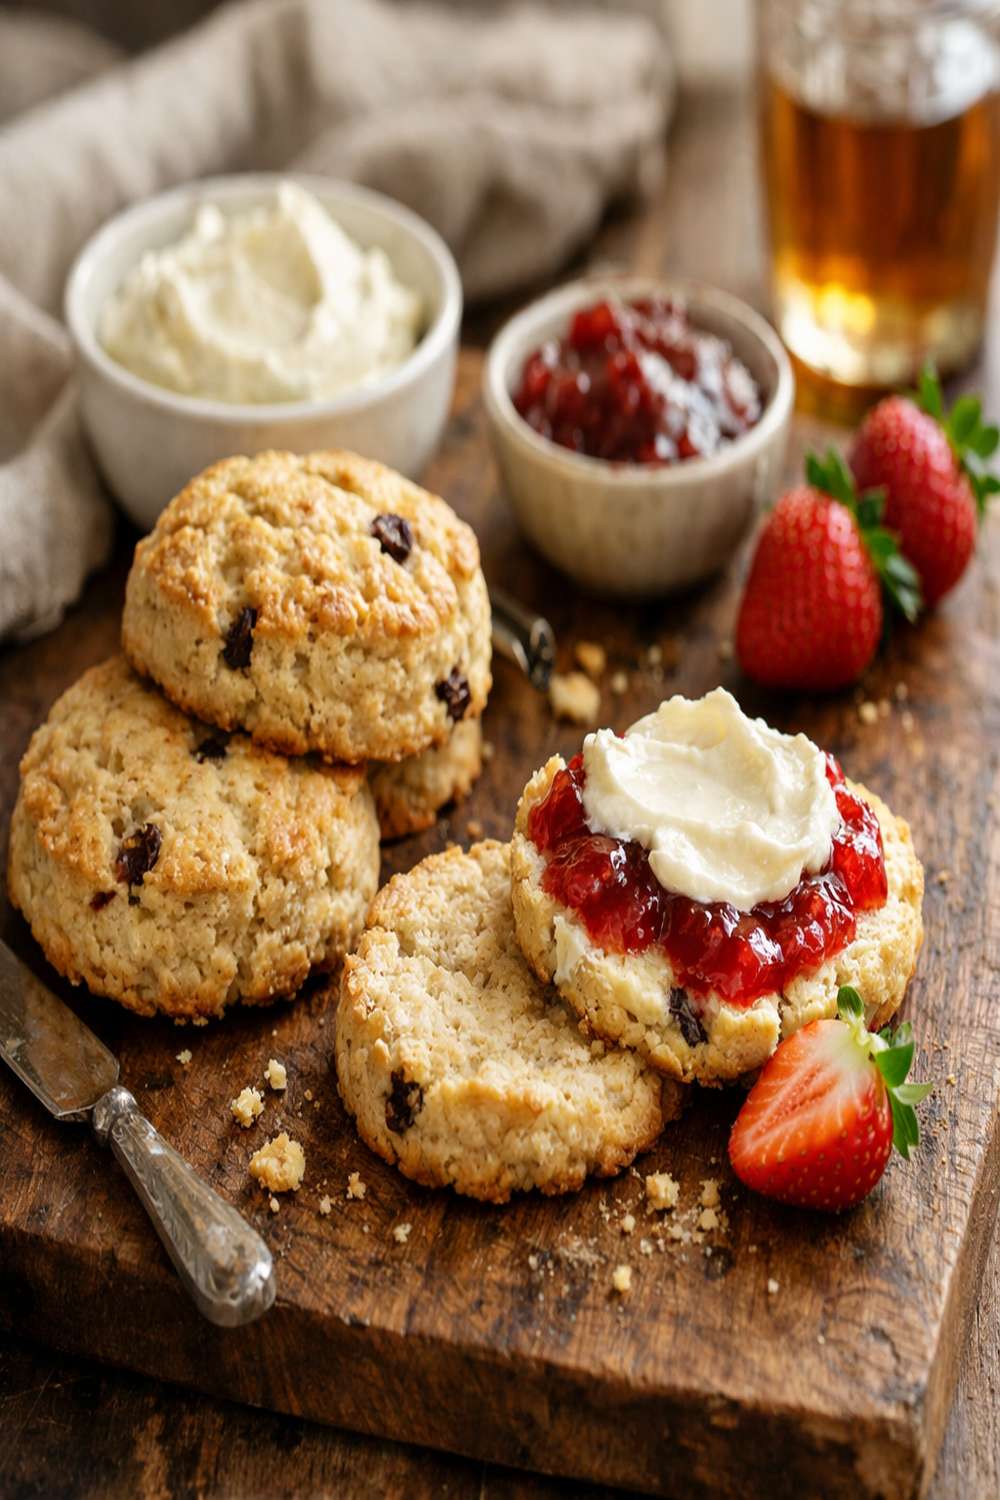
Standard and Vegan Versions: These taste virtually identical to traditional dairy scones. The tender crumb, slightly sweet flavor, and buttery aroma come through beautifully. The lemon zest and blueberries brighten what could otherwise feel heavy. The texture is flaky on the outside, tender and almost fluffy inside. These versions won’t taste “dairy-free” to anyone—they taste like excellent scones.
Keto Version: Here’s where I’m being real: this tastes noticeably different, and that’s not inherently bad—it’s just different. Almond flour has an earthier, slightly nutty undertone that’s present in every bite. The texture is more crumbly and dense, less flaky, closer to a buttery shortbread cookie texture. It’s delicious and absolutely satisfying, but it doesn’t mimic traditional scones. The lemon zest and blueberries become more prominent flavor-wise because there’s less of the neutral wheat flavor to balance them. If you’re coming from standard scones, adjust your expectations. If you’re keto and used to almond flour baking, you’ll recognize the profile immediately and love it.
Gluten-Free Version: This surprised me when I first tested it—the texture is nearly indistinguishable from the standard version. Modern 1:1 gluten-free baking flours have come so far that you get a tender crumb and flakiness without the wheaty chewiness that sometimes appears in GF baked goods. The main difference is a very subtle, slightly softer crumb—more tender, almost delicate. Some people prefer it. The flavor is identical to the standard version.
Common Mistakes to Avoid (Learned from Testing Hundreds of Batches)
I’ve made every mistake possible in my kitchen, so you don’t have to. Here are the most common errors that prevent excellent scones:
- Warm butter: This is the #1 culprit. Warm butter blends into the flour, creating dense, cake-like scones instead of flaky ones. Always cut your butter into small cubes and keep it in the fridge until the very moment you add it. If you’re working in a warm kitchen, chill your bowl and tools too.
- Overmixing: Every time you stir after adding the milk, you’re developing gluten, which toughens the final product. Stir just until combined—stop as soon as you see the liquid incorporated. This is genuinely a case of less being more.
- Inconsistent thickness: If your dough circle isn’t uniform in thickness, your scones will bake unevenly. Some will be dry, others underbaked. Use your hands or a rolling pin to flatten to exactly 1 inch throughout.
- Crushing the berries: If you stir the blueberries in instead of folding them, you’ll break them open, releasing their juice into the dough. This stains the scones and makes them soggy. Use the folding technique I described—it takes 10 extra seconds and makes a huge difference.
Make-Ahead Guide: Professional Meal Prep Strategy
One of my favorite aspects of this recipe is how beautifully it works for advance preparation. As a dietitian and busy person myself, I’ve developed a system that lets you have fresh-baked scones without morning stress.
Three Days Ahead: Prepare the Dry Mix – Combine your flour, baking powder, salt, sugar, and ground flaxseeds in an airtight container. Label it with the date. This keeps perfectly for up to 5 days and cuts your morning prep time significantly.
Two Days Ahead: Cut Your Butter and Chill – Cut your vegan butter into small cubes and place in a freezer-safe container. Freeze it. This ensures maximum coldness on bake day.
One Day Ahead: Prepare Unbaked Scones – This is the real game-changer. Mix your dry ingredients with the cold butter as directed, then add the milk and vanilla. Fold in the blueberries and lemon zest. Shape and cut your scones, then place them on a parchment-lined baking sheet. Cover loosely with plastic wrap and refrigerate overnight. The cold actually improves flakiness by allowing the fat to firm up further. In the morning, bake directly from the fridge (you may need to add 2-3 minutes to the baking time since they start cold).
Make-Ahead Baked Scones: Bake the full batch, cool completely, and store in an airtight container at room temperature for up to 2 days. Refresh them in a 300°F oven for 5 minutes before serving to restore the crispy exterior. Alternatively, freeze baked scones in a freezer bag for up to 1 month. Thaw at room temperature for 30 minutes or warm straight from frozen in a 350°F oven for 10 minutes.
Seasonal Variations: Adapting Your Scones Year-Round
The blueberry version is wonderful, but this recipe adapts beautifully to seasonal fruit and flavors. Here’s how I rotate through the year in my Florida kitchen:
Spring (March-May): Strawberries and rhubarb are at their peak. Replace blueberries with diced fresh strawberries, add ½ teaspoon ground ginger to the dry ingredients, and use orange zest instead of lemon. The combination is springy and bright.
Summer (June-August): Blackberries, raspberries, and peaches shine. Use a mix of berries, reduce the sugar by 1 tablespoon (fresh summer fruit is sweeter), and add ¼ teaspoon vanilla powder for depth. Fresh mint zest is also beautiful here—add about 1 tablespoon of finely minced fresh mint with the lemon zest.
Fall (September-November): This is when I get creative with spices. Keep the blueberries but add ½ teaspoon ground cinnamon, ¼ teaspoon ground nutmeg, and a tiny pinch of ground cloves to the dry ingredients. Replace the lemon zest with orange zest. Optional: add 2 tablespoons of chopped dried cranberries along with or instead of some of the blueberries.
Winter (December-February): I make a cranberry-orange version by using fresh or frozen cranberries (toss them with an extra teaspoon of sugar to balance tartness), adding ½ teaspoon ground cardamom to the dry ingredients, and using orange zest instead of lemon. This version pairs beautifully with hot coffee or tea.
Can I Store Dairy-Free Scone Recipe?
Storage depends on whether you’re keeping them at room temperature, in the fridge, or freezer, and whether they’re baked or unbaked. Let me break down each scenario from my professional food storage guidelines:
Unbaked, Refrigerated Dough (preferred method): Prepare your shaped, cut scones as directed through Step 7. Cover the baking sheet loosely with plastic wrap and refrigerate for up to 2 days. Bake directly from the fridge, adding 2-3 minutes to your baking time. This is my favorite method because the scones actually benefit from the cold, developing superior flakiness.
Baked, Room Temperature: Store completely cooled scones in an airtight container at room temperature for up to 2 days. After that, they start to stale and lose their tender crumb. This works well if you’re serving them within 24-36 hours.
Baked, Refrigerated: While possible, refrigeration actually speeds staling by altering the starch structure. I don’t recommend this unless you’re making a specific choice. If you do refrigerate baked scones, use within 3 days.
Baked, Frozen: This is your best long-term option. Cool scones completely, place them in a single layer on a baking sheet, and freeze for 2 hours until solid. Transfer to a freezer-safe bag or container and freeze for up to 1 month. Thaw at room temperature for 30 minutes, then warm in a 300°F oven for 5 minutes to restore crispness. Alternatively, you can bake directly from frozen at 350°F for 12-15 minutes.
Safety Note: Once cooled, don’t leave baked scones at room temperature for more than 4 hours, as bacterial growth can occur on baked goods left in warm kitchen conditions.
What to Serve With Dairy-Free Scone Recipe?
The beauty of these scones is that they pair with both sweet and savory accompaniments. Here are my favorite serving combinations, organized by dietary version:
- Avocado Spread with fresh lemon juice – Works beautifully with all versions. The creamy, savory spread contrasts perfectly with the sweet blueberries. Great for brunch.
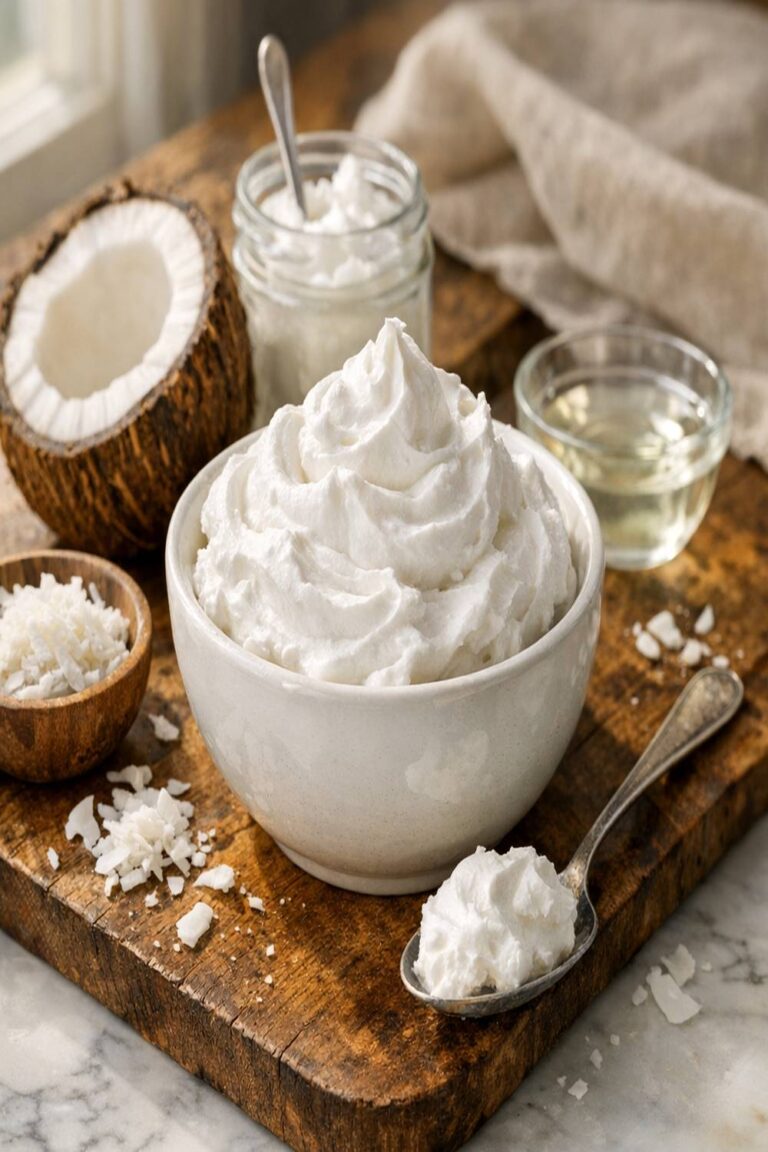
- Dairy-free whipped coconut cream with fresh berries – All versions. Chill a can of full-fat coconut milk overnight, scoop the solidified cream into a bowl, whip with a splash of vanilla and a touch of maple syrup, and serve alongside.
- Homemade cashew cheese spread – Vegan and standard versions. Blend soaked cashews with lemon juice, garlic, and herbs for a savory scone experience that’s completely unexpected.
- Warm plant-based custard or vanilla sauce – All versions. Whisk together ½ cup almond milk, 2 egg yolks (if not vegan), or cornstarch slurry (for vegan), ¼ teaspoon vanilla, and 1 tablespoon sugar. Heat gently, stirring constantly, until it coats the back of a spoon. Serve warm alongside.
- Dairy-free lemon curd – All versions. Made with cornstarch and plant-based milk instead of butter and eggs, this pairs beautifully with the blueberry-lemon flavor profile.
- Simple berry compote – All versions. Simmer frozen berries with a touch of sugar and lemon juice until jammy. Serve warm or at room temperature.
- Brunch Potato Recipe – All versions. If you’re serving scones as part of a full breakfast, these roasted potatoes make an excellent savory-sweet balance.

Dairy Free Scone Recipe
Ingredients
Method
- Preheat your oven to 400°F. Line a large baking sheet with parchment paper—this prevents sticking and ensures even browning on the bottom. Safety note: Ensure your oven racks are positioned in the center, with at least 2 inches of clearance above. This prevents the tops of your scones from browning too quickly. While the oven heats, remove your vegan butter or coconut oil from the fridge and cut it into small cubes. Place these on a plate and return to the fridge. Cold fat is non-negotiable for flaky scones. You want it so cold that it doesn't blend smoothly into the dry ingredients—instead, it creates tiny pockets that turn into steam during baking. For keto versions, this step is even more critical since you're working with almond flour, which has different hydration properties.
- In a large mixing bowl, whisk together your flour, baking powder, salt, and sugar. If you're making the gluten-free version, whisk vigorously for about 20 seconds—this distributes the xanthan gum evenly, which prevents gumminess. For keto versions: sift your almond and coconut flour combination through a fine mesh strainer before adding, as these flours compact easily and need aeration. Add your ground flaxseeds to the dry mixture now. This is your binder, working similarly to eggs. The flaxseeds themselves don't activate until they meet liquid, so combining them with the flour ensures even distribution. Pro tip from my clinical nutrition background: ground flaxseeds add omega-3 fatty acids and fiber, making this recipe more nutritionally complete than traditional scones. Give everything a final gentle whisk. You're looking for a uniform, light mixture with no clumps of baking powder visible.
- Remove your cold cubed butter from the fridge. Working quickly, add it to the dry ingredients. Using a pastry cutter, two knives held in an X formation, or your fingertips, work the cold butter into the flour until the mixture resembles coarse cornmeal with pea-sized pieces of butter still visible. Critical technique: Your hands should be cool—run them under cold water and dry completely before starting. Warm hands will melt the butter, creating dense scones instead of flaky ones. This is the most common mistake I see, and it's completely preventable. If at any point the mixture feels warm or you see the butter starting to blend smoothly, pop the bowl back in the fridge for 5 minutes. For vegan versions: Vegan butter can have slightly different water content than dairy butter, so the texture might be slightly softer. If your mixture looks too wet, add another tablespoon of flour. For keto versions: Almond flour blends differently than wheat flour—you may see slightly smaller "pea-sized" butter pieces. This is fine. Don't overmix trying to match the traditional flour texture.
- Pour your almond milk and vanilla extract into the dry mixture. Using a wooden spoon or rubber spatula, stir gently until just combined. The dough should look slightly shaggy and come together when pressed, but you shouldn't see any dry flour streaks. Safety alert: Do not overmix at this stage. Overworked dough develops gluten, creating tough, dense scones instead of tender ones. Stir just until the liquid is incorporated—this should take 15-20 gentle strokes, no more. If the dough feels too dry and crumbly—meaning it doesn't hold together when you squeeze a handful—add another tablespoon of almond milk and stir gently. The dough should feel like barely-moistened sand: crumbly but cohesive. For gluten-free versions: these doughs often need slightly more liquid because the flour absorbs differently. Start with an extra tablespoon and see how it feels. For keto versions: the dough will feel drier due to almond flour's lower water absorption. Add liquid one tablespoon at a time until it barely holds together when squeezed.
- Gently fold in your blueberries (or your chosen fruit) using a folding motion—cutting down through the center of the dough, scraping along the bottom, and folding up and over itself. Repeat 4-5 times until the berries are evenly distributed. The folding motion prevents crushing the berries and activating their juices prematurely, which would stain and compromise the dough. Add your lemon zest at this point. It disperses evenly during folding and won't clump in specific areas. For vegan versions: the lemon zest adds brightness that complements the earthiness of plant-based ingredients beautifully.
- Lightly flour a clean work surface. Turn your dough out onto the floured area. Using your hands (lightly flour them if they're sticky), gently knead the dough 3-4 times—just enough for it to come together into a cohesive mass. This is not bread dough. You're not developing structure through kneading. You're simply bringing the dough into one piece. Flatten the dough with your hands or a rolling pin until it forms a circle approximately 1 inch thick. Thickness is crucial: too thin and your scones will be dry and cake-like; too thick and they won't bake through before the top browns. Aim for consistent thickness throughout. For gluten-free versions: the dough may be slightly stickier. Flour your hands generously and work quickly but gently. For keto versions: the dough will feel different—more crumbly, less elastic. This is normal. Push it together firmly, and it will hold when baked.
- Using a pizza cutter or a large, sharp knife, cut your dough circle into 8 equal wedges, like you're slicing a pizza. A pizza cutter is ideal because it doesn't compress the edges the way a knife sometimes does. Avoid sawing motions—use a single, clean downward cut or rolling motion to prevent sealing the edges, which would prevent them from puffing in the oven. Transfer your scones to the prepared baking sheet, spacing them about 2 inches apart. They'll puff slightly during baking, and you want air circulation around each one.

- Place your baking sheet on the center rack of your preheated 400°F oven. Bake for 22-26 minutes, until the tops are lightly golden brown. Exact timing depends on your oven—every oven bakes slightly differently due to air circulation and heating element placement. Start checking at 20 minutes by looking at the top color, not by pressing the tops (which can deflate them). Safety note: Use an oven mitt when checking—steam will escape rapidly when you open the oven door, and the baking sheet will be very hot. Keep hands clear of the door opening. The scones are done when the tops are evenly light golden and a toothpick inserted into the center of one comes out clean or with just a few moist crumbs. For keto versions: these may not brown as visibly due to the sugar substitutes used. Look for the centers to feel set (not soft) when you gently tap the top. Remove the baking sheet from the oven and let the scones cool on the sheet for 5 minutes before transferring to a cooling rack. This allows the structure to set without making them soggy from condensation. Resist the urge to eat them immediately—let them cool for at least 10 minutes before adding glaze or toppings, or you'll lose the tender crumb as they'll be too soft.

- While your scones cool, sift your powdered sugar into a small bowl. Add almond milk one tablespoon at a time, stirring until you reach your desired consistency. For a thinner glaze that pools slightly, use the full 2 tablespoons of milk. For a thicker glaze that holds its shape, use just 1 tablespoon. Stir in your vanilla extract. Once the scones have cooled slightly, drizzle the glaze over the tops using a fork or whisk. The glaze will set as it cools, creating a light, sweet finish. For vegan versions: verify your powdered sugar is vegan (some contain bone char as a processing agent—check the package).
Notes
FAQs
Can I make these scones completely nut-free (no almond milk)?
Absolutely