This post contains affiliate links. As an Amazon Associate I earn from qualifying purchases.
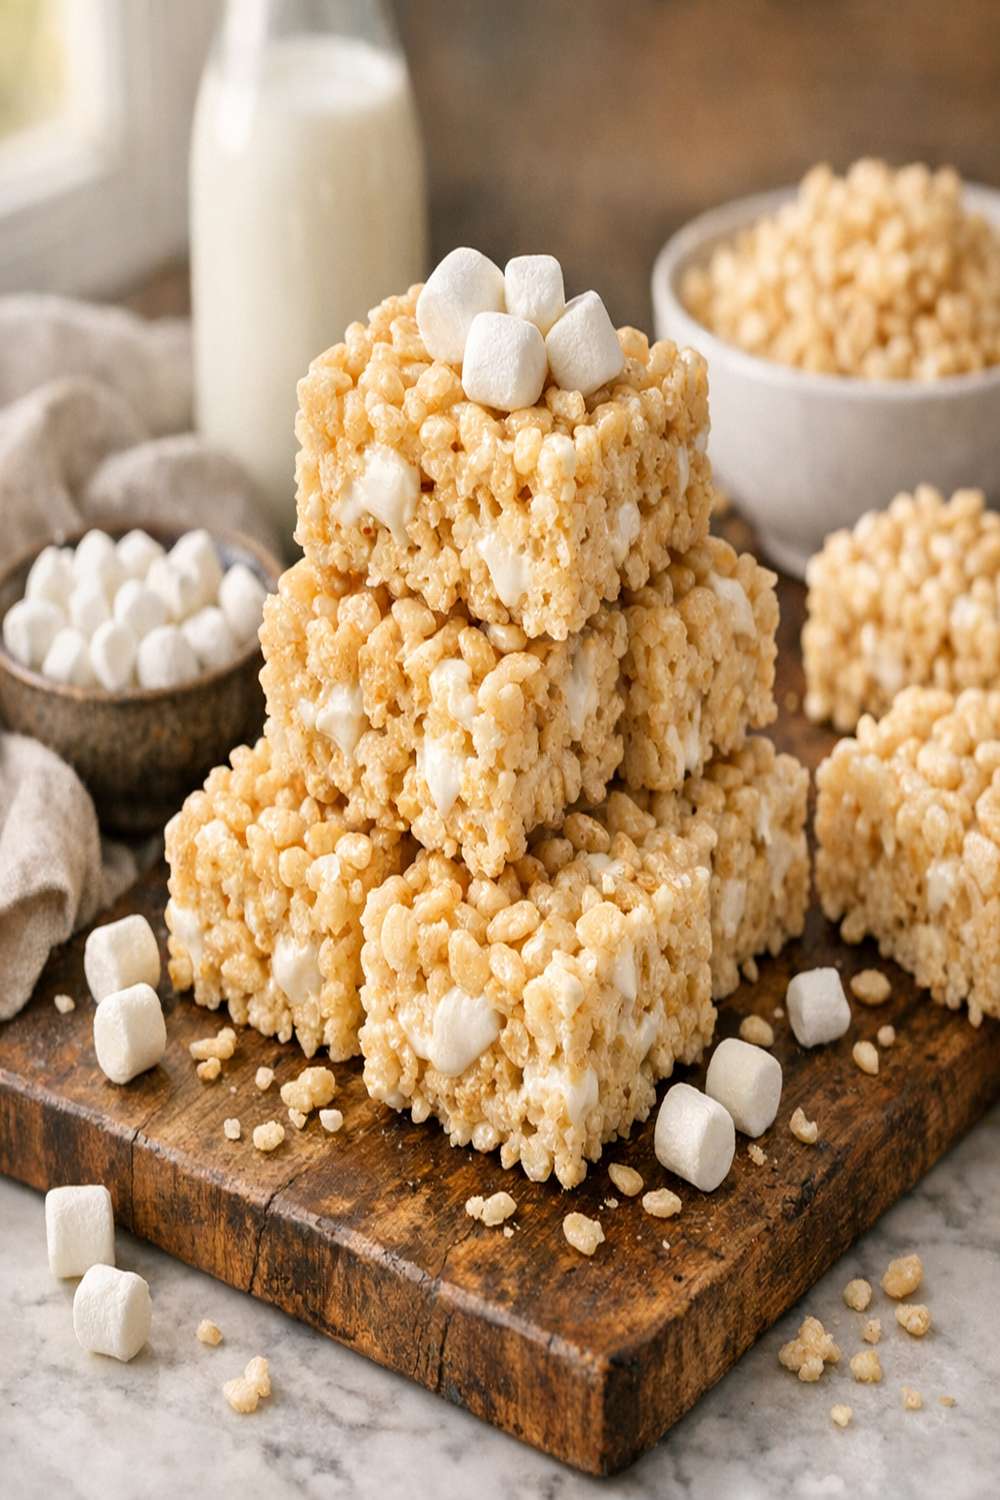
Five ingredients. That’s all it takes to create incredible Dandies Rice Krispies treats that taste just as indulgent as the classic version—without any of the animal products. No long shopping lists, no pantry raid required. When I first discovered plant-based marshmallows years ago at a local Florida market, I thought to myself: why aren’t more people using these for simple, foolproof desserts? That’s when this recipe became my go-to for family gatherings, potlucks, and those afternoons when my nephews come running into my kitchen asking for something sweet.
I’ve spent my career as a registered dietitian helping families understand that wholesome eating doesn’t require complexity. It requires intention. These five ingredients work in perfect harmony—each one pulling its weight—to deliver crispy, chewy, utterly satisfying treats that come together in under thirty minutes. If you’re looking for vegan comfort food that impresses without stress, this is it.
Why 5 Ingredients Is Actually an Advantage
- Easier to master and repeat perfectly – With fewer moving parts, you’re able to focus on technique. Once you nail the marshmallow melting point and the folding method, you can make these treats blindfolded. Consistency builds confidence.
- Each ingredient gets to shine without competition – When you’re working with fewer components, the quality of what you choose matters exponentially. There’s nowhere to hide, which means you naturally reach for better vegan butter, quality marshmallows, and fresh cereal.
- Faster shopping and less waste – I can grab these five items in under five minutes at any grocery store. No specialty hunting, no half-used containers languishing in your pantry. This is efficiency that actually makes cooking more joyful.
Choosing Your 5 Ingredients Wisely
When I sat down to develop this recipe, I thought about what makes classic Rice Krispies treats so beloved: the contrast between crispy cereal and gooey marshmallow. The richness from butter. That subtle vanilla note that ties everything together. I wanted to preserve every single one of those sensations while using plant-based ingredients that actually perform.
This isn’t about limitation—it’s about maximum flavor strategy. Every ingredient here serves a purpose. The vegan butter provides richness and helps the marshmallows meld together smoothly. The marshmallows are the star, creating that signature sticky-chewy texture. The rice cereal adds structure and that satisfying crunch. The vanilla extract brings depth and prevents the treats from tasting one-dimensional. And the parchment paper? That’s your secret weapon for easy release and cleanup.
I tested this recipe with different vegan butter brands, different marshmallow densities, and different cereal types. What I learned is that consistency matters more than perfection. You don’t need organic, artisanal ingredients here—you need reliable ones that you can find anywhere.
The 5 Ingredients
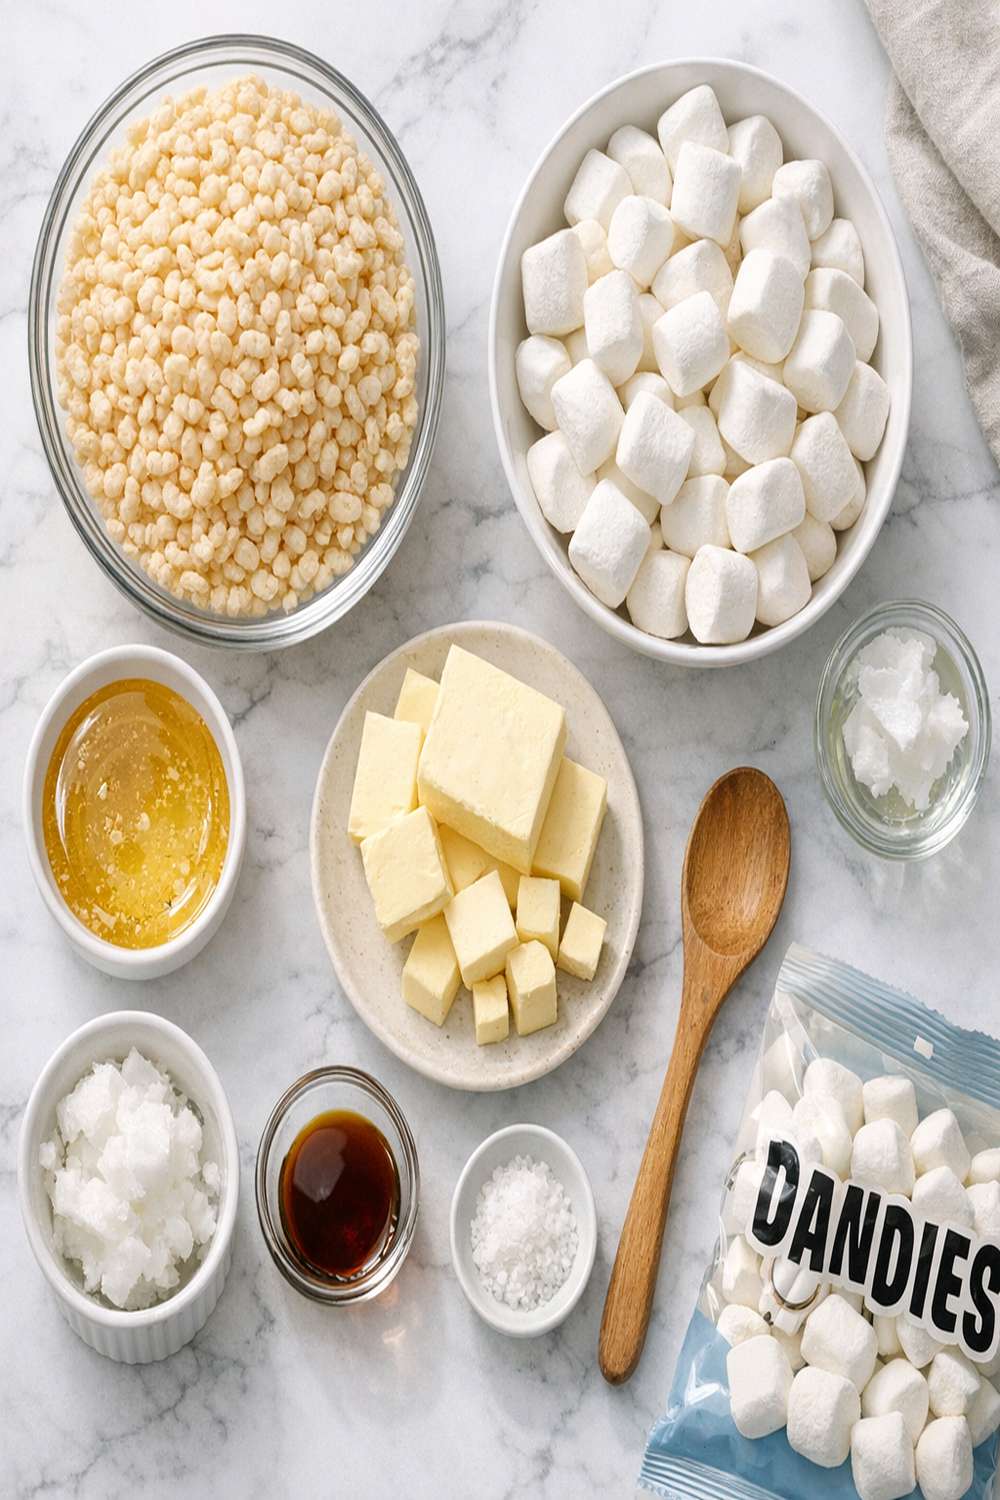
Here’s what you’ll need to make approximately 24 treats. These five components are non-negotiable, and I’m going to explain exactly why each one earned its spot on this list. When you understand the role of every ingredient, you cook with intention instead of just following instructions.
- 8 cups rice crispy cereal (measured by volume after pouring; this provides structure and keeps treats from becoming a marshmallow blob)
- Parchment paper for lining (this isn’t just convenience—it’s the difference between treats that release cleanly and treats stuck to the pan)
- 2 10-ounce bags plant-based marshmallows (the foundation of everything—look for brands like Dandies that melt consistently)
- ¾ cup vegan butter (melted, this provides richness and helps marshmallows bind together smoothly)
- ½ teaspoon pure vanilla extract (not imitation; this prevents the treats from tasting flat and one-note)
Expert’s Nutritional Tip
Here’s what my years in clinical nutrition have taught me: plant-based marshmallows contain less corn syrup than traditional versions, which makes them a genuinely better choice for blood sugar management. They’re still a treat—let’s be honest about that—but they’re a treat that won’t create the same dramatic glucose spike. One serving (two treats) typically contains around 90-100 calories and 20 grams of carbohydrates, with zero cholesterol. For someone following a vegan diet, these provide a dairy-free dessert that actually satisfies the sweet tooth without the guilt.
How to Make Dandies Rice Krispies Recipe With Just 5 Ingredients
The elegance of simplicity lies in precision. When you’re working with only five ingredients, every technique matters. I’m going to walk you through this step-by-step, highlighting the critical moments that separate good treats from exceptional ones. This recipe takes about 30 minutes total, including cooling time setup.
Step 1: Prepare Your Pan and Workspace
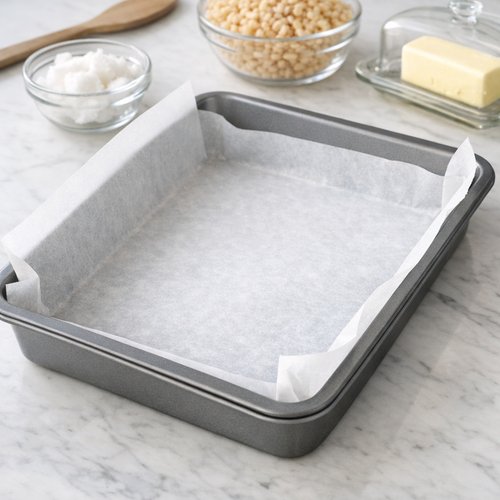
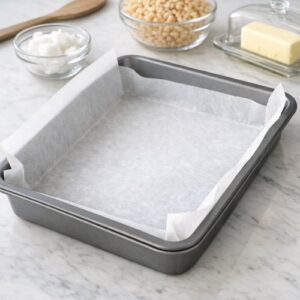
Line a 9 x 13 inch baking pan with parchment paper, allowing the paper to overhang slightly on two sides—this is crucial for later when you need to lift the finished treats out. Lightly spray the parchment with cooking oil. This step takes 60 seconds and saves you fifteen minutes of scraping later. Set your prepared pan aside on the counter where it will stay undisturbed. Have a large wooden spoon or silicone spatula within arm’s reach of your stovetop before you start heating anything.
Step 2: Melt the Vegan Butter
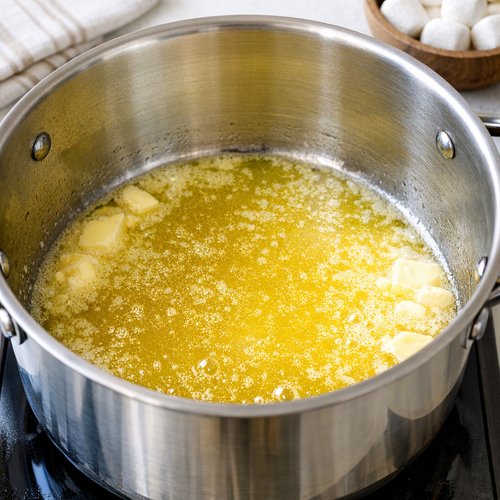
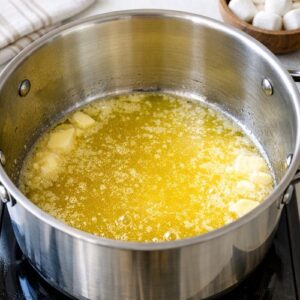
Place a large pot (I use a 5-quart stainless steel pot) over medium heat. Add your ¾ cup of vegan butter and allow it to melt completely, which takes about 2-3 minutes. Watch for the butter to turn from solid to fully liquid, but don’t let it start foaming or browning—that’s a sign the heat is too high. Once melted, you should see a glossy, smooth liquid. If your pot is too small, the marshmallows will overflow. This isn’t a problem you want to solve mid-recipe.
Step 3: Add the Marshmallows and Stir Constantly
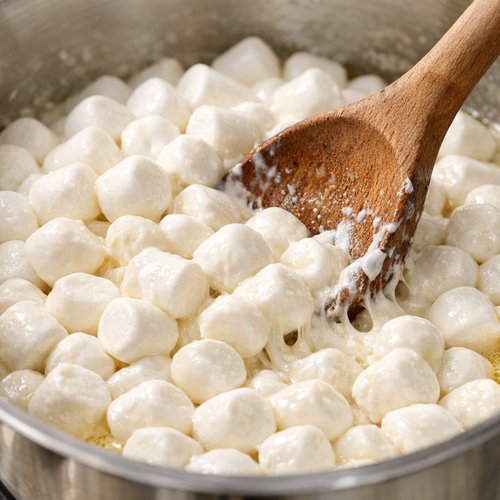
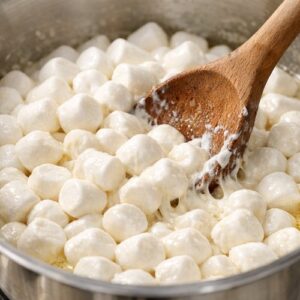
Add both 10-ounce bags of plant-based marshmallows to your melted butter. Immediately begin stirring with your wooden spoon, using firm pressure and consistent circular motions. This step is non-negotiable. Unlike traditional marshmallows that almost melt on their own, plant-based marshmallows require active, patient stirring—usually 5-7 minutes. You’ll see them gradually soften, break apart, and eventually form a thick, somewhat lumpy blob. This is exactly what should happen. Don’t expect a perfectly smooth marshmallow mixture like you see in traditional versions; plant-based versions are naturally slightly grainier. Keep stirring until about 85% of the marshmallows have integrated with the butter.
Step 4: Remove From Heat and Add Vanilla
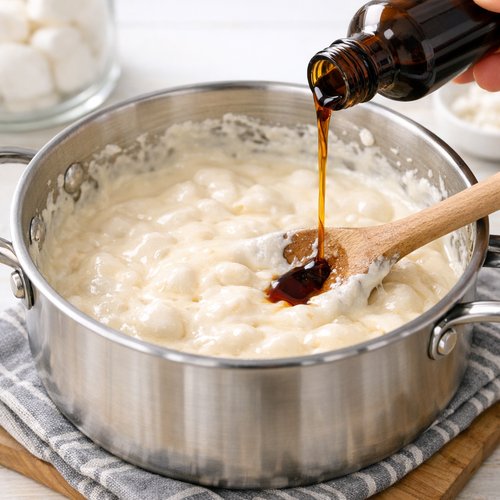
Turn off the heat and carefully remove the pot from the stovetop, setting it on a heat-safe trivet or folded kitchen towel. The pot will remain extremely hot—do not touch the bottom or sides with bare hands. Add your ½ teaspoon of pure vanilla extract and stir it in thoroughly, about 10-15 seconds of stirring. The vanilla prevents the treats from tasting one-dimensional and adds a subtle depth that people can’t quite identify but absolutely taste.
Step 5: Fold in the Cereal Gently
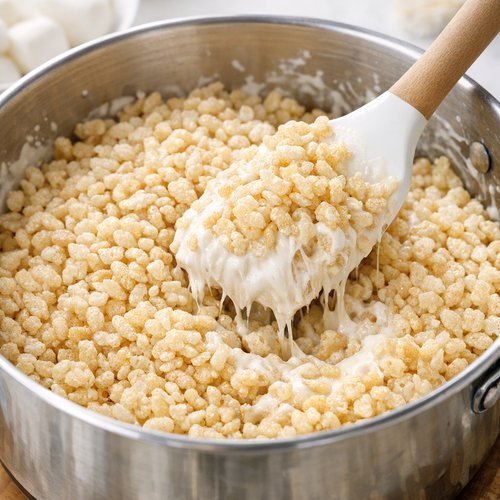
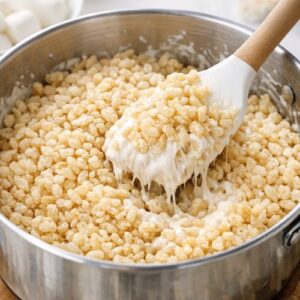
Pour all 8 cups of rice crispy cereal into the pot with the marshmallow mixture. Using your large spoon or spatula, fold the cereal into the marshmallow mixture using a gentle folding motion—think of it like folding whipped egg whites into a soufflé batter. You’re not stirring aggressively; you’re folding. This takes about 1-2 minutes. Your goal is to coat every piece of cereal with the marshmallow mixture while keeping the cereal as intact as possible. Some clumps of unmelted marshmallow will remain, and that’s perfectly fine. This creates a more interesting texture than a completely uniform mixture.
Step 6: Transfer to Pan and Press Down Evenly
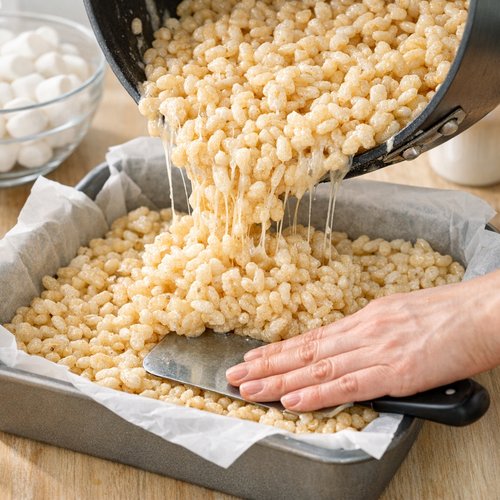
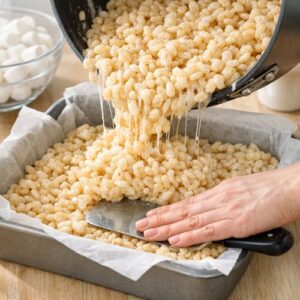
Immediately pour the entire contents of the pot into your prepared baking pan. Working quickly while the mixture is still warm and pliable, use your greased spatula (or greased hands) to press the mixture down evenly across the pan. Don’t compress it so hard that it becomes dense and brick-like. You want gentle, even pressure that creates uniformity without destroying the cereal structure. This should take about 30-45 seconds. The faster you work here, the easier this step becomes, because the mixture sets quickly as it cools.
Step 7: Cool Completely Before Cutting
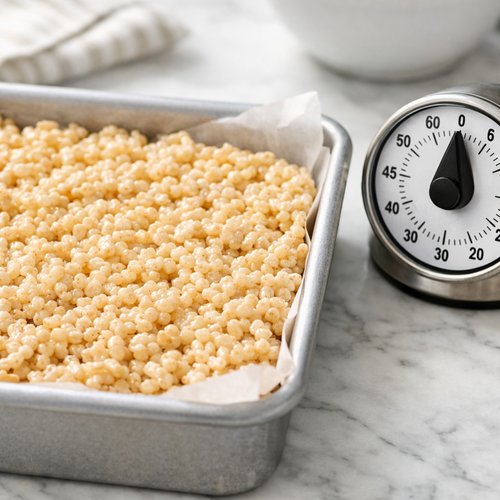
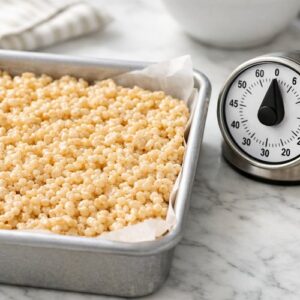
Set a timer for exactly 60 minutes. Do not attempt to cut these treats before they’re completely cool—you’ll end up with a crumbly mess instead of neat squares. The cooling time is when the marshmallow sets and the cereal firms up. During this hour, you can clean your pot (soak it immediately with hot water and a little dish soap), prepare a serving platter, or simply enjoy the smell of homemade goodness filling your kitchen.
Step 8: Remove and Cut Into Squares
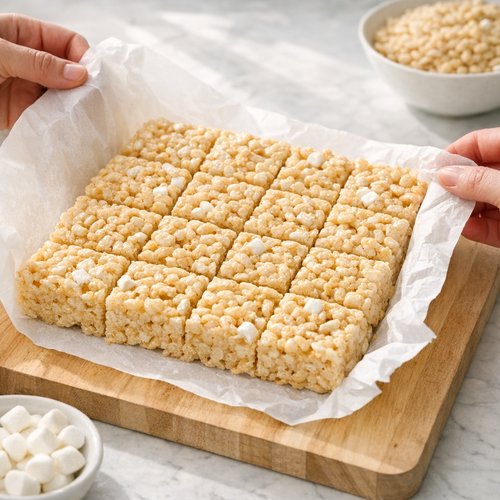
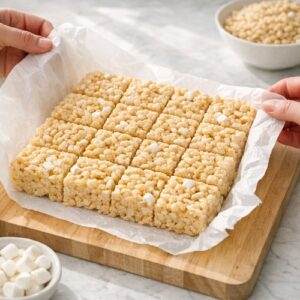
After the full 60 minutes, grasp the parchment paper overhang on two sides and gently lift the entire slab of treats out of the pan onto a clean cutting board. Using a sharp chef’s knife or a serrated bread knife, cut the treats into 24 equal squares (6 rows by 4 columns works perfectly). For the cleanest cuts, wipe your knife with a damp paper towel between each cut. This removes the sticky residue and ensures clean edges. The treats are now ready to serve and enjoy.
Make-Ahead Guide
These treats are perfect for planning ahead. Once fully cooled and cut, store them in an airtight container at room temperature for up to 5 days. They don’t require refrigeration, though Florida’s humidity means they may soften slightly in storage—that’s absolutely fine and doesn’t affect the taste. For longer storage, you can freeze them in an airtight container with parchment paper between layers for up to 2 weeks. Thaw at room temperature for about 30 minutes before serving. I often make double batches on Sunday evening, cut them into squares Monday morning, and have treats ready to grab all week. This is the kind of recipe that makes weeknight snacking effortless.
Common Mistakes to Avoid
In my years of kitchen work, I’ve seen people stumble over the same three things with this recipe. Let me save you the heartache:
- Using butter that’s too hot when adding marshmallows – If your melted butter is smoking or extremely dark brown, it’s too hot and will cause the marshmallows to break down unevenly. Melt on medium heat and you’ll avoid this entirely.
- Not stirring the marshmallows enough – This is the most common mistake. Plant-based marshmallows require more patient stirring than traditional ones. If you stir for only 2-3 minutes and give up, you’ll end up with barely incorporated marshmallows and disappointing treats. Commit to the full 5-7 minutes of stirring.
- Cutting before complete cooling – I cannot stress this enough. Forty-five minutes feels done. It’s not. The full 60 minutes allows the structure to set completely. Cut too early and you’ll have a crumbly, compressed mess.
- Overpacking the pan – When you press the mixture into the pan, restrain yourself. You want treats that are tender and slightly crispy on the edges, not dense hockey pucks. Light pressure is your friend here.
The Optional 6th Ingredient (If You Want to Elevate)
Here’s the thing about five ingredients: they’re beautiful in their simplicity. But if you want to take these treats to the next level without adding complexity, consider stirring in ¼ teaspoon of sea salt with the vanilla extract. That’s it. Just one-quarter teaspoon of quality sea salt (not iodized table salt). The salt amplifies the marshmallow flavor, creates a sweet-salty contrast that’s absolutely addictive, and makes people ask for your recipe immediately. It’s the difference between “these are good” and “these are unforgettable.” This addition still respects the spirit of simplicity while delivering impact.
Seasonal Variations
- Spring Citrus Version – Replace the vanilla extract with ½ teaspoon of lemon extract and add the zest of one lemon to your melted butter before adding marshmallows. The brightness is perfect for spring entertaining.
- Fall Spiced Version – Use vanilla as written, but add ⅛ teaspoon of ground cinnamon and ⅛ teaspoon of ground nutmeg to your melted butter. It creates autumn without overwhelming the treats.
- Winter Peppermint Version – Replace vanilla with ½ teaspoon peppermint extract and fold in ½ cup of crushed vegan peppermint candies with the cereal. This is December in treats form.
- Summer Tropical Version – Add ¼ teaspoon of coconut extract along with the vanilla, and use coconut-flavored plant-based marshmallows if you can find them. Tropical without being complicated.
5-Ingredient Variations
- Chocolate Version – Stir ¼ cup of unsweetened cocoa powder into your melted butter before adding marshmallows, then proceed as normal. Chocolate lovers will lose their minds.
- Peanut Butter Version – Replace ¼ cup of the vegan butter with creamy peanut butter, adding it to the pot at the same time. The marshmallows fold in beautifully and you get that signature peanut butter-marshmallow combination.
- Brown Butter Version – Brown your vegan butter for 3-4 minutes over medium heat (watch for the foam and nutty aroma) before adding marshmallows. Brown butter adds a sophisticated depth that elevates these from casual snack to fancy dessert.
Can I Store Dandies Rice Krispies Recipe?
Absolutely, and storage is one of the best features of this recipe. Once cooled and cut, store these treats in an airtight container at room temperature for up to 5 days. They stay fresh, maintain their texture, and actually improve slightly as the flavors settle over the first 24 hours. In my Florida kitchen, humidity is a constant challenge, so I layer parchment paper between the treats to prevent sticking. For longer storage, place them in a freezer-safe container with parchment between layers and freeze for up to 2 weeks. Thaw at room temperature for about 30 minutes before serving—no microwave needed. I don’t recommend refrigerating them because the moisture in the fridge can make them sticky and dense.
Nutrition Information
Per serving (one treat, based on 24 total): 92 calories, 3.5 grams of fat, 14 grams of carbohydrates, 0 grams of protein, and 0 grams of fiber. These treats contain zero cholesterol, zero sodium from added salt (unless you choose the sea salt upgrade), and are naturally vegan-friendly. According to USDA nutritional database standards for plant-based foods, these treats are moderate in calories but should be enjoyed as an occasional treat rather than a daily staple. The carbohydrates come primarily from the plant-based marshmallows and cereal, with minimal processing. If you’re monitoring sugar intake, one serving contains approximately 10 grams of sugar. For people following a vegan diet or managing dairy allergies, these offer a genuinely satisfying dessert that doesn’t require special ordering or complicated substitutions.
What to Serve With Dandies Rice Krispies Recipe?
One of the beauties of this recipe is that it stands alone. You don’t need to complicate it with sides or accompaniments. But if you’re serving these at a gathering and want a complete spread, keep things simple and let these treats shine. Pair them with fresh fruit—strawberries, blueberries, or sliced pineapple—to balance the sweetness with natural freshness. A simple cup of herbal tea or cold plant-based milk makes a perfect companion. If you’re planning a vegan dessert spread, these treats actually pair beautifully with other options like Avocado Spread Recipe for those who prefer something more savory-forward, or Black Bean And Sweet Potato Burger Recipe if you’re thinking appetizers and desserts together.
- Fresh berries – keeps the minimal spirit alive while adding brightness and nutrition
- Chilled herbal tea – allows the cereal treats to be the star without competition
- Plant-based milk – simple, no-fuss, lets people enjoy these treats however they want

Dandies Rice Krispies Recipe
Ingredients
Method
- Line a 9 x 13 inch baking pan with parchment paper, allowing the paper to overhang slightly on two sides—this is crucial for later when you need to lift the finished treats out. Lightly spray the parchment with cooking oil. This step takes 60 seconds and saves you fifteen minutes of scraping later. Set your prepared pan aside on the counter where it will stay undisturbed. Have a large wooden spoon or silicone spatula within arm's reach of your stovetop before you start heating anything.
- Place a large pot (I use a 5-quart stainless steel pot) over medium heat. Add your ¾ cup of vegan butter and allow it to melt completely, which takes about 2-3 minutes. Watch for the butter to turn from solid to fully liquid, but don't let it start foaming or browning—that's a sign the heat is too high. Once melted, you should see a glossy, smooth liquid. If your pot is too small, the marshmallows will overflow. This isn't a problem you want to solve mid-recipe.
- Add both 10-ounce bags of plant-based marshmallows to your melted butter. Immediately begin stirring with your wooden spoon, using firm pressure and consistent circular motions. This step is non-negotiable. Unlike traditional marshmallows that almost melt on their own, plant-based marshmallows require active, patient stirring—usually 5-7 minutes. You'll see them gradually soften, break apart, and eventually form a thick, somewhat lumpy blob. This is exactly what should happen. Don't expect a perfectly smooth marshmallow mixture like you see in traditional versions; plant-based versions are naturally slightly grainier. Keep stirring until about 85% of the marshmallows have integrated with the butter.
- Turn off the heat and carefully remove the pot from the stovetop, setting it on a heat-safe trivet or folded kitchen towel. The pot will remain extremely hot—do not touch the bottom or sides with bare hands. Add your ½ teaspoon of pure vanilla extract and stir it in thoroughly, about 10-15 seconds of stirring. The vanilla prevents the treats from tasting one-dimensional and adds a subtle depth that people can't quite identify but absolutely taste.

- Pour all 8 cups of rice crispy cereal into the pot with the marshmallow mixture. Using your large spoon or spatula, fold the cereal into the marshmallow mixture using a gentle folding motion—think of it like folding whipped egg whites into a soufflé batter. You're not stirring aggressively; you're folding. This takes about 1-2 minutes. Your goal is to coat every piece of cereal with the marshmallow mixture while keeping the cereal as intact as possible. Some clumps of unmelted marshmallow will remain, and that's perfectly fine. This creates a more interesting texture than a completely uniform mixture.
- Immediately pour the entire contents of the pot into your prepared baking pan. Working quickly while the mixture is still warm and pliable, use your greased spatula (or greased hands) to press the mixture down evenly across the pan. Don't compress it so hard that it becomes dense and brick-like. You want gentle, even pressure that creates uniformity without destroying the cereal structure. This should take about 30-45 seconds. The faster you work here, the easier this step becomes, because the mixture sets quickly as it cools.
- Set a timer for exactly 60 minutes. Do not attempt to cut these treats before they're completely cool—you'll end up with a crumbly mess instead of neat squares. The cooling time is when the marshmallow sets and the cereal firms up. During this hour, you can clean your pot (soak it immediately with hot water and a little dish soap), prepare a serving platter, or simply enjoy the smell of homemade goodness filling your kitchen.
- After the full 60 minutes, grasp the parchment paper overhang on two sides and gently lift the entire slab of treats out of the pan onto a clean cutting board. Using a sharp chef's knife or a serrated bread knife, cut the treats into 24 equal squares (6 rows by 4 columns works perfectly). For the cleanest cuts, wipe your knife with a damp paper towel between each cut. This removes the sticky residue and ensures clean edges. The treats are now ready to serve and enjoy.
Notes
FAQs
Can I use regular marshmallows instead of plant-based ones?
Technically yes, but this recipe was specifically developed for plant-based marshmallows like Dandies because they require different handling. Traditional marshmallows melt more smoothly, so you’d reduce your stirring time to 2-3 minutes. However, the recipe name honors Dandies specifically, so I’d recommend sticking with the plant-based version for the intended result. The texture and flavor profile are actually superior with plant-based marshmallows in my professional opinion.
What if my marshmallows aren’t melting smoothly?
Check two things: your heat level and your stirring consistency. Plant-based marshmallows need medium heat—not high—and continuous, patient stirring. If you’re on high heat, reduce it immediately. If you’ve only been stirring for a couple minutes, keep going. The full 5-7 minutes of stirring is crucial. These marshmallows are slightly grainier by nature, so don’t expect a perfectly smooth mixture.
Can I make these treats in advance for a party?
Yes! These are actually ideal for advance preparation. Make them up to 3 days ahead, keep them in an airtight container at room temperature, and they’ll be ready to serve. This is one of my favorite features—no last-minute stress, just grab and serve.
Why did my treats turn out dense and heavy instead of light and crispy?
Two possible reasons: you pressed them down too hard into the pan, or you didn’t cool them long enough before cutting. Be gentle with the pressing step and commit to the full 60-minute cooling time. Patience creates the right texture.
Is there a way to make these without parchment paper?
You could lightly oil the pan heavily and coat it well, but honestly, parchment paper is so inexpensive and makes the release so clean that I don’t recommend skipping it. For the couple cents it costs, you’re saving yourself real frustration and broken treats.
More Recipes You’ll Love
- Best Vegan Lasagna Recipe – A hearty, satisfying plant-based dinner that proves comfort food doesn’t need animal products
- Beet Poke Recipe – Fresh, vibrant, and beautifully simple with just five core ingredients
- Black Pepper Tofu Recipe – Crispy, flavorful, and proof that plant-based protein can be absolutely delicious
Final Thoughts
This recipe represents everything I believe about cooking: that constraint creates creativity, that simplicity honors ingredients, and that five carefully chosen components can deliver more satisfaction than a pantry full of “solutions.” I’ve served these treats at family gatherings across sunny Florida, packed them in school lunches, and gifted them to neighbors who suddenly understood why homemade beats store-bought every single time.
The power of restraint in cooking is real. When you commit to five ingredients, you’re forced to understand each one deeply. You’re forced to nail technique rather than hide behind complexity. You’re forced to taste what you’ve made and own it completely. That’s where the real joy lives—not in elaborate recipes with ingredient lists longer than your arm, but in simple preparations executed with intention and care.
Make these treats this week. Watch them disappear in days. Notice how people ask for the recipe and seem surprised when you tell them it’s just five ingredients. That surprise, followed by understanding, is the whole point. Happy cooking!