This post contains affiliate links. As an Amazon Associate I earn from qualifying purchases.
Picture this: it’s December, your kitchen smells like cinnamon and molasses, and you’re pulling a tray of spiced gingerbread people from the oven while your family gathers around—no animal products required. I still remember the year my sister asked me to veganize our grandmother’s gingerbread recipe for her partner. I was nervous, honestly. How could I possibly capture that nostalgic warmth without butter and eggs? But that first bite proved me wrong. Those cookies were crispy on the edges, chewy in the middle, and so deeply spiced that my mom asked for the recipe before she even knew they were vegan. That’s when I realized something magical: the best comfort foods transcend their ingredients. They’re really about the love baked into them. This vegan gingerbread recipe has become my go-to for holiday gatherings, cookie exchanges, and those moments when you want to create something that nourishes everyone at your table—no matter their dietary choices. Whether you’re following a plant-based lifestyle or simply looking to expand your baking repertoire, these cookies deliver the same joy as the traditional versions. I’ve adapted this recipe countless times in my nutrition practice, and I promise you’ll be amazed at how a simple flax egg and quality molasses create cookies that rival anything made with conventional ingredients. Let me walk you through exactly how to make gingerbread magic happen in your kitchen.
The Best Vegan Gingerbread Cookies That Taste Like Tradition
My grandmother kept her gingerbread recipe card tucked in a kitchen drawer, stained with decades of molasses splatters and flour fingerprints. When I became a registered dietitian, I inherited that card along with the responsibility of keeping the tradition alive—but adapted for a more inclusive table. The first time I made these vegan gingerbread cookies for my extended family, I set them out nervously, knowing my cousins’ skepticism. By the second round of baking, my aunt was asking for extras to take home. That moment taught me that recipes aren’t about perfection; they’re about bringing people together. These cookies do exactly that, and they prove that plant-based baking isn’t about compromise—it’s about creativity and intention.

When to Make Gingerbread Cookie Vegan Recipe
These spiced beauties work for far more occasions than you might think. While they’re absolutely stellar for December celebrations, I find myself making batches throughout the year for different reasons. Here’s when I reach for this recipe:
- December holiday gatherings – The classic timing. These are perfect for cookie exchanges, classroom parties, or simply having on hand for unexpected guests during the season of cheer.
- Thanksgiving dessert platters – Skip the heavy pie and add these spiced cookies to your dessert spread. They pair beautifully alongside other fall treats.
- Casual weeknight gatherings – You don’t need a special occasion to bake these. I make them on regular Tuesdays just because the smell makes everyone happy.
- Gift-giving occasions – Package these in a festive box with a ribbon. They’re homemade, thoughtful, and signal that you care enough to bake from scratch.
- Kids’ school events – These are perfect for bake sales and classroom celebrations, especially when you need to accommodate plant-based students.
- Valentine’s Day gifts – Cut them into hearts instead of gingerbread people. The spices feel warm and romantic in February.
What Makes This Gingerbread Cookie Vegan Recipe Special
In my years as a registered dietitian, I’ve learned that the best recipes are the ones that feel indulgent while actually nourishing your body. This gingerbread recipe does something special: it honors tradition while respecting dietary choices. The secret isn’t in replacing ingredients with “substitutes”—it’s in understanding why each ingredient matters and choosing alternatives that deliver the same function and flavor.
The flax egg here isn’t just a placeholder for the real thing. Flax seeds contain omega-3 fatty acids and lignans, compounds that support heart health. When mixed with hot water, they create a binding agent that works beautifully in these cookies. The vegan butter—usually coconut or olive oil-based—actually distributes the spices more evenly throughout the dough than traditional butter sometimes does. And the molasses? That’s where the nutritional magic lives. Unsulphured molasses is rich in iron, calcium, and potassium, making these cookies nutritionally denser than standard butter cookies.
What truly elevates these cookies is respecting the spice profile. Ginger, cinnamon, allspice, and cloves aren’t just flavor boosters—they’re anti-inflammatory powerhouses. I’m not saying you should eat cookies for their health benefits, but there’s something beautiful about creating treats that taste like pure joy and actually contain ingredients your body recognizes and appreciates. That’s the philosophy I bring to every recipe I develop.
Scaling for Your Crowd
One of my favorite things about these gingerbread cookies is their flexibility. Whether you’re baking for two people or hosting a cookie decorating party for fifteen, this recipe scales beautifully. Here’s how I approach different crowd sizes:
- Intimate gathering (2–4 people) – Cut the entire recipe in half. You’ll have 18 cookies instead of 36. Baking time stays the same at 10–12 minutes, but watch them carefully since they may bake slightly faster in a smaller batch on a less crowded tray.
- Medium celebration (8–12 people) – Use the recipe as written. This yields 36 cookies, which is perfect for sampling with plenty of decoration options.
- Large party or exchange (15+ people) – Double the entire recipe and bake in two batches. Give yourself at least 30 minutes between batches so your hands don’t get too warm when rolling out dough, and let your oven cool slightly between batches.
The Ingredients
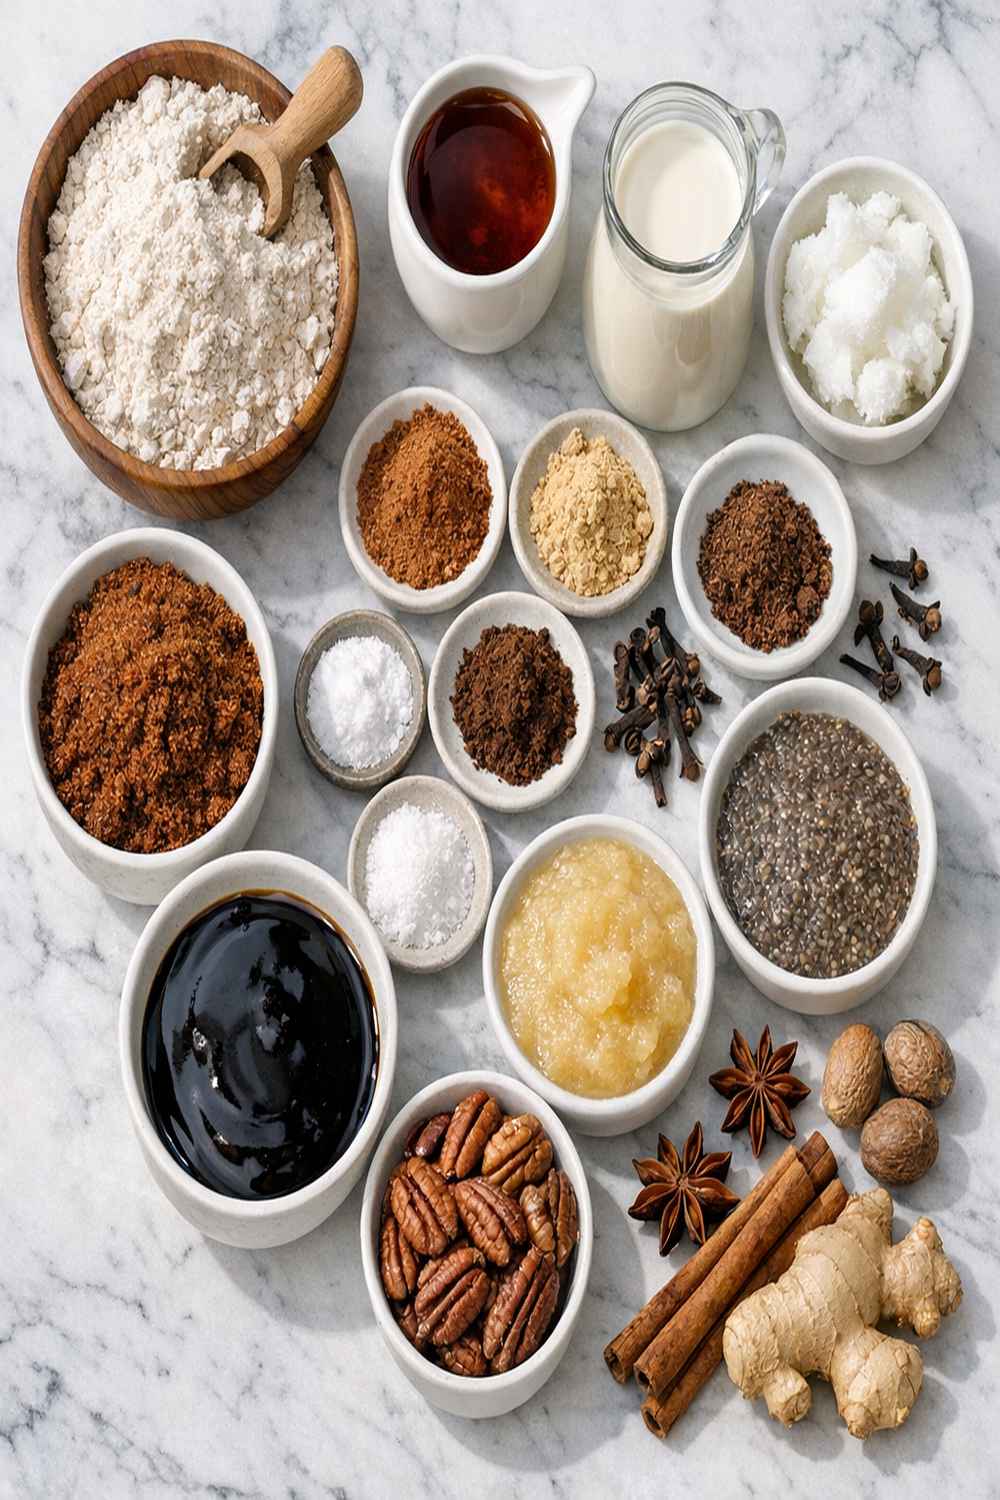
Here’s everything you need to create cookies that taste like they came from a professional bakery—but better, because you made them with intention:
For the Cookie Dough
- 1/4 teaspoon fine sea salt (enhances the spices and balances sweetness)
- 2 tablespoons cornstarch or tapioca starch (helps with texture and prevents excessive spreading)
- 1/4 teaspoon ground allspice (don’t skip this—it adds complexity)
- 1/2 cup light brown sugar (packed gently, measures about 100 grams)
- 1 teaspoon baking soda (this helps the cookies spread slightly and crisp at the edges)
- 2 teaspoons ground ginger (fresh ginger powder has more punch than stale)
- 1/3 cup unsulphured molasses (choose unsulphured for a more delicate mineral flavor and slightly lighter color)
- 2 cups all-purpose flour (spoon and level, never pack, for accurate measurements)
- 2 teaspoons ground cinnamon (Ceylon cinnamon if possible—it’s sweeter and more nuanced)
- 1/2 teaspoon pure vanilla extract (not imitation—this makes a real difference in vegan baking)
- 1 flax egg (combine 1 tablespoon ground flaxseed meal with 3 tablespoons hot water, then let sit for 1 minute to thicken)
- 1/4 teaspoon ground cloves (measure carefully; this is potent and beautiful in small amounts)
- 1/4 cup plant-based butter, softened (dairy-free works best; coconut or olive oil-based brands are reliable)
For the Decorative Icing
- 1 tablespoon unsweetened soy milk (or any plant-based milk; soy provides the best consistency for piping)
- 1/2 teaspoon pure vanilla extract (same brand you used for the dough)
- 1 cup powdered sugar (sifted to remove lumps, measures about 120 grams)
Yield: This recipe makes approximately 36 decorated gingerbread cookies, depending on the size of your cookie cutter.
How to Make Gingerbread Cookie Vegan Recipe for Your Occasion
I’m going to walk you through each step like I’m standing right next to you in the kitchen. These instructions are foolproof when you follow them carefully, and I’ve included specific expert warnings where they matter. You’ve got this.
Step 1: Prepare Your Workspace and Preheat the Oven
Preheat your oven to 350°F (180°C) and position the rack to the center of your oven. This is important for even baking. If you have an older oven, use an oven thermometer to verify the temperature—vintage ovens can run 25 degrees off, which affects cookie texture.
While the oven heats, gather your equipment: an electric mixer (or a strong arm and a wooden spoon), measuring cups and spoons, a mixing bowl, a rolling pin, cookie cutters, parchment paper, and baking sheets. Arrange your parchment paper on your baking sheets now—you don’t want to be fumbling with this while working with sticky dough.
Expert safety warning: If you’re baking with children, explain that the oven will be very hot and establish a “no touching” zone around it once it’s preheating. Designate a safe space for kids to work on decorating while you handle the baking portion.

Step 2: Create Your Flax Egg Binder
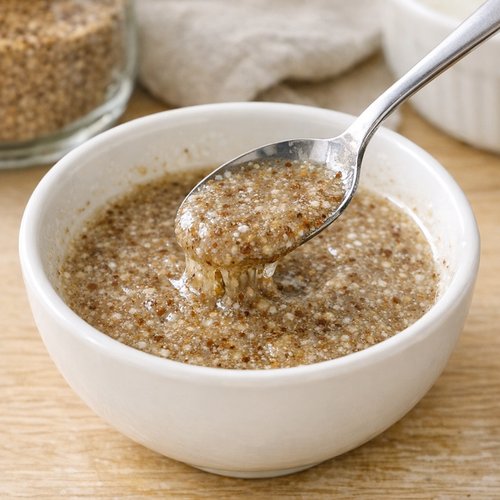
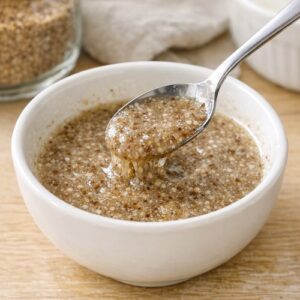
Before you start mixing anything else, combine 1 tablespoon of ground flaxseed meal with 3 tablespoons of hot water in a small bowl. Stir it together and let it sit for exactly 1 minute. You’ll see it transform from a watery mixture to something with the consistency of beaten eggs—that’s the flaxseed’s natural binding power activating. This is your egg replacement, and it’s crucial for holding these cookies together while keeping them vegan.
Pro tip: I always make my flax egg while the oven is preheating. It needs that full minute to gel, and doing it first means it’s ready exactly when you need it.
Step 3: Cream Together the Butter and Brown Sugar
Add your softened plant-based butter and light brown sugar to your mixing bowl. Turn the mixer to medium speed and beat for about 2–3 minutes until the mixture becomes light, fluffy, and noticeably paler in color. This step is called “creaming,” and it’s doing something important: it’s incorporating tiny air bubbles into the dough, which help your cookies rise and achieve a tender crumb.
Critical moment: Make sure your vegan butter is truly softened—not melted, but soft enough that you can press your finger into it easily. Cold butter won’t cream properly, and the dough will feel dense. If your butter is too firm, let it sit on the counter for 10 minutes.
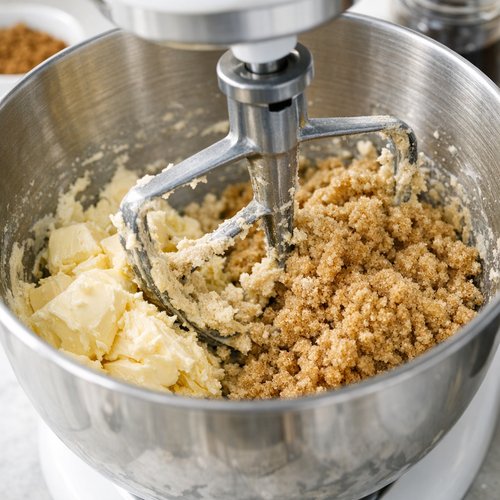
Step 4: Add Wet Ingredients
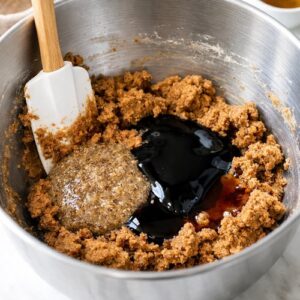
Scrape down the sides of the mixing bowl with a spatula. Now add your prepared flax egg, 1/3 cup molasses, and 1/2 teaspoon vanilla extract. Turn the mixer to medium speed and beat everything together for about 1 minute until well combined. The mixture should look smooth and cohesive. The molasses is the star ingredient here—it provides deep spice flavor, moisture, and a beautiful dark color.
Important note: If your molasses is very thick (unsulphured molasses tends to be thicker than sulphured), warm it for 15 seconds in the microwave before measuring. This makes it flow easily and incorporate smoothly into the dough.
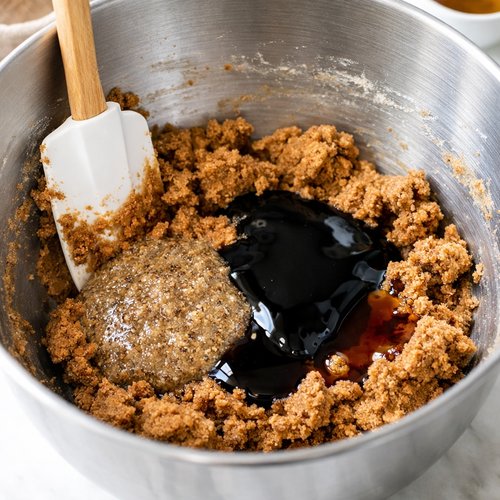
Step 5: Combine All Dry Ingredients
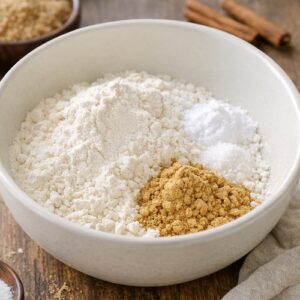
In a separate medium bowl, combine your dry ingredients: 2 cups all-purpose flour, 1 teaspoon baking soda, 1/4 teaspoon salt, 2 teaspoons ground ginger, 2 teaspoons cinnamon, 1/4 teaspoon allspice, 1/4 teaspoon cloves, and 2 tablespoons cornstarch or tapioca starch. Whisk these together vigorously for about 30 seconds. This distributes the leavening agent and spices evenly throughout the flour—crucial for consistent flavor in every bite.
Pro tip from my nutrition practice: I always whisk dry ingredients separately in vegan baking. It ensures that the baking soda—which can sometimes clump—is evenly distributed, preventing any metallic or soapy taste that can sometimes occur if it concentrates in one spot.
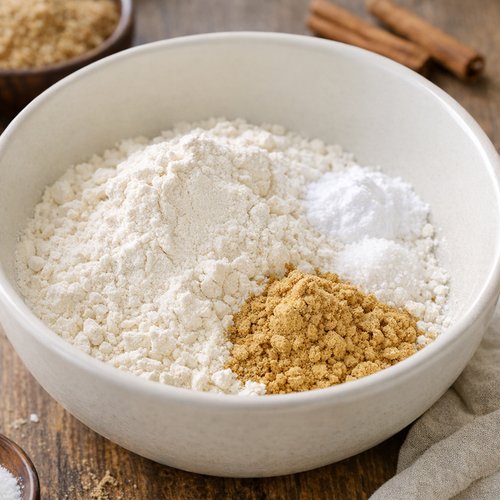
Step 6: Bring Wet and Dry Ingredients Together
Add all your whisked dry ingredients to the mixing bowl with your wet mixture. Turn the mixer to low speed and beat until just combined—you want everything mixed thoroughly, but you’re not looking for smooth, glossy dough like you would make for brownies. This is a stiff cookie dough, and it should look somewhat crumbly when you’re done mixing. Once it comes together, stop mixing immediately. Overmixing develops gluten, which makes cookies tough.
Expert safety warning: If using a stand mixer, make absolutely sure your hands are away from the bowl before turning it on. The dough can be thick enough to grab fabric or hair.
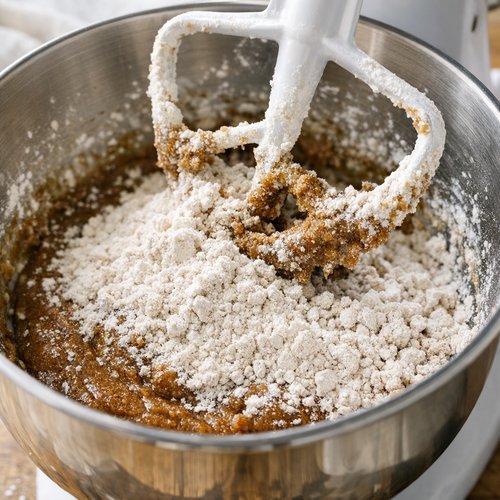
Step 7: Prepare Your Work Surface and Begin Rolling
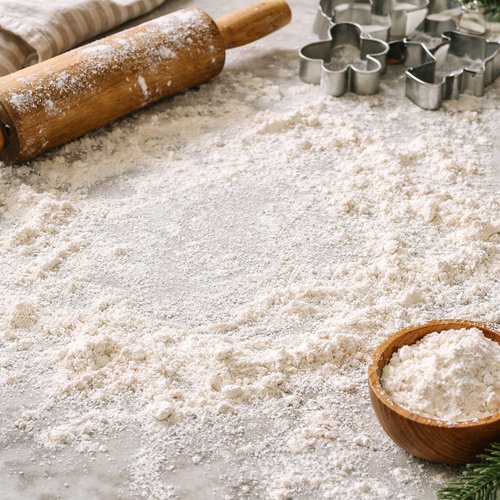
This is where patience becomes your greatest tool. Generously flour a clean countertop or cutting board—I mean really generous. Sprinkle flour on your hands as well. Transfer your dough to the floured surface and gently form it into a ball. The dough will be slightly sticky, and that’s completely normal. This is not the time to panic and add more flour. Instead, dust your hands with a little more flour as needed.
Here’s a technique I’ve perfected over years of vegan baking: flour your rolling pin generously, then roll the dough out to about 1/4 inch thick. Work in smooth, even strokes from the center outward. If the dough sticks, lift it slightly, add a pinch of flour to the work surface underneath it, and continue. Take your time—rushing this step leads to torn dough and frustration.
Expert tip: If your dough becomes too warm and sticky as you work, pop it into the refrigerator for 10 minutes. A cold dough is infinitely easier to work with.
Step 8: Cut Out Your Gingerbread Shapes
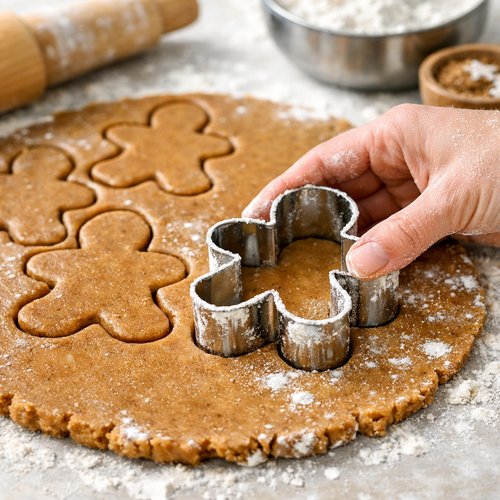
Once your dough is rolled to 1/4 inch thickness, it’s time for the fun part. Dip your cookie cutter in flour before each cut—this prevents sticking and ensures clean shapes. Press the cutter straight down, then wiggle it slightly to loosen the cookie before lifting it away. Transfer each cut-out cookie to your parchment-lined baking sheet, leaving about 1 inch between them. These cookies will spread slightly as they bake.
As you work, you’ll notice dough scraps accumulating. Don’t discard them. Gather the scraps together into a loose ball, dust it lightly with flour, and repeat the rolling and cutting process. You want to use every bit of dough—it’s perfectly acceptable to reroll scraps multiple times in cookie baking.
Critical moment: If you find your dough becoming very warm and unmanageable, refrigerate it for 10–15 minutes before continuing. This is especially important if you’re working in a warm kitchen or during summer months.
Step 9: Bake Until Golden and Set
Once your baking sheet is full of cut-out cookies, place it in your preheated 350°F oven. Bake for 10–12 minutes. Your cookies are done when the edges are firm and slightly darker in color, but the centers still feel slightly soft to the touch—they should not be hard. This is important: vegan cookies can dry out quickly if overbaked, since they lack the moisture that traditional butter provides.
At the 9-minute mark, crack the oven door open and look at them. If the edges are golden but the centers still look slightly underbaked, you’re in perfect territory. They’ll continue cooking slightly as they cool on the pan.
Expert safety warning: Use oven mitts and be very careful when removing the hot baking sheet. The parchment paper will be extremely hot. Set the entire sheet on a heat-safe surface and let the cookies cool completely before handling—at least 15 minutes, preferably 30 minutes. I know it’s tempting, but warm cookies are fragile and will tear if you try to move them.

Step 10: Cool Completely Before Decorating
This step is non-negotiable. While your cookies cool on the baking sheet, you can prepare your decorative icing. Sift your powdered sugar into a clean bowl, then add 1/2 teaspoon vanilla extract and 1 tablespoon soy milk. Stir with a fork, adding the milk slowly. You want the consistency to be thicker than pancake batter but still workable—it should hold a peak for a moment before melting back down.
Once the cookies are completely cool, transfer them to a serving platter or storage container. Now, and only now, decorate them using your prepared icing. You can pipe decorative details, create faces, or paint on designs. If you’re planning to gift these cookies, I recommend decorating them no more than 4 hours before presentation, so the icing sets up but the cookies stay fresh.

Make-Ahead Timeline
As a registered dietitian who works with busy families, I’ve learned that the secret to successful holiday baking is strategic make-ahead planning. Here’s exactly how I approach these cookies:
- 1 week before – Gather all your dry ingredients and store them together in an airtight container. This saves precious kitchen time and ensures you don’t forget anything when you’re ready to bake.
- 2–3 days before – Prepare and bake all your cookies. Store them in an airtight container at room temperature. Properly baked vegan cookies stay fresh for up to 5 days without becoming hard or stale, as long as they’re sealed.
- 1 day before – Prepare your decorative icing and store it in a piping bag in the refrigerator. The consistency actually improves overnight as it sets slightly.
- Day of your event – 2–3 hours before serving, decorate your cookies. This timing ensures the icing is set but still fresh-looking. If you’re packaging them as gifts, decorate the morning of and package in the afternoon for freshness.
How to Present and Plate Gingerbread Cookie Vegan Recipe
The presentation of food is just as important as its taste—that’s something my family taught me before I ever became a dietitian. These gingerbread cookies are beautiful on their own, but a few presentation tricks elevate them from “homemade cookies” to “showstopper dessert.” Here’s how I arrange them:
- Create height variation – Stack some cookies standing upright, leaning one against another, while laying others flat. This creates visual interest and prevents the platter from looking flat or boring.
- Use a theme – If you’ve decorated them with different designs, group similar ones together: all the blue-iced ones in one section, red-iced in another. This creates a cohesive, intentional look rather than a random spread.
- Incorporate natural elements – Tuck fresh rosemary sprigs or small cinnamon sticks around the cookies. These add color, fragrance, and tell the story of the spices baked into the cookies.
- Serve on quality platters – Wooden boards, white ceramic platters, or even a tiered cake stand elevates the presentation instantly. The quality of the serving vessel signals that these are special treats, not just random snacks.
Seasonal Variations
While gingerbread feels quintessentially December, I’ve adapted this recipe throughout the year for different occasions and celebrations:
- Spring version (Valentine’s or Easter) – Cut cookies into heart shapes instead of gingerbread people. Reduce cloves to 1/8 teaspoon (it can feel heavy in spring), increase vanilla to 3/4 teaspoon, and add 1/4 teaspoon cardamom instead. Decorate with pink and white icing for romance, or pastels for spring.
- Summer version (Father’s Day or casual gatherings) – Add 1 tablespoon of finely grated fresh ginger to the wet ingredients (in addition to ground ginger) for brightness. Reduce molasses to 1/4 cup and add 1/4 cup unsulphured coconut nectar for a lighter taste. Cut into star shapes. The fresh ginger creates a more zingy, refreshing flavor that feels summery.
- Fall version (Thanksgiving, beyond winter holidays) – Keep the recipe as written but increase cinnamon to 3 teaspoons and add 1/4 teaspoon nutmeg. Cut into pumpkins, leaves, or acorns with fall-themed cutters. Decorate with orange and deep brown icing.
What to Serve Alongside Gingerbread Cookie Vegan Recipe
These cookies stand beautifully on their own, but I love building a complete seasonal dessert spread around them. Here are my go-to pairings that create a memorable dessert experience:
- Hot spiced beverages – Serve alongside hot cider, chai tea, or spiced coffee. The warm drink complements the spices in the cookies perfectly and creates a cozy moment.
- Dairy-free whipped cream – Make or purchase plant-based whipped cream to serve on the side. Guests can dollop it on if they wish, adding richness and texture.
- Complementary desserts – I often pair these with apple crisp recipe dairy-free for a full fall spread, or with banana cake vegan recipe for variety in texture and flavor.
- Fruit and cheese board – Fresh citrus, dried apricots, roasted nuts, and a vegan cheese create a sophisticated board that provides contrast to the spiced cookies.
- Candy alternatives – If you’re creating a dessert spread for a party, add some festive vegan candy or chocolate-covered nuts alongside the cookies for variety in sweetness levels.
Can I Store Gingerbread Cookie Vegan Recipe?
Storage is where vegan cookies actually shine compared to traditional versions. Because they lack egg and dairy, they stay fresh longer and remain soft and chewy rather than drying out. Here’s my storage strategy:
Room temperature storage: Keep baked, undecorated cookies in an airtight container at room temperature for up to 5 days. I stack them between layers of parchment paper to prevent sticking. They won’t dry out during this time, which is wonderful news for make-ahead baking.
Decorated cookies: Once iced, store them in a single layer in an airtight container for up to 3 days. Don’t stack them, or the icing will transfer and smudge.
Freezer storage: This is my favorite secret. Undecorated cookies freeze beautifully for up to 2 months in a freezer-safe container. Thaw them at room temperature for about 30 minutes before decorating. This is life-changing for holiday planning—bake your cookies in November, and you’ll have gorgeous homemade treats ready for December gatherings.
Cookie dough storage: You can also freeze your rolled-out dough. Arrange cut shapes on a parchment-lined baking sheet, freeze until solid (about 2 hours), then transfer to a freezer bag. Bake directly from frozen, adding just 2–3 minutes to the baking time.
Nutrition Information
Based on USDA nutrition databases, here’s the nutritional profile for one decorated cookie (approximately 1 ounce or 28 grams):
Per cookie: 95 calories | 3.5g fat (0.5g saturated) | 15g carbohydrates | 1.2g fiber | 10.5g sugar | 1.1g protein | 185mg sodium | 95mg potassium | 2.4mg iron (13% Daily Value) | 15mg calcium
What I love about these cookies from a nutritional perspective is the iron content. One cookie provides over 10% of the daily iron recommendation, thanks to the molasses. For plant-based eaters, this is significant—we’re often seeking out iron-rich foods, and cookies that contribute meaningfully to your mineral intake feel like a small victory.
The fiber comes from the whole grains and flaxseed in the recipe. While these aren’t “health food” cookies, they’re more nutritionally dense than standard butter cookies, which matters when you’re serving them to people you care about.
Expert’s Nutritional Tip from Barbara Brito
Here’s something I’ve noticed in my nutrition practice: people often stress about the sugar content in cookies, and rightfully so. But what matters more is the overall quality of carbohydrates and how the cookie makes you feel. These gingerbread cookies contain complex carbohydrates from whole-grain flour, plus the molasses provides slow-release sugars. The fiber and fat from the flaxseed help slow glucose absorption, preventing the blood sugar spike-and-crash that can happen with highly processed cookies. When you eat one of these cookies mindfully—actually tasting the spices, not mindlessly consuming a handful—you’re far more likely to feel satisfied with less.
Common Mistakes to Avoid
After years of teaching nutrition classes and baking with clients, I’ve seen the same mistakes happen repeatedly. Here’s how to sidestep them:
- Using cold vegan butter – This is the number-one culprit in failed vegan baking. Cold butter won’t cream properly, resulting in dense cookies. Let it sit on the counter for 15 minutes before mixing. Your cookies will thank you with a tender crumb.
- Skipping the flax egg rest period – That 1-minute rest is essential. Without it, the flax seed hasn’t activated its binding properties, and your cookies may crumble apart. I set a timer on my phone to make sure I wait the full minute.
- Overbaking the cookies – This is especially easy with vegan cookies because they don’t have the moisture-retaining properties of traditional butter. When in doubt, pull them out slightly early. They continue baking on the pan as they cool.
- Working with room-temperature dough on a warm day – If it’s above 75°F in your kitchen, refrigerate your dough between batches. A sticky dough is miserable to work with, and this simple step prevents frustration.

Gingerbread Cookie Vegan Recipe
Ingredients
Method
- Preheat your oven to 350°F (180°C) and position the rack to the center of your oven. This is important for even baking. If you have an older oven, use an oven thermometer to verify the temperature—vintage ovens can run 25 degrees off, which affects cookie texture. While the oven heats, gather your equipment: an electric mixer (or a strong arm and a wooden spoon), measuring cups and spoons, a mixing bowl, a rolling pin, cookie cutters, parchment paper, and baking sheets. Arrange your parchment paper on your baking sheets now—you don't want to be fumbling with this while working with sticky dough. Expert safety warning: If you're baking with children, explain that the oven will be very hot and establish a "no touching" zone around it once it's preheating. Designate a safe space for kids to work on decorating while you handle the baking portion.

- Before you start mixing anything else, combine 1 tablespoon of ground flaxseed meal with 3 tablespoons of hot water in a small bowl. Stir it together and let it sit for exactly 1 minute. You'll see it transform from a watery mixture to something with the consistency of beaten eggs—that's the flaxseed's natural binding power activating. This is your egg replacement, and it's crucial for holding these cookies together while keeping them vegan. Pro tip: I always make my flax egg while the oven is preheating. It needs that full minute to gel, and doing it first means it's ready exactly when you need it.
- Add your softened plant-based butter and light brown sugar to your mixing bowl. Turn the mixer to medium speed and beat for about 2–3 minutes until the mixture becomes light, fluffy, and noticeably paler in color. This step is called "creaming," and it's doing something important: it's incorporating tiny air bubbles into the dough, which help your cookies rise and achieve a tender crumb. Critical moment: Make sure your vegan butter is truly softened—not melted, but soft enough that you can press your finger into it easily. Cold butter won't cream properly, and the dough will feel dense. If your butter is too firm, let it sit on the counter for 10 minutes.

- Scrape down the sides of the mixing bowl with a spatula. Now add your prepared flax egg, 1/3 cup molasses, and 1/2 teaspoon vanilla extract. Turn the mixer to medium speed and beat everything together for about 1 minute until well combined. The mixture should look smooth and cohesive. The molasses is the star ingredient here—it provides deep spice flavor, moisture, and a beautiful dark color. Important note: If your molasses is very thick (unsulphured molasses tends to be thicker than sulphured), warm it for 15 seconds in the microwave before measuring. This makes it flow easily and incorporate smoothly into the dough.
- In a separate medium bowl, combine your dry ingredients: 2 cups all-purpose flour, 1 teaspoon baking soda, 1/4 teaspoon salt, 2 teaspoons ground ginger, 2 teaspoons cinnamon, 1/4 teaspoon allspice, 1/4 teaspoon cloves, and 2 tablespoons cornstarch or tapioca starch. Whisk these together vigorously for about 30 seconds. This distributes the leavening agent and spices evenly throughout the flour—crucial for consistent flavor in every bite. Pro tip from my nutrition practice: I always whisk dry ingredients separately in vegan baking. It ensures that the baking soda—which can sometimes clump—is evenly distributed, preventing any metallic or soapy taste that can sometimes occur if it concentrates in one spot.
- Add all your whisked dry ingredients to the mixing bowl with your wet mixture. Turn the mixer to low speed and beat until just combined—you want everything mixed thoroughly, but you're not looking for smooth, glossy dough like you would make for brownies. This is a stiff cookie dough, and it should look somewhat crumbly when you're done mixing. Once it comes together, stop mixing immediately. Overmixing develops gluten, which makes cookies tough. Expert safety warning: If using a stand mixer, make absolutely sure your hands are away from the bowl before turning it on. The dough can be thick enough to grab fabric or hair.

- This is where patience becomes your greatest tool. Generously flour a clean countertop or cutting board—I mean really generous. Sprinkle flour on your hands as well. Transfer your dough to the floured surface and gently form it into a ball. The dough will be slightly sticky, and that's completely normal. This is not the time to panic and add more flour. Instead, dust your hands with a little more flour as needed. Here's a technique I've perfected over years of vegan baking: flour your rolling pin generously, then roll the dough out to about 1/4 inch thick. Work in smooth, even strokes from the center outward. If the dough sticks, lift it slightly, add a pinch of flour to the work surface underneath it, and continue. Take your time—rushing this step leads to torn dough and frustration. Expert tip: If your dough becomes too warm and sticky as you work, pop it into the refrigerator for 10 minutes. A cold dough is infinitely easier to work with.

- Once your dough is rolled to 1/4 inch thickness, it's time for the fun part. Dip your cookie cutter in flour before each cut—this prevents sticking and ensures clean shapes. Press the cutter straight down, then wiggle it slightly to loosen the cookie before lifting it away. Transfer each cut-out cookie to your parchment-lined baking sheet, leaving about 1 inch between them. These cookies will spread slightly as they bake. As you work, you'll notice dough scraps accumulating. Don't discard them. Gather the scraps together into a loose ball, dust it lightly with flour, and repeat the rolling and cutting process. You want to use every bit of dough—it's perfectly acceptable to reroll scraps multiple times in cookie baking. Critical moment: If you find your dough becoming very warm and unmanageable, refrigerate it for 10–15 minutes before continuing. This is especially important if you're working in a warm kitchen or during summer months.

- Once your baking sheet is full of cut-out cookies, place it in your preheated 350°F oven. Bake for 10–12 minutes. Your cookies are done when the edges are firm and slightly darker in color, but the centers still feel slightly soft to the touch—they should not be hard. This is important: vegan cookies can dry out quickly if overbaked, since they lack the moisture that traditional butter provides. At the 9-minute mark, crack the oven door open and look at them. If the edges are golden but the centers still look slightly underbaked, you're in perfect territory. They'll continue cooking slightly as they cool on the pan. Expert safety warning: Use oven mitts and be very careful when removing the hot baking sheet. The parchment paper will be extremely hot. Set the entire sheet on a heat-safe surface and let the cookies cool completely before handling—at least 15 minutes, preferably 30 minutes. I know it's tempting, but warm cookies are fragile and will tear if you try to move them.

- This step is non-negotiable. While your cookies cool on the baking sheet, you can prepare your decorative icing. Sift your powdered sugar into a clean bowl, then add 1/2 teaspoon vanilla extract and 1 tablespoon soy milk. Stir with a fork, adding the milk slowly. You want the consistency to be thicker than pancake batter but still workable—it should hold a peak for a moment before melting back down. Once the cookies are completely cool, transfer them to a serving platter or storage container. Now, and only now, decorate them using your prepared icing. You can pipe decorative details, create faces, or paint on designs. If you're planning to gift these cookies, I recommend decorating them no more than 4 hours before presentation, so the icing sets up but the cookies stay fresh.

Notes
FAQs
Can I use regular butter instead of vegan butter?
Absolutely, though that would make this a traditional recipe rather than vegan. If you’re substituting regular butter, use the same amount (1/4 cup). The results will be nearly identical, though some bakers report that dairy butter creates slightly crispier edges. The flavor difference is minimal—these cookies are spice-forward, so the butter choice is less crucial than in a vanilla cookie.
What can I use if I don’t have ground flaxseed?
You have a few options: Use 1/4 cup unsweetened applesauce mixed with 1 tablespoon cornstarch instead. Or try 3 tablespoons of aquafaba (the liquid from a can of chickpeas) whisked for 1 minute. Both work well, though the flax egg is my preference because it adds nutritional value. Avoid mashed banana—the flavor will interfere with the gingerbread spice profile.
Can I make these cookies gluten-free?
Yes! Replace the all-purpose flour with a 1:1 gluten-free flour blend. I recommend King Arthur Baking Company’s blend because it already includes xanthan gum for binding. You may need to add an extra 1 tablespoon of flour if the dough feels overly sticky—gluten-free flours absorb liquids differently, so it’s a bit of an adjustment. The baking time remains the same.
How long does the icing take to dry completely?
The powdered sugar icing dries to the touch within 30 minutes at room temperature, but it fully sets in about 2 hours. If you’re stacking cookies or packaging them as gifts, wait at least 2 hours. If you’re short on time, refrigerating the finished cookies for 30 minutes speeds up the setting process considerably.
Can I use molasses from a jar that’s been open for a year?
Molasses has an incredibly long shelf life due to its high sugar content—opened jars last for years. That said, if the molasses has become rock-hard or crystallized, it’s time to replace it. You can soften hardened molasses by microwaving the jar for 15–20 seconds, but if it smells fermented or off, trust your nose and start fresh. Old molasses won’t affect food safety, but it might affect flavor.
More Recipes for Your Table
- Ginger Snap Treats Recipe – Another beloved ginger cookie that’s slightly crispier and uses a different spice blend. Perfect if you want variety on your dessert platter.
- this cozy soup – While completely different from cookies, this warming soup pairs beautifully with gingerbread cookies as part of a holiday meal.
- Banana Cake Vegan Recipe – Another plant-based treat to round out your dessert rotation, perfect for year-round entertaining.
These gingerbread cookies represent something bigger to me than just a recipe—they’re a declaration that plant-based baking is not about deprivation or compromise. It