

Ingredients
Method
Step 1: Prepare Your Workspace and Preheat the Oven
- Preheat your oven to 350°F (180°C) and position the rack to the center of your oven. This is important for even baking. If you have an older oven, use an oven thermometer to verify the temperature—vintage ovens can run 25 degrees off, which affects cookie texture. While the oven heats, gather your equipment: an electric mixer (or a strong arm and a wooden spoon), measuring cups and spoons, a mixing bowl, a rolling pin, cookie cutters, parchment paper, and baking sheets. Arrange your parchment paper on your baking sheets now—you don't want to be fumbling with this while working with sticky dough. Expert safety warning: If you're baking with children, explain that the oven will be very hot and establish a "no touching" zone around it once it's preheating. Designate a safe space for kids to work on decorating while you handle the baking portion.

Step 2: Create Your Flax Egg Binder
- Before you start mixing anything else, combine 1 tablespoon of ground flaxseed meal with 3 tablespoons of hot water in a small bowl. Stir it together and let it sit for exactly 1 minute. You'll see it transform from a watery mixture to something with the consistency of beaten eggs—that's the flaxseed's natural binding power activating. This is your egg replacement, and it's crucial for holding these cookies together while keeping them vegan. Pro tip: I always make my flax egg while the oven is preheating. It needs that full minute to gel, and doing it first means it's ready exactly when you need it.

Step 3: Cream Together the Butter and Brown Sugar
- Add your softened plant-based butter and light brown sugar to your mixing bowl. Turn the mixer to medium speed and beat for about 2–3 minutes until the mixture becomes light, fluffy, and noticeably paler in color. This step is called "creaming," and it's doing something important: it's incorporating tiny air bubbles into the dough, which help your cookies rise and achieve a tender crumb. Critical moment: Make sure your vegan butter is truly softened—not melted, but soft enough that you can press your finger into it easily. Cold butter won't cream properly, and the dough will feel dense. If your butter is too firm, let it sit on the counter for 10 minutes.

Step 4: Add Wet Ingredients
- Scrape down the sides of the mixing bowl with a spatula. Now add your prepared flax egg, 1/3 cup molasses, and 1/2 teaspoon vanilla extract. Turn the mixer to medium speed and beat everything together for about 1 minute until well combined. The mixture should look smooth and cohesive. The molasses is the star ingredient here—it provides deep spice flavor, moisture, and a beautiful dark color. Important note: If your molasses is very thick (unsulphured molasses tends to be thicker than sulphured), warm it for 15 seconds in the microwave before measuring. This makes it flow easily and incorporate smoothly into the dough.

Step 5: Combine All Dry Ingredients
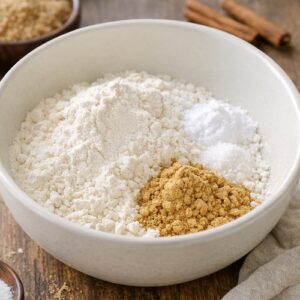
- In a separate medium bowl, combine your dry ingredients: 2 cups all-purpose flour, 1 teaspoon baking soda, 1/4 teaspoon salt, 2 teaspoons ground ginger, 2 teaspoons cinnamon, 1/4 teaspoon allspice, 1/4 teaspoon cloves, and 2 tablespoons cornstarch or tapioca starch. Whisk these together vigorously for about 30 seconds. This distributes the leavening agent and spices evenly throughout the flour—crucial for consistent flavor in every bite. Pro tip from my nutrition practice: I always whisk dry ingredients separately in vegan baking. It ensures that the baking soda—which can sometimes clump—is evenly distributed, preventing any metallic or soapy taste that can sometimes occur if it concentrates in one spot.
Step 6: Bring Wet and Dry Ingredients Together
- Add all your whisked dry ingredients to the mixing bowl with your wet mixture. Turn the mixer to low speed and beat until just combined—you want everything mixed thoroughly, but you're not looking for smooth, glossy dough like you would make for brownies. This is a stiff cookie dough, and it should look somewhat crumbly when you're done mixing. Once it comes together, stop mixing immediately. Overmixing develops gluten, which makes cookies tough. Expert safety warning: If using a stand mixer, make absolutely sure your hands are away from the bowl before turning it on. The dough can be thick enough to grab fabric or hair.

Step 7: Prepare Your Work Surface and Begin Rolling
- This is where patience becomes your greatest tool. Generously flour a clean countertop or cutting board—I mean really generous. Sprinkle flour on your hands as well. Transfer your dough to the floured surface and gently form it into a ball. The dough will be slightly sticky, and that's completely normal. This is not the time to panic and add more flour. Instead, dust your hands with a little more flour as needed. Here's a technique I've perfected over years of vegan baking: flour your rolling pin generously, then roll the dough out to about 1/4 inch thick. Work in smooth, even strokes from the center outward. If the dough sticks, lift it slightly, add a pinch of flour to the work surface underneath it, and continue. Take your time—rushing this step leads to torn dough and frustration. Expert tip: If your dough becomes too warm and sticky as you work, pop it into the refrigerator for 10 minutes. A cold dough is infinitely easier to work with.

Step 8: Cut Out Your Gingerbread Shapes
- Once your dough is rolled to 1/4 inch thickness, it's time for the fun part. Dip your cookie cutter in flour before each cut—this prevents sticking and ensures clean shapes. Press the cutter straight down, then wiggle it slightly to loosen the cookie before lifting it away. Transfer each cut-out cookie to your parchment-lined baking sheet, leaving about 1 inch between them. These cookies will spread slightly as they bake. As you work, you'll notice dough scraps accumulating. Don't discard them. Gather the scraps together into a loose ball, dust it lightly with flour, and repeat the rolling and cutting process. You want to use every bit of dough—it's perfectly acceptable to reroll scraps multiple times in cookie baking. Critical moment: If you find your dough becoming very warm and unmanageable, refrigerate it for 10–15 minutes before continuing. This is especially important if you're working in a warm kitchen or during summer months.

Step 9: Bake Until Golden and Set
- Once your baking sheet is full of cut-out cookies, place it in your preheated 350°F oven. Bake for 10–12 minutes. Your cookies are done when the edges are firm and slightly darker in color, but the centers still feel slightly soft to the touch—they should not be hard. This is important: vegan cookies can dry out quickly if overbaked, since they lack the moisture that traditional butter provides. At the 9-minute mark, crack the oven door open and look at them. If the edges are golden but the centers still look slightly underbaked, you're in perfect territory. They'll continue cooking slightly as they cool on the pan. Expert safety warning: Use oven mitts and be very careful when removing the hot baking sheet. The parchment paper will be extremely hot. Set the entire sheet on a heat-safe surface and let the cookies cool completely before handling—at least 15 minutes, preferably 30 minutes. I know it's tempting, but warm cookies are fragile and will tear if you try to move them.

Step 10: Cool Completely Before Decorating
- This step is non-negotiable. While your cookies cool on the baking sheet, you can prepare your decorative icing. Sift your powdered sugar into a clean bowl, then add 1/2 teaspoon vanilla extract and 1 tablespoon soy milk. Stir with a fork, adding the milk slowly. You want the consistency to be thicker than pancake batter but still workable—it should hold a peak for a moment before melting back down. Once the cookies are completely cool, transfer them to a serving platter or storage container. Now, and only now, decorate them using your prepared icing. You can pipe decorative details, create faces, or paint on designs. If you're planning to gift these cookies, I recommend decorating them no more than 4 hours before presentation, so the icing sets up but the cookies stay fresh.

Notes
- Using cold vegan butter - This is the number-one culprit in failed vegan baking. Cold butter won't cream properly, resulting in dense cookies. Let it sit on the counter for 15 minutes before mixing. Your cookies will thank you with a tender crumb.
- Skipping the flax egg rest period - That 1-minute rest is essential. Without it, the flax seed hasn't activated its binding properties, and your cookies may crumble apart. I set a timer on my phone to make sure I wait the full minute.
- Overbaking the cookies - This is especially easy with vegan cookies because they don't have the moisture-retaining properties of traditional butter. When in doubt, pull them out slightly early. They continue baking on the pan as they cool.
- Working with room-temperature dough on a warm day - If it's above 75°F in your kitchen, refrigerate your dough between batches. A sticky dough is miserable to work with, and this simple step prevents frustration.