Barbara Brito
Before we jump into the enticing world of Kung Pao sauce, let’s take a moment to explore what pairs beautifully with this delectable condiment. First off, going classic with chicken or tofu makes for a satisfying dish. You can easily sauté some diced chicken breast or crispy tofu cubes and coat them generously in this savory sauce.
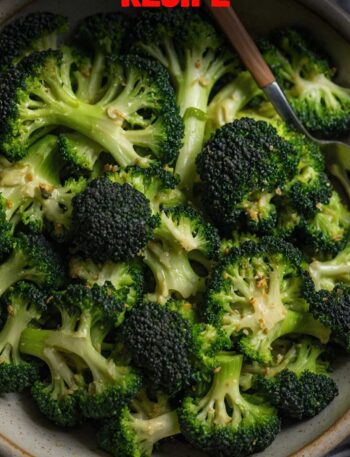
But we don’t have to stop there. Stir-fried vegetables like bell peppers, broccoli, and snap peas make excellent accompaniments. Their vibrant colors and crunch bring a delightful contrast to the rich flavors of the sauce.
Feeling adventurous? Try it with steamed brown rice or quinoa. Both add a nutty flavor and a hearty texture to your meal. Don’t underestimate the power of noodles, either! Whether you prefer chow mein, lo mein, or rice noodles, they can soak up that Kung Pao goodness.
Okay, let’s dive into the story behind this recipe—the myriad of flavors that beckon you to the kitchen.

Kung Pao sauce is not just a condiment; it’s a bold statement rich in history and flavors. This sauce ties back to Chinese culinary traditions, specifically from the Sichuan province. My first attempt at making this sauce was an exhilarating journey.
I fondly remember the anticipation, the chopping, the simmering, and finally, that moment—the first taste. It was a symphony of spicy, tangy, and nutty notes swirling together to create magic in a bottle.
As a registered dietitian and self-proclaimed foodie, I take my sauces seriously. They can elevate a good dish to extraordinary heights. Today, I’ll guide you on crafting an unforgettable Kung Pao sauce right in your kitchen. This sauce isn’t just about taste; it represents family gatherings, flavor dynamism, and unforgettable moments while sharing meals. Let’s go ahead and crack this culinary code together, shall we?
You Might Also Like These Recipes!
What is Kung Pao Sauce?
Kung Pao sauce is a delightful blend of flavors that harmonizes sweet, spicy, tangy, and umami elements. Traditionally, this sauce includes soy sauce, vinegar, sugar, and a unique pepper known as Sichuan pepper. This isn’t your average stir-fry sauce; it offers a depth of flavor that transforms simple ingredients into extraordinary dishes.
The beauty of Kung Pao lies in its versatility. Whether you’re drenching crispy chicken, mixing with stir-fried veggies, or simply dousing it over rice, the sauce adapts to various types of dishes while maintaining its identity.
What is the Flavor Profile of the Dish?
If you’re wondering what makes Kung Pao sauce truly special, let’s break it down. First, there’s the spiciness—a gentle heat that awakens your taste buds but doesn’t overwhelm you. The umami from soy sauce provides depth, while the tanginess from vinegar elevates the overall flavor. The sweetness from sugar or honey tracks through the background and rounds out the heat and tang. And don’t forget the nutty element from sesame oil or peanuts, adding texture and richness to the experience.
Why You’ll Love This Recipe?
Easy to Make: Even if you’re a kitchen newbie, you can whip this up without breaking a sweat.
Customize It: You can adjust the heat level to suit your preference—mild for the timid, fiery for the brave.
Healthy Ingredients: Packed with wholesome elements, it adds flavor without guilt.
Versatile Applications: Use it in numerous dishes—grilled veggies, noodles, you name it!
Great for Meal Prep: Make a batch and have it on standby for quick lunches or dinners.
Let’s take a closer look at what we need to make our Kung Pao sauce shine.
Ingredients
Here’s what you’ll need:
- 1 tablespoon chili-garlic paste (smoother texture)
- 1 teaspoon honey or brown sugar
- 1 teaspoon toasted sesame seeds (extra nuttiness)
- 1 teaspoon finely chopped fresh cilantro (fresh herbal note)
- 1 tablespoon finely chopped leek, scallions, or white onion
- 1 cup chicken or vegetable broth
- 2 tablespoons light soy sauce
- 1 tablespoon Chinese black vinegar or balsamic vinegar
- 1-inch piece of fresh ginger, peeled and minced
- 3 cloves garlic, minced
- 2 tablespoons toasted sesame oil or peanut oil
- 1 teaspoon coarsely crushed Sichuan peppercorns
- 6-8 dried spicy chilies (for heat)
- 1 tablespoon cornstarch combined with 2 tablespoons water (for thickening if desired)
Step by Step Instructions
Step 1: Gather Your Ingredients
Before anything, gathering all of your ingredients is key. Trust me, life’s much easier when you have everything at your fingertips. Set out your bowls, chop everything finely, and measure your liquids.
Step 2: Heat the Oils
In a small saucepan, heat the toasted sesame oil over medium heat. You should feel that warmth radiating from the pan. This step is crucial because warming the oil will help extract the flavors from the garlic and ginger that you will add shortly.
Step 3: Sauté Garlic and Ginger
Once the oil is warm, toss in the minced garlic and ginger. You want to sauté them until they are fragrant but not browned. This usually takes about 30 seconds. The aroma will sweep through your kitchen—it’s honestly one of my favorite moments.
Step 4: Incorporate the Broth and Sauces
Next, pour in the chicken or vegetable broth. Follow this with the light soy sauce, black vinegar, and honey or brown sugar. Stir everything together until well-combined. The broth acts as the savory base of your sauce.
Step 5: Add Chili-Garlic Paste and Spicy Chilies
Now’s the fun part: add the chili-garlic paste and dried spicy chilies. You may want to adjust the quantity of chilies depending on your heat tolerance. Remember, we’re building layers of flavor here.
Step 6: Create the Cornstarch Slurry
In a small separate bowl, whisk together the cornstarch and water until smooth. This will help thicken our sauce. Slowly stir this slurry into the saucepan with the other ingredients while simmering. It’s mesmerizing to see the sauce transform!
Step 7: Finish with Peppers and Nuts
Finally, add the crushed Sichuan peppercorns and toasted sesame seeds. If you find yourself with fresh cilantro, sprinkle that in for a finishing touch. It elevates the whole dish visually and flavor-wise.
Step 8: Simmer and Taste
Reduce the heat and let the sauce simmer for about 5-10 minutes, stirring occasionally. This will allow all the flavors to meld beautifully. Don’t forget to taste and adjust if needed—maybe a pinch more sugar or an extra splash of soy sauce.
Step 9: Cool and Store
Once satisfied with the taste, remove from heat and let it cool before you bottle it up. Store it in an airtight container in the fridge for up to two weeks.

Tips & Tricks
Adjust Heat: Feel free to play with the amount of chili-garlic paste and Sichuan peppercorns based on your personal preference.
Let it Rest: Allowing the sauce to sit for a day helps intensify the flavors.
Who Needs Takeout?: Use this sauce as an easy alternative to takeout. It’s just as convenient!
Non-Traditional Additions: Love peanuts? Toss them in for crunch. Want some sweetness? Chopped bell peppers bring color and flavor.
Make It Vegan: Opt for vegetable broth while skipping chicken—easy-peasy!
Nutrition Information
This Kung Pao sauce recipe has approximately:

(Nutritional values can vary based on specific ingredients used.)

How Can You Store This Kung Pao Sauce Recipe?
To preserve the freshness of your Kung Pao sauce, transfer it into an airtight container. Store it in the fridge, where it can maintain its flavors for about two weeks. You can also freeze it in ice cube trays—just pop those out as needed for an easy meal boost!
Ingredient Alternatives
If you’re missing some ingredients in your pantry, don’t fret. Here are some alternatives to consider:
Chili Garlic Sauce: If you don’t have chili-garlic paste, use sriracha or even a dash of hot sauce for a kick. Adjust the quantity based on personal heat tolerance.
Soy Sauce: For a gluten-free option, try tamari; it’s a fantastic substitute without sacrificing flavor.
Vinegar: If black vinegar is out of reach, apple cider vinegar or even lemon juice will do the trick to add acidity.
Conclusion
There you have it, an in-depth exploration of Kung Pao sauce. This tantalizing blend of flavors will infuse your meals with a delightful twist. From crispy chicken to colorful vegetables, this sauce adapts to whatever your heart desires.
Cooking should be a journey of joy and flavors, filled with experiences and memories. So, gather your ingredients, get your hands a bit messy, and enjoy the process. It’s about creating not just spicy goodness but connections with your loved ones over delightful meals. Give it a try, and you’ll find yourself saying, “Forget takeout; I’ll whip up my own Kung Pao!”
You Might Also Like These Latest Recipes!

Kung Pao Sauce Recipe – Great Meal Recipes
Ingredients
Method
- Before anything, gathering all of your ingredients is key. Trust me, life’s much easier when you have everything at your fingertips. Set out your bowls, chop everything finely, and measure your liquids.
- In a small saucepan, heat the toasted sesame oil over medium heat. You should feel that warmth radiating from the pan. This step is crucial because warming the oil will help extract the flavors from the garlic and ginger that you will add shortly.
- Once the oil is warm, toss in the minced garlic and ginger. You want to sauté them until they are fragrant but not browned. This usually takes about 30 seconds. The aroma will sweep through your kitchen—it’s honestly one of my favorite moments.
- Next, pour in the chicken or vegetable broth. Follow this with the light soy sauce, black vinegar, and honey or brown sugar. Stir everything together until well-combined. The broth acts as the savory base of your sauce.
- Now’s the fun part: add the chili-garlic paste and dried spicy chilies. You may want to adjust the quantity of chilies depending on your heat tolerance. Remember, we’re building layers of flavor here.
- In a small separate bowl, whisk together the cornstarch and water until smooth. This will help thicken our sauce. Slowly stir this slurry into the saucepan with the other ingredients while simmering. It’s mesmerizing to see the sauce transform!
- Finally, add the crushed Sichuan peppercorns and toasted sesame seeds. If you find yourself with fresh cilantro, sprinkle that in for a finishing touch. It elevates the whole dish visually and flavor-wise.
- Reduce the heat and let the sauce simmer for about 5-10 minutes, stirring occasionally. This will allow all the flavors to meld beautifully. Don’t forget to taste and adjust if needed—maybe a pinch more sugar or an extra splash of soy sauce.
- Once satisfied with the taste, remove from heat and let it cool before you bottle it up. Store it in an airtight container in the fridge for up to two weeks.