

Ingredients
Method
Step 1: Prepare Your Chickpeas Properly
- This step determines everything that follows. Open your can of chickpeas and pour the entire contents—chickpeas and liquid—into a fine-mesh strainer. Rinse under cold running water for at least 30 seconds, stirring gently with your fingers to remove the starchy foam. This foam is what creates graininess in inferior hummus. Don't skip this step or rush through it. The liquid clinging to undercooked chickpeas creates a pasty texture rather than smooth cream. After rinsing, let the chickpeas drain in the strainer while you prepare your other ingredients.

Step 2: Add Ingredients to Your Food Processor in the Right Order
- Order matters more than most recipes acknowledge. First, add the drained chickpeas to your food processor bowl. Next, add the tahini, minced garlic, cumin, and salt. Finally, squeeze in your fresh lemon juice. The acid in lemon juice helps break down the chickpea cell walls slightly, promoting smoother blending. Don't add water yet—this comes in the next step. I use this order because it allows the dry ingredients and tahini to coat the chickpeas before liquid introduces steam.
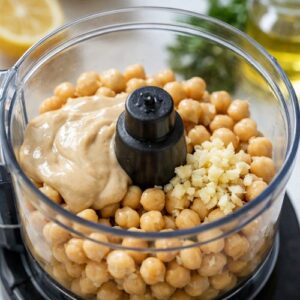
Step 3: Begin Processing and Add Water Gradually
- This is where the ice-cold water technique becomes critical. Start your food processor and let it run continuously for about 2 minutes before adding any water. You'll notice the mixture starts looking like coarse meal, then begins clumping as the tahini releases its oils. This is exactly what you want. Now, with the processor running, add your ice-cold water one tablespoon at a time through the feed tube. Add 4 tablespoons initially, then pause to assess consistency. Critical Safety Note: Keep your hands and utensils away from the food processor opening while it's running. Never attempt to retrieve stuck ingredients while the blade spins. Always unplug the unit before accessing the interior.
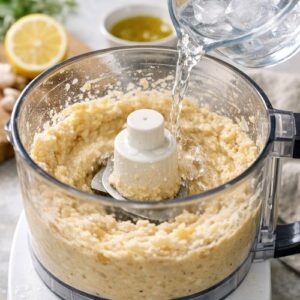
Step 4: Achieve Perfect Creaminess Through Extended Processing
- This step separates good hummus from extraordinary hummus. Continue processing for another 2-3 minutes after adding water, even if it looks creamy after just one minute. Keep going. The extended processing time allows the tahini to fully emulsify, incorporating tiny air bubbles that create that luxurious, cloud-like texture. If your hummus still seems thick or you see any graininess, add one more tablespoon of ice-cold water and process for another minute. The hummus should move smoothly around the blade when you stop it.
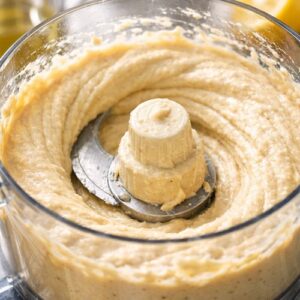
Step 5: Taste and Season to Perfection
- Stop the processor and taste your hummus using a clean spoon. This is your quality control moment. Adjust salt first—add ¼ teaspoon increments if needed. Then taste for lemon brightness; if it seems flat, add another ½ tablespoon of fresh lemon juice. Cumin depth comes last—add another pinch if the flavor feels one-dimensional. Process briefly after each adjustment, about 15-20 seconds, to fully incorporate changes.

Step 6: Transfer and Garnish for Visual Appeal
- Spoon your finished hummus into a shallow serving bowl, using the back of your spoon to create a slight well in the center. Drizzle your extra-virgin olive oil into this center well, allowing it to pool visually. This isn't just for appearance; the oil provides richness and helps preserve the hummus. Sprinkle paprika or sumac across the olive oil for color contrast, scatter your toasted pine nuts around the well, and finish with fresh herbs. The visual presentation makes this look like something from a Mediterranean restaurant.