
Ingredients
Method
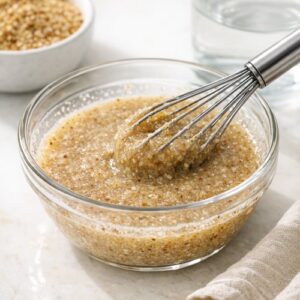
Step 1: Prepare Your Flax Egg Binder
- In a small bowl, whisk together the 3 tablespoons of golden flaxseed meal with the 9 tablespoons of water. Let this mixture sit for exactly 5 minutes at room temperature. This resting period is non-negotiable—the flax needs time to absorb the water and develop its gel structure. You'll notice the mixture becomes noticeably thicker and more viscous. This gel is what will hold your filling together as it bakes, so don't rush this step. The flax is absorbing water and releasing polysaccharides that will create a network similar to how egg proteins coagulate.
Step 2: Preheat and Position Your Oven
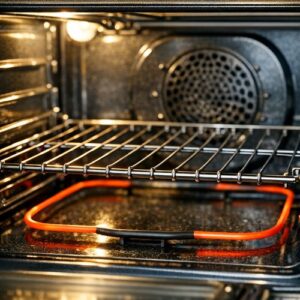
- Preheat your oven to 350°F with the rack positioned in the lower third of your oven. This positioning is crucial—you want the bottom heat more intense than the top heat so your crust bakes through before your filling sets completely. Lower-positioned pies bake more evenly. If your crust isn't pre-baked (blind-baked), that's fine; the pie will bake through in this recipe. Have your pie crust ready in a 9-inch pie dish at room temperature.
Step 3: Combine Your Wet Ingredients
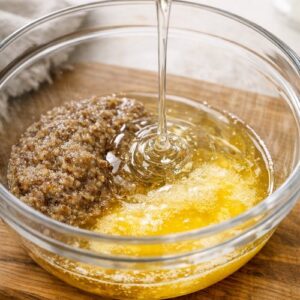
- In a medium mixing bowl, combine your cooled flax egg with the ¾ cup corn syrup and ¼ cup melted butter that's been slightly cooled (it should be warm but not hot, around 110°F—testing with a clean finger should feel comfortably warm). Whisk these together until you see a homogeneous mixture with no visible streaks of butter. This step is where emulsification begins. The lecithin naturally present in both the flax and butter helps them blend smoothly rather than separating.
Step 4: Incorporate Dry Ingredients
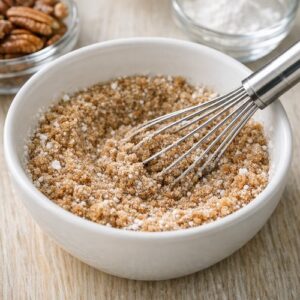
- In a separate small bowl, whisk together your ⅔ cup brown sugar, ½ teaspoon salt, 1 teaspoon cinnamon, and 3 tablespoons tapioca flour. This pre-mixing prevents clumping and ensures even distribution of flavoring throughout the filling. The tapioca flour will hydrate slightly during this mixing, which is fine—it'll continue to hydrate as it bakes and reaches 140-150°F, at which point it fully gelatinizes. Gradually add the dry mixture to your wet ingredients while whisking constantly. This prevents lumping and ensures you achieve a smooth, lump-free filling. Whisk for about 30-45 seconds after the last addition until you see no visible streaks of dry ingredients.
Step 5: Add Vanilla and Pecans
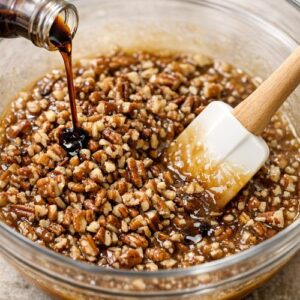
- Stir in your 2 teaspoons of pure vanilla extract and gently fold in your 2½ cups of chopped pecans. Use a rubber spatula and fold gently—you want to incorporate the nuts without crushing them further. They'll release oils as they bake, and you want them to remain in distinct pieces rather than becoming a paste.
Step 6: Transfer to Crust and Arrange Topping
- Pour the filling into your prepared pie crust, spreading it evenly with a spatula. If you're using whole pecans for decoration, arrange them in concentric circles or your preferred pattern on top now. They'll toast beautifully as the pie bakes. If you want a subtle sparkle, sprinkle the optional 1 tablespoon of granulated sugar over the top—it creates a light crust during baking.

Step 7: Bake to Perfect Doneness
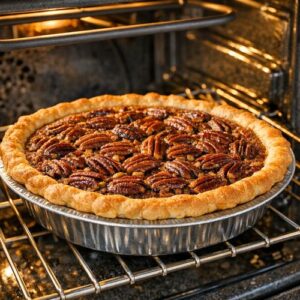
- Place your pie in the preheated 350°F oven on the lower rack. Bake for 45-55 minutes. Here's your doneness test: the edges should be set and firm when you gently shake the pie pan, but the center 2-inch circle should jiggle slightly when moved. This is carryover cooking territory—the residual heat will continue setting that center for 10-15 minutes after you remove it from the oven. ⚠️ SAFETY WARNING: Never insert a knife into the pie to test doneness, as this can cause the filling to leak through any crack made. Trust the jiggle test instead. The top should be deeply golden brown, almost mahogany in spots where pecans are concentrated. If the crust edges are browning too quickly (before 40 minutes, you can create a foil ring around the crust edge to shield it.
Step 8: Cool Completely Before Slicing
- Remove the pie from the oven and place it on a wire cooling rack. This is important—cooling on a rack allows air to circulate underneath, preventing the bottom crust from becoming soggy. Let the pie cool at room temperature for at least 2 hours before cutting. This waiting period allows the filling to fully set through the tapioca gelatinization process. If you slice too early, the filling will run. I know it's hard to wait when it smells this incredible, but trust me on this. The pie will also develop better flavor as it cools to room temperature. The volatile aromatic compounds from vanilla and cinnamon become more noticeable, and the caramelized sugars develop more complexity.

Notes
- Use dark corn syrup for deeper flavor - While light corn syrup works perfectly fine, dark corn syrup has been cooked longer and contains molasses, which adds additional caramelized notes and complexity. It also naturally contains vanillin, which amplifies vanilla flavors.
- Don't skip the flax egg resting period - I cannot stress this enough. The 5-minute rest allows the flaxseed to fully hydrate and develop its binding capacity. Skipping this or rushing it results in a filling that separates or fails to set properly.
- Toast your pecans lightly before chopping if using raw pecans - This awakens their natural oils and deepens the flavor. Toast at 325°F for 6-8 minutes, stirring halfway through, until fragrant. Then chop.
- Bring all ingredients to room temperature - Especially your flax egg and melted butter. Cold ingredients don't emulsify as effectively and create texture problems.
- Use a pie shield if available - This metal ring slips over the crust edge and prevents over-browning. If you don't have one, create a simple one from aluminum foil by wrapping it around the outer edge of the pie.